Grow with AppMaster Grow with AppMaster.
Become our partner arrow ico

Authorization and Registration in AppMaster

Authorization and Registration in AppMaster
Сontents

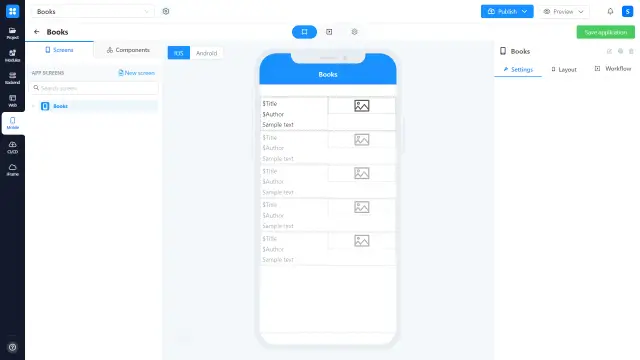
In this article, we are going to give you an example of how to set up sign-in \ sign-up processes for mobile applications. First of all, imagine that we already have a page in our mobile application, representing a list of books. Each book has its own title, author name, genre, and image cover.

app builder

Let’s start from the Sign-In page first and create a new blank screen (View).

no code app builder

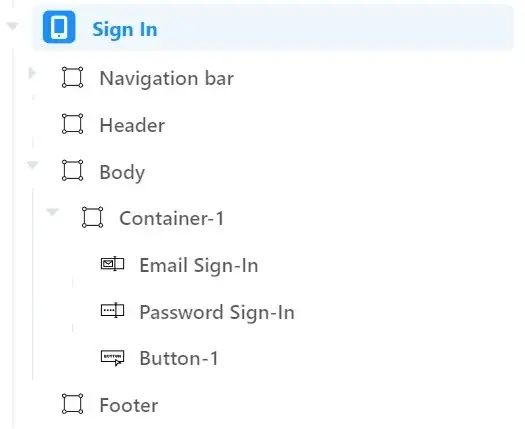
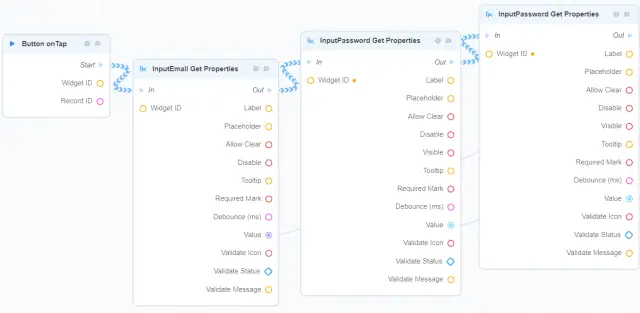
The screen’s layout contains a container to align its content. Email field component and pass field component are inside this container. Button for triggering the authorization process is also inside it. Screen’s component tree looks as follows:

components tree

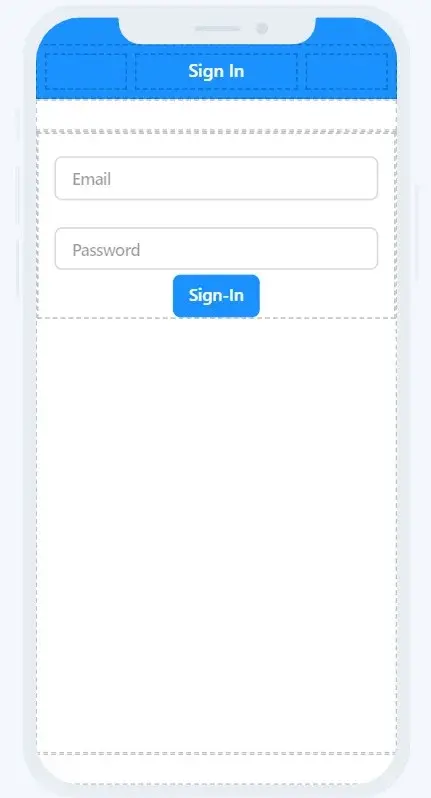
In the designer it looks like

mobile app builder

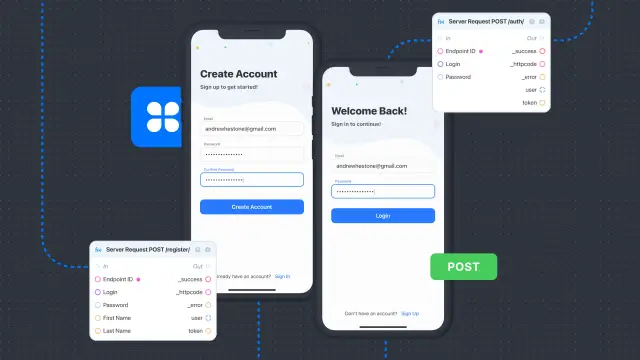
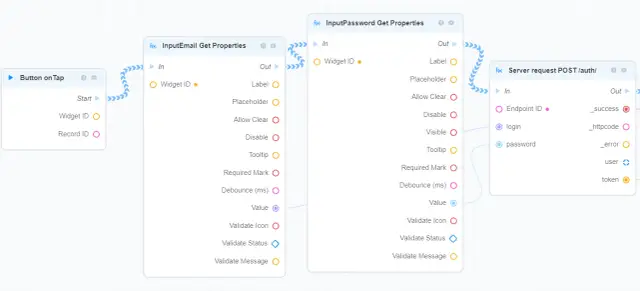
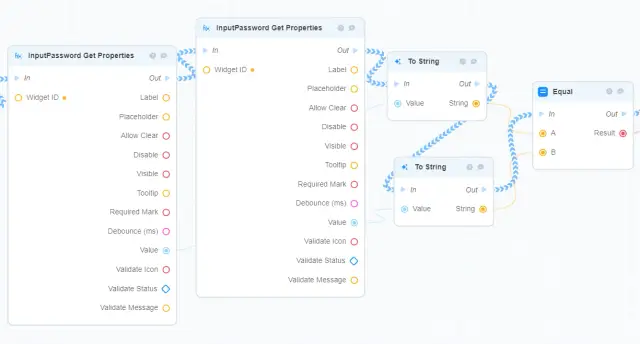
The first part of the authorization business process related to the button’s workflow and you can see it on the picture below:

no-code business process

  • It is triggered by on-tap action;
  • First of all it gets the values (Get Properties) from input fields (email and password);
  • The values from inputs are passed into the POST /auth business process block.

app generator

  • If the request is successful (If-Else = true valuation) then the new Auth Token is assigned to the current user who executed this request;
  • After the Auth Token is assigned - the user has to be navigated to the new screen (Books list page in this example).

visual programing

  • If the request is not successful - then the email field and pass field component statuses are to be updated (Update Properties) with the corresponding messages (Validate Message) and statuses (Validate Status)

That’s it regarding the authorization. The next step is to make a registration logic for our application. Let’s create a new blank screen (View) as we already did for the sign-in logic. Don’t forget to fill it in with the components.

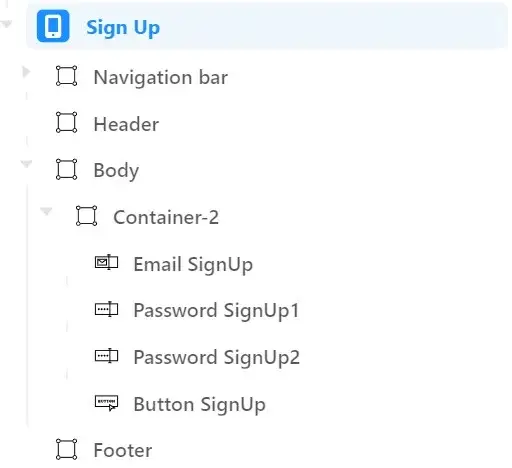
Screen components tree looks like:

Screen components tree

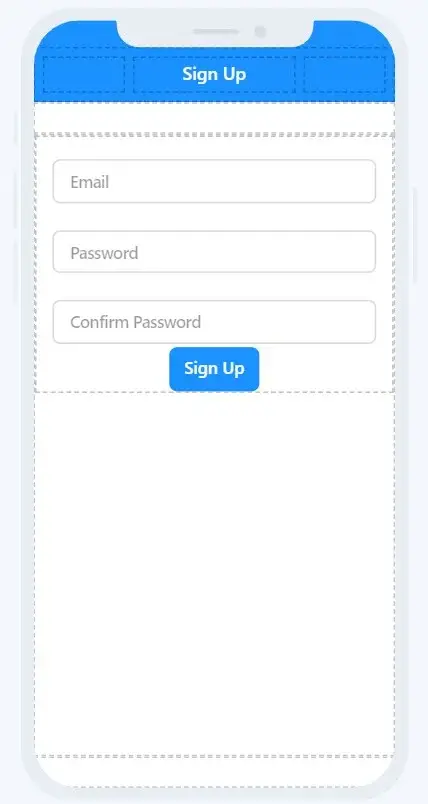
Screen layout on the screenshot below:

no code mobile builder

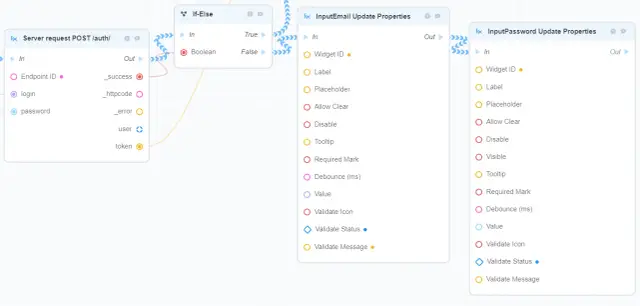
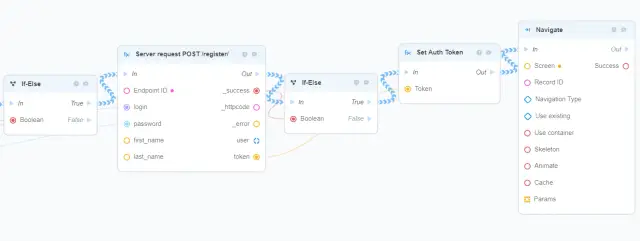
Sign-Up business process related to the button’s workflow and is triggered by on-Tap action. The first part of the business process is shown on the screenshot below.

visual programing

  • As was already mentioned the business process starts from on-tap action;
  • First of all, all the values from inputs has to be obtained for further processing (Get Properties)
Try AppMaster no-code today!
Platform can build any web, mobile or backend application 10x faster and 3x cheaper
Start Free

no-code developing

  • Both passwords have to be compared with each other. In order to do this they have to be converted into string format (To String);
  • Comparison is being handled by Equal logic block.

no-code visual programing

  • If passwords are matched then the values from inputs are to be provided into the POST /register block;
  • If the registration is successful (validated by if-else block) then the new Auth Token is assigned to the current user;
  • After the token is assigned the user has to be navigated to the new page (Books list in this example).

no-code

  • If the password are not matched (False validation of the first if-else block) or the registration is not successful (False validation of the second if-else block) then the input components statuses (Validate Status) and messages (Validate Message) are to be updated with the corresponding values.

That’s all we need for registration logic.

The last step we need to make is to make sure that the user will be navigated to the correct page (Sign-In page in this example) once he is signed in. Also we need to add the logic that the user will be navigated to the Books list page if he is already signed in and has an active Auth Token. This can be done in the Triggers and Actions section.

Triggers and Actions no-code

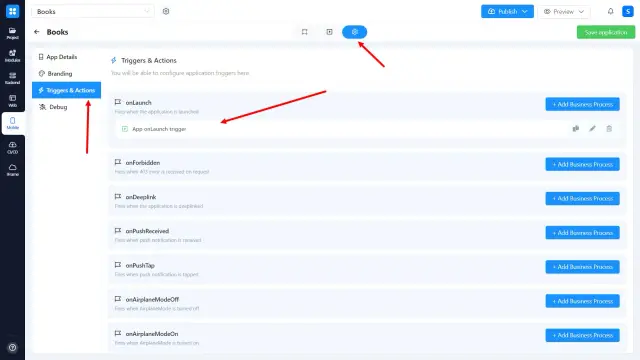
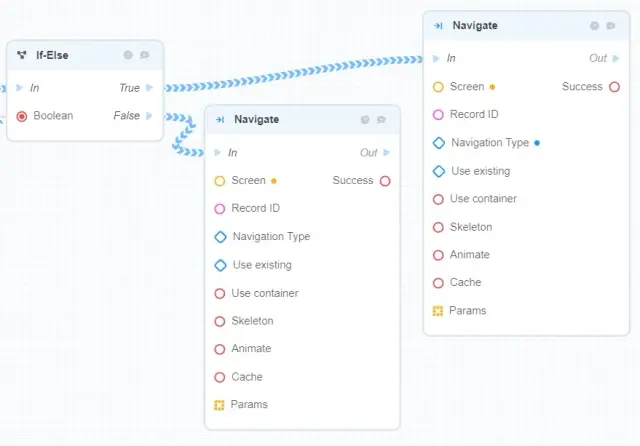
The trigger which is responsible for on-launch actions - is the onLaunch trigger. It is usually predefined by default for every new application, but we want to create some custom logic here. So the final result looks like this on the screenshot below:

visual programing

  • Firstly, it gets the latest Auth Token of the current user
  • Then, it sends a request to the server which requires authentication. For example, GET /user/profile request since it accepts the Auth Token
  • The success of the request is validated by the If-Else block

no-code

  • If the request is successful (True validation of if-else block) then the user is navigated to the Books list screen;
  • If not - he is navigated to the Sign-In screen.

That is how easy Sign-In/Sign-Up processes in mobile applications on the AppMaster.io platform. Full video tutorial: 

Conclusion

The no-code platform AppMaster makes it easy to create your mobile app. You can always register on the platform and check out all the functionality.

Related Posts

The Key to Unlocking Mobile App Monetization Strategies
Discover how to unlock the full revenue potential of your mobile app with proven monetization strategies including advertising, in-app purchases, and subscriptions.
Key Considerations When Choosing an AI App Creator
When choosing an AI app creator, it's essential to consider factors like integration capabilities, ease of use, and scalability. This article guides you through the key considerations to make an informed choice.
Tips for Effective Push Notifications in PWAs
Discover the art of crafting effective push notifications for Progressive Web Apps (PWAs) that boost user engagement and ensure your messages stand out in a crowded digital space.
GET STARTED FREE
Inspired to try this yourself?

The best way to understand the power of AppMaster is to see it for yourself. Make your own application in minutes with free subscription

Bring Your Ideas to Life