


Equipment reservation app: prevent conflicts and track returns
Plan an equipment reservation app that prevents double bookings, records returns and damage, and places faulty items on maintenance hold.
Learn how to add new contacts to the address book in mobile applications.
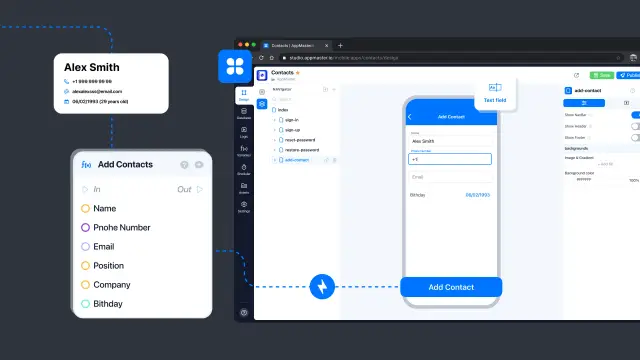
A variety of business process blocks in AppMaster allow you to build a variety of logic in mobile and web applications. This article considers an example of a simple mobile application that creates a user contact according to the specified parameters. Most of the application settings are omitted and not presented in detail in this article (such as setting the onLaunch trigger).
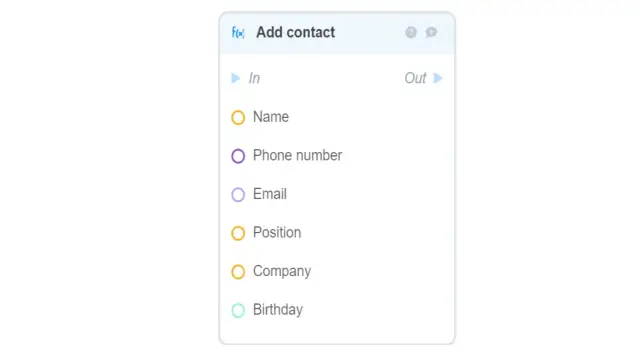
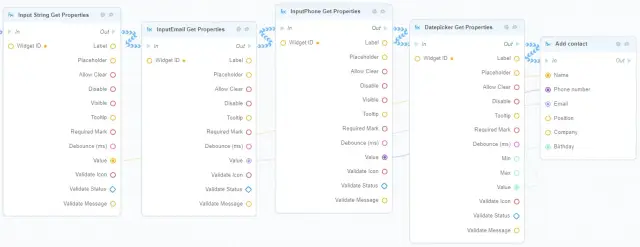
The main logic is implemented using the pre-installed Add contact business process block.
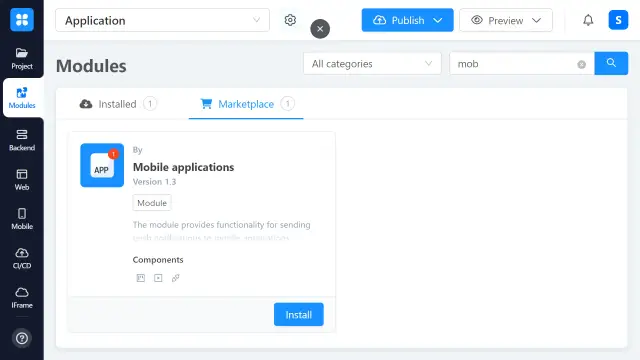
First, you need to install the Mobile apps module in your application. This module is located in the Modules section.
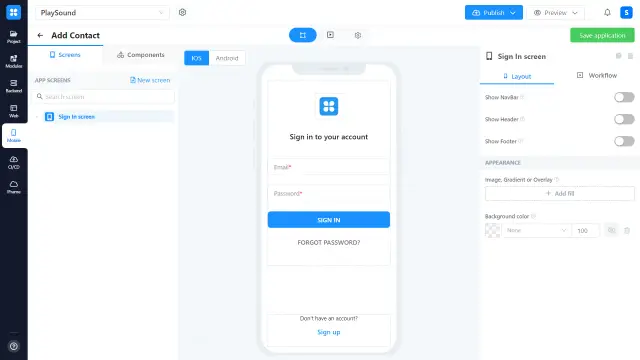
After installing the module, go to the mobile app designer tab and remove all auto-generated screens, except for the Sign In Screen. The authorization business process is generated. You can read about customizing the authorization business process at this link.
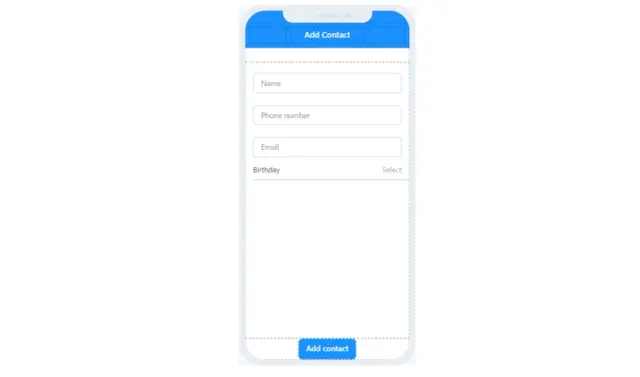
Next, an empty screen (View) is created and filled with functional elements. Text Field for Name; Phone Field for a Phone number; Email field for Email and Date Picker for Birthday. The interface looks like this:
The logic for adding a contact is a business process that starts with the onTap trigger of the Add contact button and looks like this:
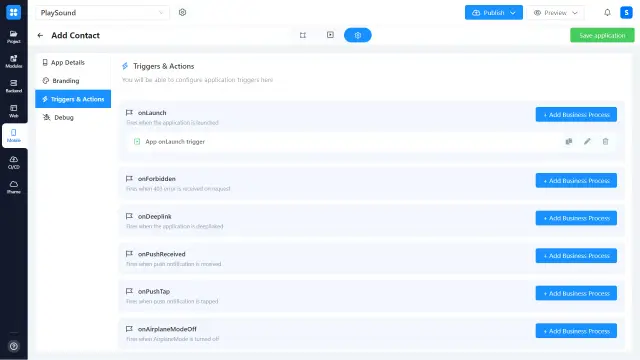
The last thing left is to set up navigation when loading the app. Navigation is configured using the launch trigger in the Triggers & Actions section.
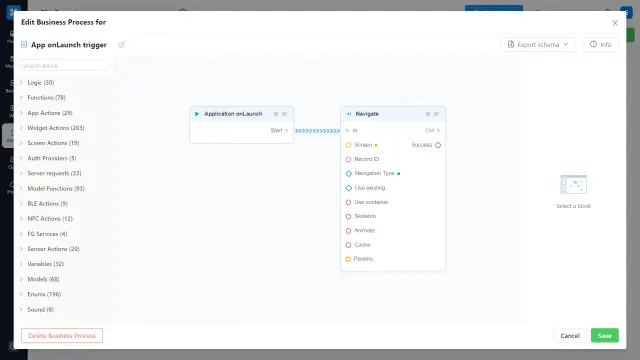
Navigation is done using the Navigate block. The Navigation type at application startup (onLaunch) must always be root. In our example, the user must first go to the Sign In screen, so this screen is specified in the Screen property of the Navigate block.
Don't also forget to edit the authorization business process so that in case of successful authorization, the Screen property of the Navigate block points to the screen we created for adding a contact to the user's address book.
Thus, in this article, the principle of using the Add Contact block in mobile applications to add new contacts to the user's address book was considered.
Experiment with AppMaster with free plan.
When you will be ready you can choose the proper subscription.


