


 Jul 14, 2026
 8 min
8 minEquipment reservation app: prevent conflicts and track returns
Plan an equipment reservation app that prevents double bookings, records returns and damage, and places faulty items on maintenance hold.

How to create a web app using the drag & drop web app builder from AppMaster.io?
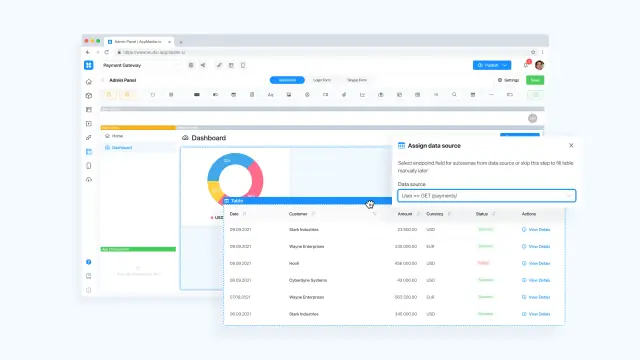
The Web Application Designer is a visual builder with a convenient drag & drop interface. You don't need to know programming to understand it - like other no-code tools on our platform, it's intuitive.
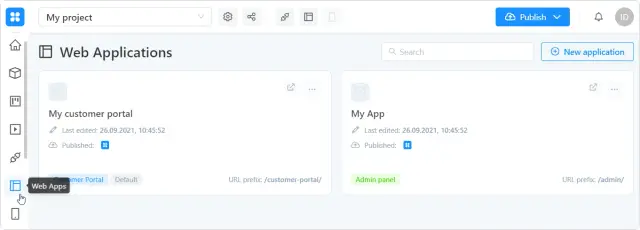
To get started, go to the Web Apps tab - all applications created within your project will be displayed. Here you can open them for editing, delete or creating new ones.
To configure the selected application - click on its preview.
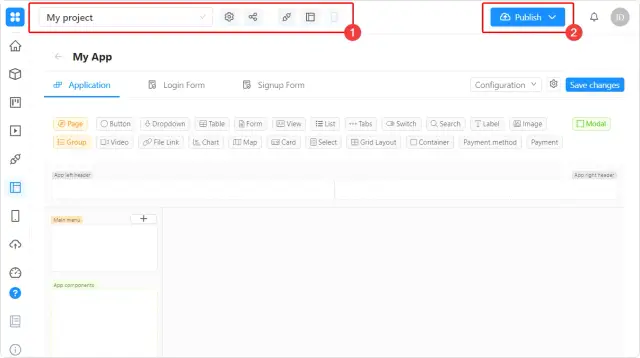
The web application editing window allows you to customize its appearance, data exchange with the backend, as well as some general parameters.
In the information field about the project (1), you will see its name, you can go to the settings, share it, open the API documentation, and also see the published version of your web application. The publish button (2) allows you to publish the project - apply all saved changes that you made in the web application designer and other sections of AppMaster.io Studio.
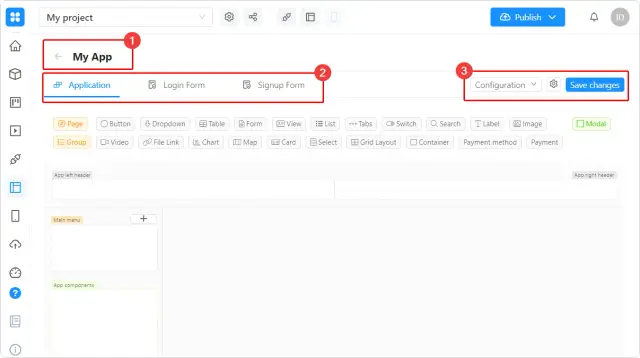
Below is the name of your application (1). Lower are the tabs (2) for the transition between the application settings and its authorization and registration forms (they are configured separately).
On the right (3), you can export the config file (config.json) or reset it to default settings, open the settings of the current web application and save the changes you made to it (without publishing).
The component area contains the blocks required to create and customize the interface of a web application. To add a component to the interface, drag it with the mouse to one of the sections of the screen.
The components are divided into 3 groups:
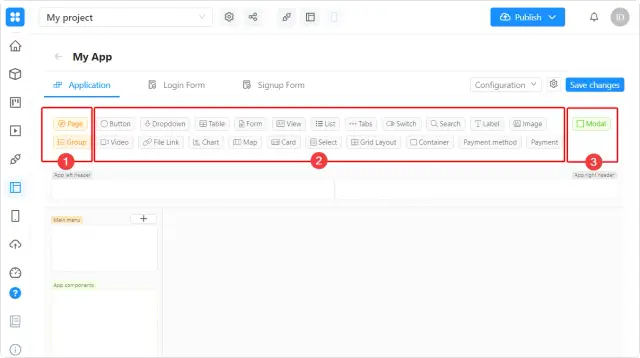
The component color matches the color of the section to which it can be added. For example, the Page component is for the Main Menu, and the Modal is for the App components.
We will soon add the list of components and their detailed description to the documentation system.
Page section (1) appears after you add at least one page to your application (2).
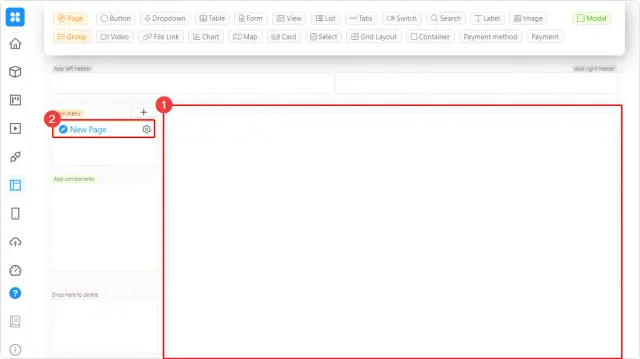
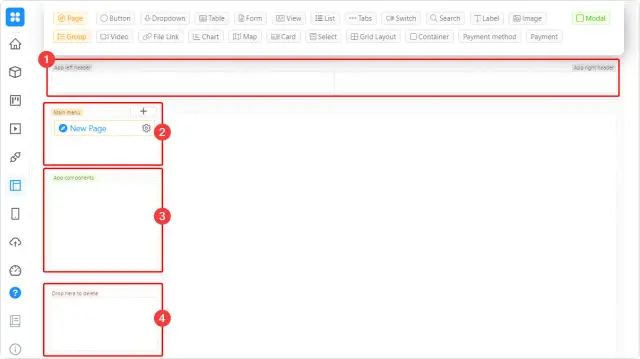
Above the main canvas in the header (1). It will be displayed at the very top of the web application window, on all its pages. Here you can add exit and return buttons, logo, contacts, language switcher, etc.
On the left is the menu (2). In the section App components (3) you can add models that will be available on all pages of the application. Modals are not visible to users until the event that triggers them occurs.
Below is the "trash bin" (4) to quickly remove components from the page by dragging and dropping (you can also click the trash can icon in the settings window).
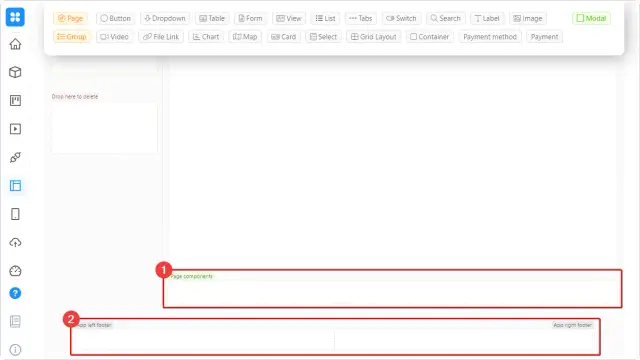
Below the main section is Page components (1). The modals you add here will only be available on the current page.
The bottommost section, the footer (2), works in a similar way to the header.
The best way of working: Before creating a web application in AppMaster.io think over its layout and design a backend. After that, you can add the necessary components and immediately link them to the database and business processes. Detailed information about our no-code platform is in the docs. Specific examples of settings are in the blog and on the YouTube channel.
 What is the AppMaster Web Application Designer?
It is a visual, drag-and-drop tool for building the interface of an AppMaster web application. You can add pages, forms, buttons, lists, maps, and modal windows without writing code.
How do I open a web application for editing?Open your project and go to the Web Apps tab. Create a web app or select an existing one, then click its preview to open the editor.
What can I configure in the editor?The editor lets you change the interface, connect it to backend data, and adjust general application settings. It also separates the main app settings from authorization and registration form settings.
How do I add a component to a page?Drag a component from the component area into a compatible section of the screen. The component color shows which section accepts it.
What types of components can I use?Components fall into three groups: items for pages and page groups, interface elements such as forms and buttons, and modal windows. Choose the group that matches the part of the app you want to build.
What is the header used for?The header appears at the top of every page in the web app. Use it for shared items such as a logo, navigation controls, contact details, or a language switcher.
What are App components?App components are available across all pages of the application. Add shared models or modal windows there when several pages need to use them.
How are page components different from App components?Page components belong only to the page you are editing. Add a modal there when users should only be able to trigger it from that specific page.
What is the difference between saving and publishing?Save stores your edits in the current web application without making them live. Publish applies saved changes from the web designer and other AppMaster Studio sections to the published version.
What is a good way to start building a web app?Plan the page layout and backend first. Then add interface components and connect them to the database and business processes as you build, so each screen has the data and actions it needs.
Experiment with AppMaster with free plan.
When you will be ready you can choose the proper subscription.
 Jul 14, 20268 min
 Jul 13, 20268 min
 Jul 08, 20268 min