


Equipment reservation app: prevent conflicts and track returns
Plan an equipment reservation app that prevents double bookings, records returns and damage, and places faulty items on maintenance hold.
Learn how to publish your app on the App Store in 2023 successfully. Discover step-by-step instructions, requirements, and best practices.
Mobile applications have become an indispensable part of our lives in today's rapidly evolving digital landscape. With millions of apps available for download on the App Store, developers need to understand the intricacies of publishing their creations on this widely popular platform. As we venture into 2023, Apple updates its policies, requirements, and best practices, making it vital for app creators to stay informed and adapt accordingly.
In this article, we will delve into the step-by-step process, from preparing your app for submission to navigating Apple's review process and launching it for users to enjoy. We aim to equip you with the necessary knowledge, tools, and insights to ensure a smooth and successful app publishing experience.
Whether you're an experienced developer or a newcomer to the world of app creation, this guide will provide valuable information to help you navigate the ever-changing landscape of the App Store. So, let's embark on this exciting journey together and propel your app toward success in 2023.
Before submitting your app to the App Store, it's essential to prepare and ensure that you have met all the requirements. Proper preparation will make the submission process smoother and increase your app's chances of being approved by Apple. This section will guide you through the crucial steps to take before submitting your application for review, including creating a developer account, adhering to legal requirements, and complying with Apple's guidelines and instructions.
You'll first need to enroll in the Apple Developer Program to submit your app to the App Store. This program grants you access to a wealth of development tools, resources, and support necessary for creating and distributing apps on iOS, macOS, watchOS, and tvOS platforms. To sign up, visit the Apple Developer website and follow individual or organization enrollment instructions. Be prepared to provide personal or business information, verify your identity, and pay an annual membership fee. Once enrolled, you'll gain access to essential developer resources such as beta software, advanced app capabilities, and extensive documentation to help you develop high-quality apps.
Before publishing your app, ensure that you comply with all legal requirements, including copyright and trademark laws, privacy regulations, and age rating guidelines. It's crucial to respect the intellectual property rights of others and secure any necessary permissions for using copyrighted or trademarked material within your app. It would help if you also created a clear and comprehensive privacy policy, which should be accessible within your app and linked during the submission process. This policy must inform users about the data you collect, how it's used, and their rights concerning their personal information. It's important to familiarize yourself with Apple's App Store Review Guidelines and local laws that may apply to your app's content and functionality to avoid potential legal issues.
Apple has specific guidelines and technical requirements for your app to be eligible for the App Store. These requirements include adhering to the Human Interface Guidelines, which detail best practices for designing user-friendly and accessible interfaces across different devices and platforms. By following these guidelines, you ensure that your app provides a consistent and enjoyable user experience, increasing its chances of success on the App Store. Additionally, ensure your app is built using the latest version of Xcode and supports the most recent iOS version to ensure optimal compatibility, performance, and security. Keep up to date with Apple's evolving requirements and incorporate any necessary changes into your app.
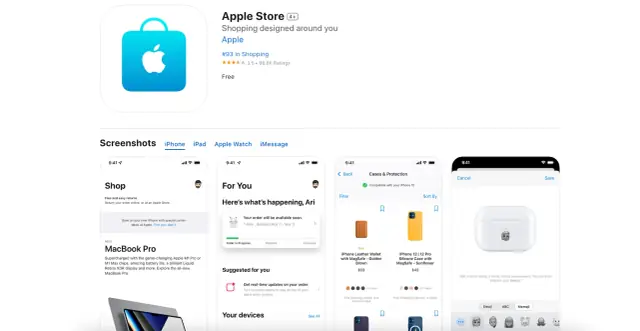
Once you have completed the above steps, you can submit your app to the App Store. Begin by preparing your app for submission, which includes creating App Store assets like app icons, screenshots, and app previews. These visuals convey your app's purpose and functionality while enticing potential users to download it. Next, use App Store Connect to create a new app record, fill in the necessary metadata, such as your app's description, keywords, and support information, and configure in-app purchases or subscriptions if applicable. Finally, submit your app for review and await Apple's feedback. If your app meets all guidelines and requirements, it will be approved for publication on the App Store. Be prepared for possible revisions or resubmissions, as Apple's review process is thorough and focused on ensuring high-quality, safe, and trustworthy apps for its users.
Before submitting your app to the App Store, you'll need to develop and fine-tune it to meet Apple's standards. Here's an outline of the process of creating an app from ideation to completion:
In today's fast-paced digital world, creating an app rapidly and cost-effectively has become increasingly important for businesses and entrepreneurs. No-code solutions like AppMaster offer a game-changing approach to app development, empowering professional developers to become highly efficient technical leaders throughout the entire project. Instead of coordinating a large team consisting of the backend, frontend, and mobile developers, AppMaster enables a single individual with technical expertise to assemble all parts of an application using a user-friendly drag-and-drop interface.
AppMaster's synchronized development environment ensures that changes made to the backend, such as API modifications or data model adjustments, are automatically reflected in the web and mobile applications. This seamless integration eliminates the need for constant communication, rewriting code snippets, or juggling multiple tasks simultaneously, saving valuable time and reducing the likelihood of errors. As a result, app development with AppMaster becomes ten times faster, allowing developers to focus on innovation and delivering exceptional user experiences. By leveraging no-code solutions like AppMaster, businesses can rapidly bring their app ideas to life without sacrificing quality or functionality, making it an ideal choice for those looking to streamline the development process and maximize efficiency.
An engaging and informative product page attracts potential users and conveys your app's value proposition. A well-crafted app description and product page will showcase your app's features, functionality, and unique selling points, ultimately convincing users to download and try your app. Follow these steps to create a compelling product page for your app:
Once your app is developed, and your product page is complete, it's time to submit your app to the App Store for verification. Apple's review process is thorough, ensuring that only high-quality, safe, and reliable apps are available to users. Follow these steps to submit your app for verification:
After submitting your app for verification, the next phase involves waiting for Apple's review team to evaluate and approve it. The approval process is essential to ensure that the apps available on the App Store are high quality, safe, and reliable for users. The time it takes for your app to be reviewed can vary, with factors such as the complexity of your app, the current review queue, and whether your app requires additional attention due to specific features or functionalities all playing a role.
While waiting for approval, you can monitor your app's review status in App Store Connect. If the review team encounters any issues with your app, they will notify you via email, detailing the problems and providing guidance on resolving them. Promptly address these issues, make the necessary changes, and resubmit your app for review.
Once your app has been approved, you will receive an email notification from Apple. This confirmation indicates that your app has passed the review process and is ready for release on the App Store. You have several options for releasing your app, such as releasing it immediately after approval, scheduling a specific release date, or manually releasing it when you're ready.
After your app is released, it's important to keep an eye on its performance, including download numbers, user ratings, and reviews. This information will help you identify areas for improvement and guide future updates to enhance your app's overall user experience. Maintaining a successful app requires ongoing maintenance and updates to keep it relevant, secure, and in compliance with the latest App Store guidelines. Regularly addressing user feedback, fixing bugs, and adding new features will ensure your app remains competitive and continues to meet user expectations.
Apps submitted to the App Store are subject to Apple's review process, which ensures that only high-quality, safe, and reliable apps are available to users. Some common reasons for app rejection during this process include:
To minimize the risk of rejection, it's essential to carefully review Apple's guidelines and ensure that your app complies with all requirements before submitting it for review.
The App Store is a digital platform developed by Apple Inc., where users can browse, download, and purchase applications for iOS, iPadOS, watchOS, and macOS devices.
To publish your app on the App Store, you need to have an Apple Developer account, a completed app that adheres to Apple's guidelines, necessary app assets like icons and screenshots, and an Xcode project.
Visit the Apple Developer website and click on the "Account" tab. Then, sign in with your Apple ID or create one if you don't have one. Enroll in the Apple Developer Program by following the on-screen instructions and paying the annual membership fee.
As of March 2023, the annual membership fee is $99 for individuals and organizations and $299 for the Apple Developer Enterprise Program. Fees may vary by country or region and are subject to change.
Carefully review the App Store Review Guidelines to ensure your app follows Apple's standards for content, design, and functionality.
Use Xcode, Apple's integrated development environment (IDE), to build, test, and archive your app. Then, create an App Store Connect account and set up your app's metadata, such as its name, description, keywords, pricing, and availability.
In Xcode, upload your archived app to App Store Connect. Then, go to your app's page on App Store Connect, complete the submission form, and submit the app for review.
The review process typically takes between 24 hours and a few days. However, it may take longer if additional information or modifications are required.
If your app is rejected, you will receive feedback from Apple explaining the reasons for the rejection. Address the issues mentioned, make the necessary changes, and resubmit your app for review.
Yes, you can submit updates to your app by creating a new version in App Store Connect and uploading the updated binary through Xcode. The update will undergo the same review process as the initial submission.
You need an Apple Developer Program membership, a finished app, App Store assets, accurate listing details, and a privacy policy when your app collects data. Test the app on supported devices before you upload it.
You enroll with an Apple ID, verify your identity or organization, and pay the membership fee. The account lets you sign apps, use App Store Connect, and submit builds for review.
Create the app record in App Store Connect, then add its name, subtitle, description, category, keywords, age rating, support details, privacy information, icon, and screenshots. Keep every claim accurate and make the screenshots match the current app.
Use screenshots to show the screens that explain the app's main job first. Add a preview video only if it makes the experience easier to understand, and avoid images that promise features the app does not have.
Build and test the release version, archive it in Xcode, and upload the build to App Store Connect. Select that build in the app record, complete the required review details, then submit it.
Review time often ranges from hours to several days. Check the status in App Store Connect and watch for messages from Apple, especially if the reviewer needs access instructions or a test account.
Read Apple's rejection message carefully, reproduce the issue, fix it, and reply or resubmit with a clear explanation. Do not submit the same build again unless you have addressed the reason Apple gave.
Crashes, unfinished features, misleading metadata, missing privacy details, broken purchases, and confusing navigation often cause trouble. Test the exact build you plan to submit, including sign-in, payments, permissions, and account deletion flows.
Yes. Create a new version in App Store Connect, upload the new build, update any changed listing information, and send it through review. Plan regular fixes and updates so the app stays compatible with current devices and Apple requirements.
You can build a complete mobile app without writing the whole codebase by hand. AppMaster lets you design data, business logic, and mobile interfaces visually, then generate native iOS and Android applications for testing and release.
Experiment with AppMaster with free plan.
When you will be ready you can choose the proper subscription.


