


Equipment reservation app: prevent conflicts and track returns
Plan an equipment reservation app that prevents double bookings, records returns and damage, and places faulty items on maintenance hold.
Discover the essentials of working with modules to speed up the process of apps development.
Appmaster.io modules are collections of files and settings that empower and speed up development. By connecting them, you get the opportunity to add various functions to the application - user authorization, image editing, data encryption, mailing lists, and much more.
The content of each module depends on what kind of functionality it adds. These can be separate blocks of code, user interface components, ready-made data models, business processes, endpoints, etc.
After you connect the module, AppMaster.io will automatically import its files into your project and set up the initial configuration. After that, you just have to configure the new components to a minimum - and they will be ready to go.
You can find out which modules we have already added to this article. More information is in the Documentation.
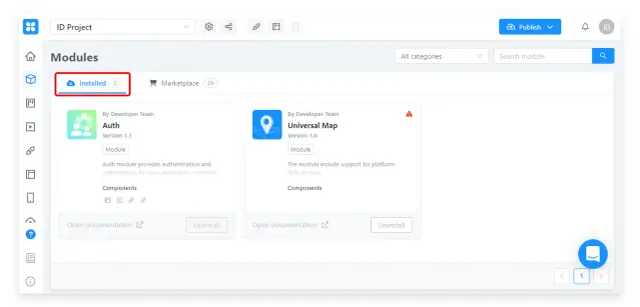
To get started with modules, open the Modules section in Appmaster Studio.
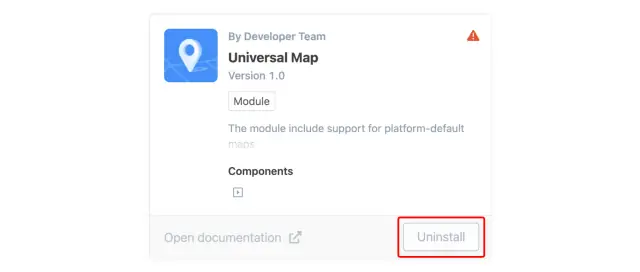
All installed modules are located on the Installed tab. For example, some of them, Auth and Universal Map are installed automatically, right after the project is created.
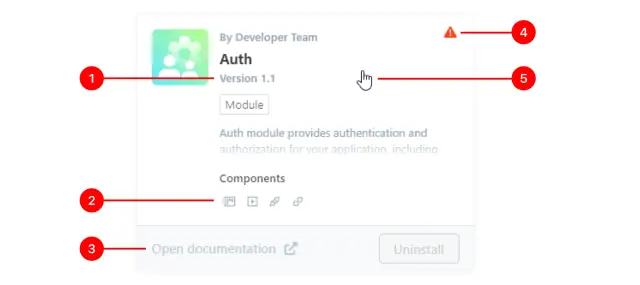
The preview displays basic information about the module: the current version (1), the icons of the components that it adds to the application (2), and a link to the Documents page with its description (3). If you need to configure the module (or it is configured incorrectly), a warning icon (4) will be displayed in the corner. To open the information and settings window, click once on the preview (5).
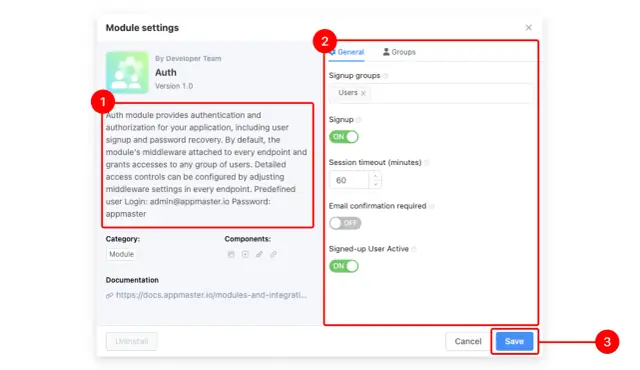
In addition to basic information, it contains a description of the module (1) and its settings field (2). The settings are individual for each specific module. If it interacts with other services and programs, most likely they will also need to be configured. Read more about this on the modules pages in the Documentation.
When finished, click the Save button to save your changes (3).
To uninstall a module, click the Uninstall button on the preview or in the settings window (1) and confirm the action in the pop-up window (2).
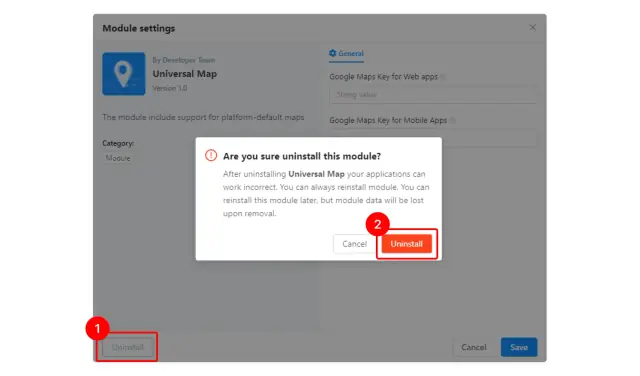
When deleting a module, all added settings, files, and data will be deleted or disabled. This also applies to all objects that you created from its data models. We recommend that you backup your application or database before uninstalling.
You may lose data!
If the module has added data models to your project, all their data will be deleted along with it. Please check everything carefully and make backups before deleting them.
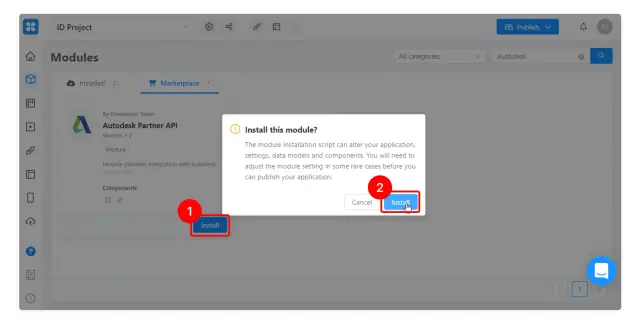
All other modules available for installation are located on the Marketplace tab (1). Here you can sort the components by category (2) or find the one you need by name (3).

Click the Install button (1) and confirm the action in the pop-up window (2) to install the selected module. Once installed, it will move to the Installed tab.
You can also configure the module before installation: click on it (1), in the window that opens, fill in the required fields (2) and click Install (3).
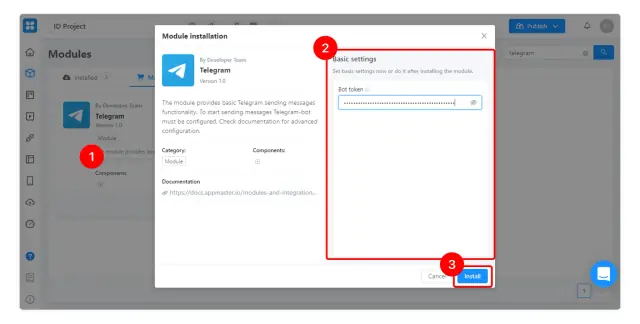
It makes no difference when configuring a module - before installation (in the Marketplace) or after it (in Installed). Use the method that works best for you.
We recommend that you start creating your application by connecting modules. Ready-made data models, business logic, predefined settings, interface elements, custom code, and automation scripts - all of this will significantly speed up development.
Of course, it is not easy to understand the functionality and select all the necessary components at the beginning of the project. But if you find the time for this now, you will save hundreds of design hours in the future because the modules already have everything you need to work.
The list of modules is regularly updated: we release new and updated versions of existing ones, add new functions and change individual settings. Some modules become the basic tools of Appmaster Studio. For example, the Auth authorization module can no longer be disabled or removed, as it used to be - after all, the operation of many other components depends on it.
Soon we will have updated functionality - Appmaster.io will inform you about the release of new modules and their compatibility with those that you already have installed.
Subscribe to us in messengers and social networks so as not to miss important and interesting things!
Important news and updates can be found in the Appmaster.io telegram channel, on Facebook and LinkedIn.
Check out our blog for step-by-step instructions, tutorials, and ideas for building apps.
If you have any questions or suggestions, write to the telegram chat of our community or through the bot on the website.
We are always glad to receive feedback from you!
Experiment with AppMaster with free plan.
When you will be ready you can choose the proper subscription.


