


 Jul 14, 2026
 8 min
8 minEquipment reservation app: prevent conflicts and track returns
Plan an equipment reservation app that prevents double bookings, records returns and damage, and places faulty items on maintenance hold.

Discover different modules available on AppMaster.io and how to add them to your application.
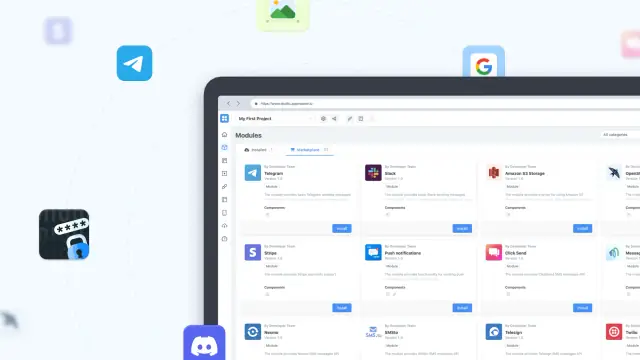
Appmaster.io Modules are preset that help to speed up customization. While connecting them, you add various functions to the application - user authorization, image editing, data encryption, mailing lists, and much more. After that, you just have to configure the new components and they will be ready to go.
With this approach, you can easily modify your application without making it too "heavy" - after all, it will contain only the necessary functionality.
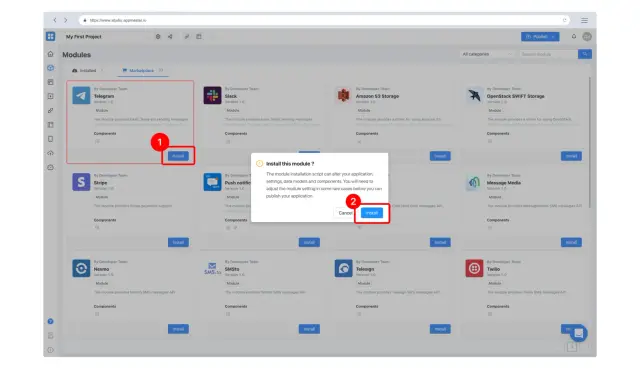
This can be done in the "Modules" block on the "Marketplace" tab. Select the one you need and click "Install" - the platform will install it automatically. All presets that have already been added are shown on the "Installed" tab.
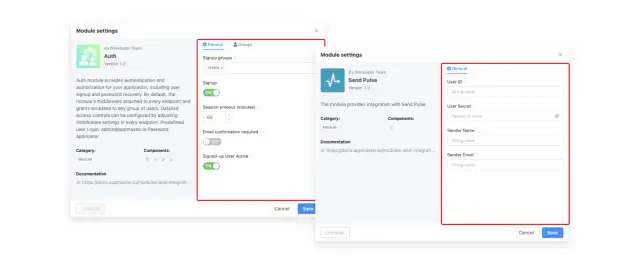
The settings are individual for each module and depend on its functions. If it interacts with other services and programs, most likely they will also need to be configured. Read more in the platform documentation and articles with examples of settings in our blog.
At the time of this writing this article, we have added 23 modules to Appmaster.io.

Adds user management functionality. With Auth, your application will have:
The platform automatically installs this module when creating a project. We do not recommend disabling or deleting it if you do not want to create your registration and login algorithms.
External authorization adds the functions of registration/authorization of users through their accounts in other services. This makes it easier for your users to register, and you can collect more information about them (for example, the addresses of pages in social networks).
Now you can add authorization to your application via Google, Facebook, LinkedIn, and Apple ID.
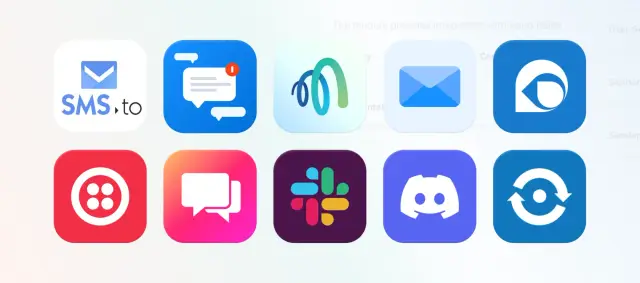
Unlock the ability to send letters and messages directly from your application, as well as configure mailings.
Appmaster.io currently supports sending emails via SMTP and push notifications, and also works with:

Connects Stripe payment system to your app.

Unlocks the ability to store your application files in Amazon S3 Storage and OpenStack SWIFT Storage. Before enabling these modules, you need to manually transfer existing files to the repository.

A complex module that was written for a project by a company using Autodesk in their work. Provides integration with Autodesk Partner API.

Adds basic functions for working with images.

Protection of information. Let’s embed data encryption algorithms into your application and add digital signatures.
Another 10 modules are in the final stages of development and will soon be available for installation.

Follow our news - as soon as updates appear, we immediately write about it on Twitter and the Telegram support channel!
 What are AppMaster modules?
Modules are ready-made feature sets for an AppMaster application. They can add authorization, messaging, payments, file storage, image tools, encryption, and other functions without building each part from scratch.
How do I install a module?Open Marketplace, go to the Modules section, choose the module you need, and select Install. AppMaster adds its components automatically, and you can find the module later on the Installed tab.
Should I install every available module?Not always. Install only the features your application needs, so the project stays focused and easier to configure. You can add another module later when a new requirement appears.
What does a module add to my app?Each module may add items such as data models, business processes, API endpoints, or interface components. Open the module window to see exactly which components it adds.
What does the Auth module do?Auth adds user registration, login, user data storage, and groups for access rights. AppMaster installs it when you create a project, so keep it unless you plan to build your own sign-up and login flow.
Can users sign in with Google or Apple?External authorization lets people sign in through accounts such as Google, Facebook, LinkedIn, or Apple ID. You still need to configure the chosen provider before users can use that sign-in option.
How can my app send emails or messages?Use a messaging module to send emails, push notifications, or messages through supported services such as Telegram, Slack, Discord, SendPulse, and SMS providers. Configure the service account details inside the module settings.
How do I add Stripe payments?Install the Stripe module, then connect your Stripe account in its settings. This lets your application work with Stripe payments after you complete the required configuration.
Where can I store app files?The file storage modules support Amazon S3 and OpenStack SWIFT. If your app already has files, move them to the selected storage repository before you enable the module.
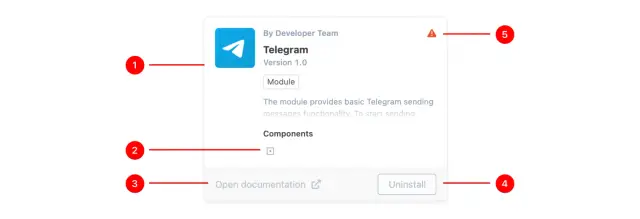
What does the warning icon on a module mean?A warning icon means the module still needs setup or has incorrect settings. Open the module, check its configuration and any connected service details, then save the corrected values.
Experiment with AppMaster with free plan.
When you will be ready you can choose the proper subscription.
 Jul 14, 20268 min
 Jul 13, 20268 min
 Jul 08, 20268 min