Discord bot: how to create it and add it to the server
Instruction to create a server, channel, and Discord bot, then add the created bot to your server.
To connect the Discord bot to your application, you will need a bot token (to configure the module) and the ID of the channel you will send messages to (to submit form).
We will tell you how to create a server, channel, and Discord bot, and then add the created bot to your server. You can read about how to configure sending messages on the AppMaster.io platform in this article.
Create server and channel, copy channel ID
First, you need to create a new server in Discord (or get admin rights on an existing one). Open your Discord account page in a browser - this will make it easier to navigate between the settings pages.
1. Click on the "+" in the left pane.
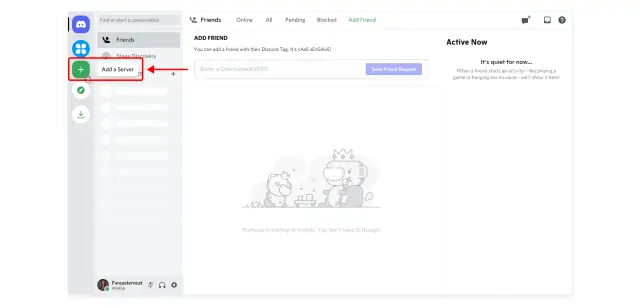
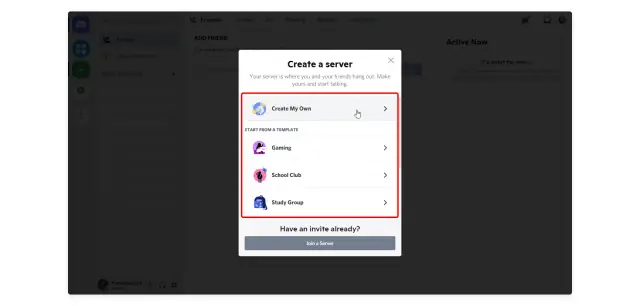
2. Choose a server template based on your industry or create your own.
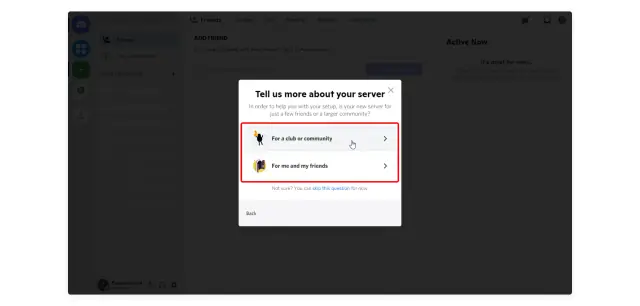
3. Indicate for what purposes you want to use it.
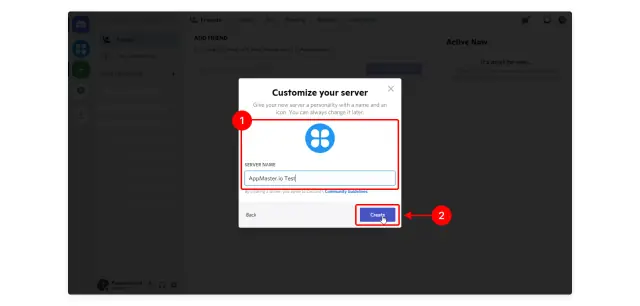
4. Select the image of the future server (1), specify a name (2), and create it (3).
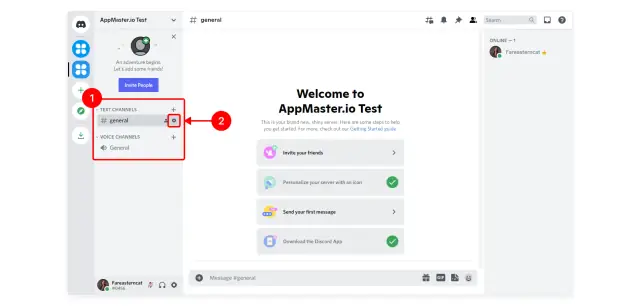
5. The server has been created. By default, two channels have already been added to it - text and voice (1). To change channel settings, click the gear icon (2). You can add a new channel by clicking on the "+" next to the name of the section.
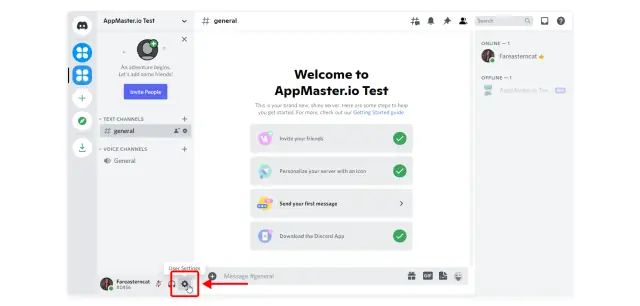
6. Now you need to get the ID of the selected channel. To do this, you must first enable developer mode in your profile settings. Click on the gear icon next to your nickname and photo.
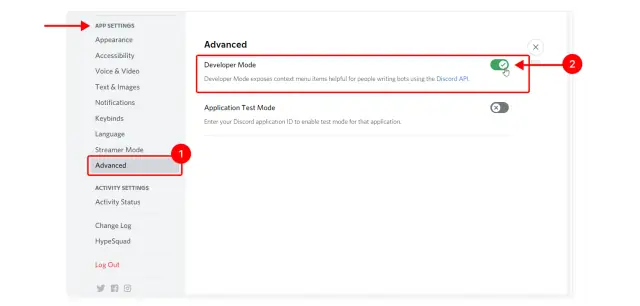
7. Go to the APP SETTINGS section, to the Advanced tab (1), and move the Developer mode selector - the developer mode is activated (2).
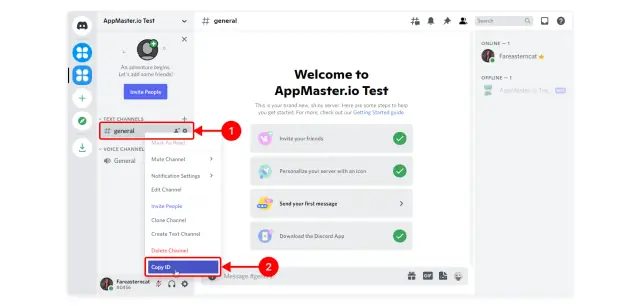
8. Return from the settings menu and right-click on the desired channel (1), in the pop-up menu, select Copy ID - your channel ID will be copied (2). Save it in any text document so you don't come back to this step.
Create a bot and add it to the server, copy the bot token
To create a bot, go to the dedicated developer Discord page: https://discord.com/developers/. Open it in an adjacent browser tab without logging out of your Discord account.
First, you need to create an application, then create a bot in this application and configure permissions for it, and only after that add the bot to the server.
1. On the Applications tab, select New Application.
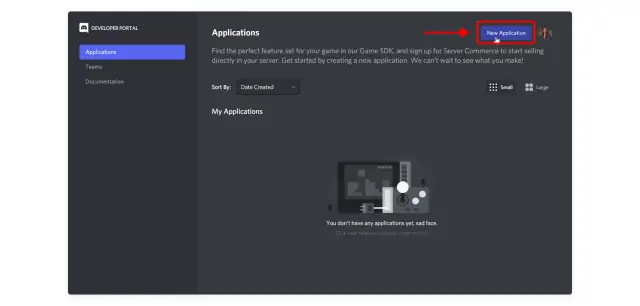
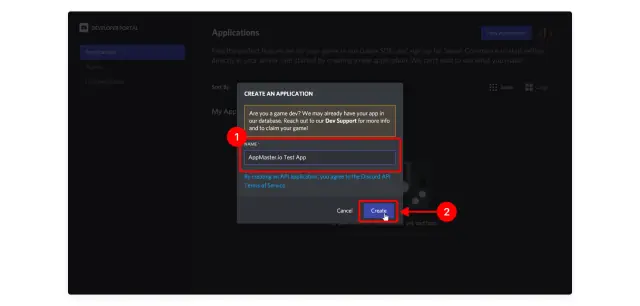
2. First, you need to create an application, then create a bot in this application and configure permissions for it, and only after that add the bot to the server.
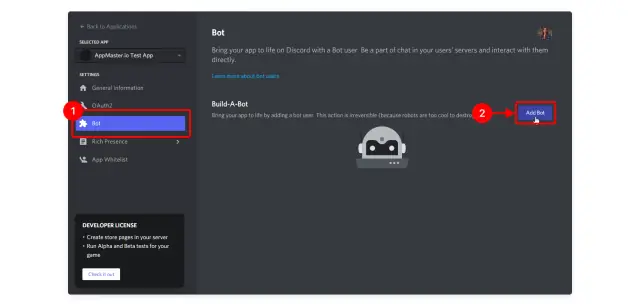
3. The application has been created. Go to the Bot (1) tab and click Add Bot to add a new bot.
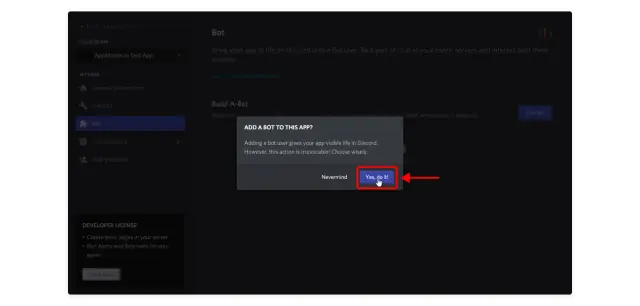
4. Agree to add a bot to your application.
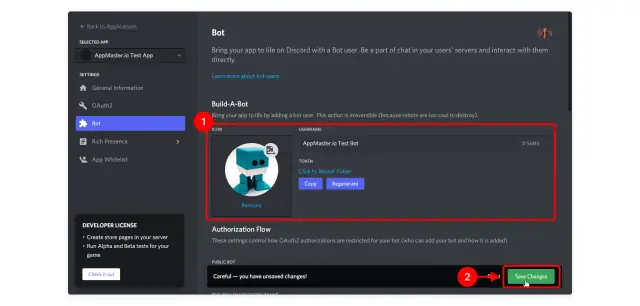
5. The bot has been created. All information about it will be displayed on the Bot tab. Here you can change its name, add an image and copy the bot token (1). You will need this token to configure the Discord module on the Appmaster.io platform. Each time you make changes, the developer portal will prompt you to save them (2).
Save the bot token so that you do not return to this step during subsequent configuration.
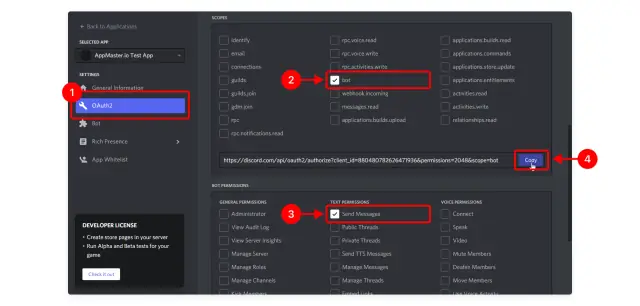
6. Now go to the OAuth2 (1) tab - here you can configure permissions and get a link to your bot. In the SCOPES section, select bot (2), in BOT PERMISSIONS, mark the permissions you want to grant it, in our case - we only send messages, so select Send Message (3). Then copy the automatically generated Discord link (4).
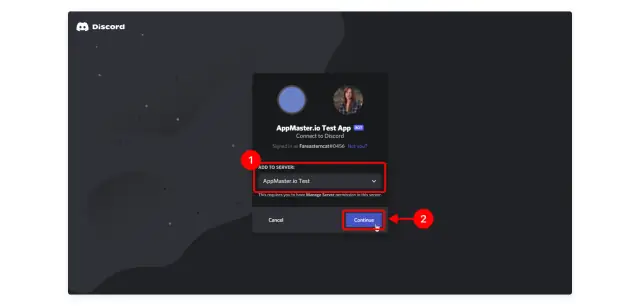
7. Paste the copied link into the address bar of your browser and follow it - your application window will open. Select your server from the dropdown list (1) and click Continue(2).
8. Make sure that the application (and therefore the bot created in it) is given only the necessary permissions, and then add it to your server.
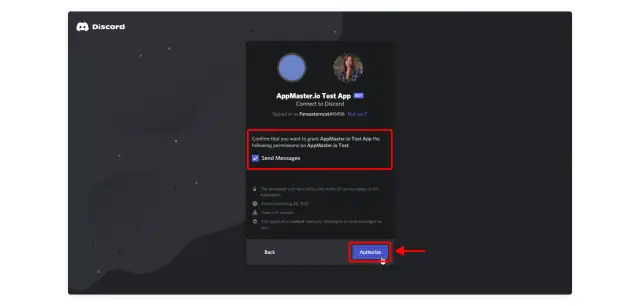
9. Make sure that the application (and therefore the bot created in it) is given only the necessary permissions, and then add it to your server.
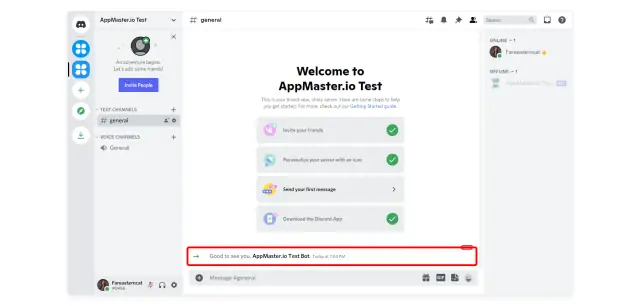
Connect the bot to the application via AppMaster.io Studio
Everything is ready. You have received a bot token for the Discord module and the channel ID for the posting form. Now go to AppMaster.io Studio and configure sending messages from your application by following the instructions Discord module: connect bot and send messages.
Follow our blog and join the community chat to learn about platform news and new articles.
For more information on what modules are and how to configure them, see AppMaster.io 101 Tutorial.


