Registration and authorization through social networks
Tools for setting up registration and authorization via social networks for websites, web, and mobile applications.

Tools for setting up registration and authorization via social networks for websites, web, and mobile applications are no-code and low-code solutions of varying degrees of complexity. There are tons of ready-made plugins, widgets, modules, even platforms with toolkits for such integrations.
How it works
The general mechanism is as follows:
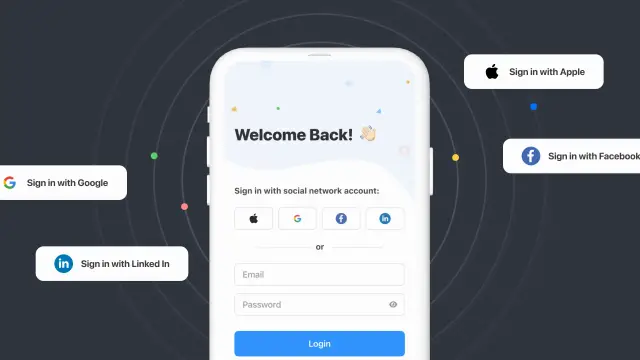
- Users click on the icon of a specific social network, such as Facebook or LinkedIn, in the login window.
- After that, the application is launched, transmitting data from the application or site and vice versa. Its work is practically invisible - only a pop-up message is displayed asking for confirmation of registration/login through the selected service.
- After confirmation by clicking the "Continue as ..." button, the social network transmits the access key to the data of the current profile, depending on the set permissions.
- Your resource starts the process of registering and copying the necessary data - but only those that were previously configured for collection (or that are set in the parameters of the component responsible for authorization).
What data can be collected
Public data (they differ from resource to resource). Most often they include login, ID or page address, photo or avatar, last name, first name, email address, location, time zone, gender, age.
Much depends on what information the users themselves have allowed access to in their account settings. Often, when registering or editing a profile, people automatically put down extra "checkmarks", which opens up access to additional information. Permission lists for submitting data can be found in the documentation or settings for a particular social network.
Why is it needed?
For owners of websites, mobile, and web applications, this will help to collect more information about the target audience, preferences, interests, social circle. People fill out their Facebook stories, LinkedIn job data, or Instagram page more carefully than their registration form or profile, so the information will be more accurate.
It is also less likely that your customers will forget the credentials under which they logged in. The history of interaction will be more relevant, and the conversion, accordingly, will be higher.
Also, if in addition to logging in, you configure the ability to like, comment, repost - clients will more often talk about you and their impressions of working with you (alas, not only positive but also negative).
It is more convenient for users to click the "Login" button through their usual Google, Facebook, Twitter, Linkedin (in which they are most likely already authorized) than to add data to a separate form on the site or in the application. Some users, especially those who spend a lot of time on the Internet, generally refuse to go to new resources if they need to create a new account or fill out a questionnaire to enter.
By setting up a quick login form, you will increase the chances that potential customers will nevertheless show activity - they will go to the site, download the application and test the mobile game.
However, the traditional registration form should also be left, because some people, especially the older generation, mistrust the authorization buttons via social networks, especially if the resource on which they need to register is unfamiliar to them.
How to setup
Independently
You will have to do this separately for each social network, also add blocks of code, which are often difficult for beginners to configure - both on the side of your website or application and on the external service. For no-code solutions, this option is not particularly suitable, unless you came to no-code development from ordinary programming and you already have a similar experience.
Through special services
Such services provide not only whole lists of various resources through which you can configure the entrance, but also convenient tools for statistics, analytics, integration in your account. This will shorten the development time and also simplify the work with clients in the ready-made application. The disadvantages are that the tools are less flexible than those created independently or for a specific platform, plus you will be tied to the service in one way or another.
Plugins, widgets, modules
Variants are great for solutions built on CMS / no-code platforms. Login and registration are essential for both websites and applications - no matter web or mobile - so even on unpopular platforms, you can find many options, especially if your community is active enough.
Developer rules
Whichever option you choose, it is important adhering to the basic rules.
- If data is transmitted through a form on your website or processed in your application, you are responsible for their safety.
- The terms of use and privacy policy will not only help keep you out of trouble but will also add loyalty from new users.
- Next to the registration button, briefly explain why signing in through third-party services is better. Come up with a bonus for customers that will be additional motivation.
- Not only social networks. WhatsApp, Telegram, Amazon, Apple accounts can also be used to register on websites, in mobile and web applications.
- If you connect a lot of authorization options, users will forget which one they chose. Use popular ones in your area (but Google should be on the list for sure).
Disadvantages of registration via social networks
Of course, they are there too:
- The older your target audience is, the less likely its representatives will use this type of registration.
- Not all services are suitable for resources aimed at corporate clients, especially entertainment social media.
- Not all providers will provide you with all the information you need. Therefore, be sure to read the documentation, conduct tests, follow the news and updates of the services through which the authorization is configured.
- When deleting or changing accounts, users lose access to your resource.
- Even regular customers often forget through which service they logged in.
Authorization via social media on AppMaster.io
Now on our platform, the main authentication module and 4 authorization modules are available through third-party services:
- Apple
What is their significance? First of all, in the ease of setup. For the LinkedIn module only, you need to specify the Client Secret, Redirect URL, and Client ID. For the rest of the modules, the client or application ID is sufficient, depending on the module.
Setting up on the side of third-party services is also easy - just register a developer account by specifying a few basic parameters. Step-by-step instructions for configuring authorization modules are in our next articles.
If you don't want to wait - write to the telegram chat of the AppMaster.io community to directly ask questions to our developers.


