


 Jul 14, 2026
 8 min
8 minEquipment reservation app: prevent conflicts and track returns
Plan an equipment reservation app that prevents double bookings, records returns and damage, and places faulty items on maintenance hold.

Setting up import in Static and Dynamic versions on the no-code platform. Video example is included.
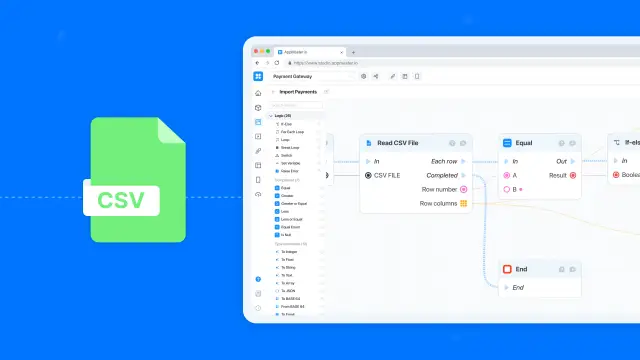
When the application is created and launched, it is periodically necessary to import information into its database from files. Of course, the databases will also be replenished automatically - due to information added by users or provided by integrated services. But it is better to add import settings for common CSV, XLS, or XLSX formats in advance - most likely, they will be useful to you and will greatly simplify your work in the future.
Today we will talk about setting up import on the no-code platform AppMaster.io in two versions:
At the end of the article, there is a video with examples and an explanation of all the configuration steps.
The development of such functionality is not much different from classical programming, but with the help of visual tools, you will do it much faster. To do this, you need to follow 5 simple steps:
If you already have experience with AppMaster.io or other no-code platforms, then set up is unlikely to take more than an hour, even taking into account watching the tutorial video.
Many of them are analogs of classical programming functions - only in the form of visual tools, with which you will work on the drag & drop principle.
Here is a list of the main blocks for setting up import with their brief description.
\* In addition to them, you may also need various auxiliary blocks: if, when processing values from a file, you need to convert data from one format to another, save a variable for further processing, concatenate or split strings.
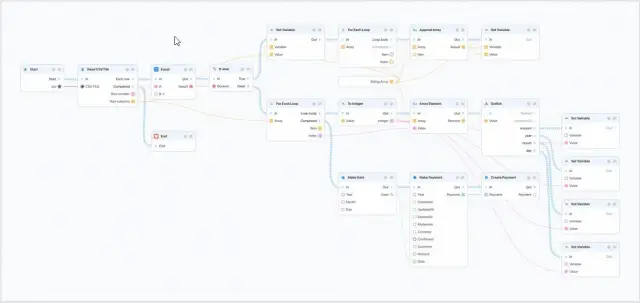
In this case, you do not need to specify the names of the columns, but their order must be the same in all loaded files - otherwise, the program will import data incorrectly.
In this case, the columns in the loaded files can be in any order, but their names must always be the same for the import to be successful.
To set up dynamic import, you need to add analysis blocks for the first row of the table - to determine which data is contained in each of the columns of the loaded file.
When adding an endpoint, select the POST method, write down the URL and specify the created business process - the minimum setup is complete. Additional information on how to define access rights for user groups or from different IPs can be found in the platform documentation (EN and RU versions). File upload form
For the import form to work correctly, you need to select Create Record when creating it and specify the created endpoint, as well as add a form confirmation button (trigger - onClick, action - Submit form).
This video describes in detail all the steps for setting up static and dynamic imports using a CSV file as an example.
VIDEO - AppMaster.io How-To: Import CSV/Excel File
Would you like to chat directly with our developers and other no coders? Join the Appmaster.io Telegram community. We will be glad to answer your questions!
 When should I use static import?
Use static import when every file keeps the same column order. The app reads values by position, so a changed order can put data in the wrong fields.
When should I use dynamic import?Choose dynamic import when files may place columns in different positions but keep the same header names. The process reads the first row, then matches each value to its named column.
Which file formats can the import accept?You can prepare CSV, XLS, or XLSX files. The import flow follows the same general setup, while the business process uses the reader block for the file type you accept.
What does the import business process do?Create a business process that receives the uploaded file, reads its rows, converts values when needed, creates model objects, and saves them to the database.
Do my files need column headers?Static import relies on column positions, so header names are not required for its mapping. Dynamic import needs consistent header names because it uses them to identify each column.
How do I connect the upload form to the import process?Add a POST endpoint and connect it to the import business process. Your web form sends the selected file to that endpoint when the user submits it.
How do I map file values to database fields?Use a loop to process each row, then direct each column value to the correct field. Add conversion blocks before saving when a file uses a different date, number, or text format.
What should the file upload form include?The form should let users select a file, submit it, and see either a success message or a useful error message. Configure it to create a record through the import endpoint.
How should I test a file import?Test with realistic sample files before you release the feature. Check normal imports, empty cells, invalid values, unexpected column orders, and files with missing headers.
How does dynamic import handle columns in a different order?Treat the first row separately. Store its column names in an array, retrieve the matching name for each later value, and route the value according to that name.
Experiment with AppMaster with free plan.
When you will be ready you can choose the proper subscription.
 Jul 14, 20268 min
 Jul 13, 20268 min
 Jul 08, 20268 min