Adding Log Values to the Application
Let's figure out what log files are and how to record the value of the log in AppMaster.
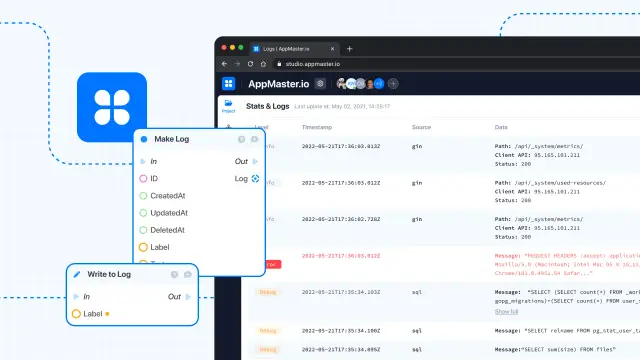
Logging is an important part of the development process. Logging helps to protect developers and users from large-scale failures and problems in applications and systems.
Let's figure out what log files are and how to record the value of the log in AppMaster.
What are logs?
A log is a text file that contains system information about the operation of the software or server. The log includes data about the actions performed by the program or the user.
Why are logs needed?
When errors occur in a server, program, or computer operation, logs are what specialists refer to determine the cause and source of this error.
Logs list events in chronological order, their sources and errors, and why they occurred. Different specialists can use logs. For administrators, log files contain information about why devices and systems failed. Developers need logs for debugging - finding and fixing errors on a website or application. Logs are also helpful for SEO specialists who track traffic statistics using them.
Logging and analyzing logs is the most important tool in the work of IT specialists. It allows you to quickly identify the causes and sources of problems and failures and correct them. In applications, logs help monitor their work to find bugs in time.
Levels and types of logs
Logging is necessary at all stages of development and during the further operation of the software. This can accumulate many log files, which will be very difficult to understand. Therefore, they are divided into levels and types for the convenience and simplification of searching and reading.
There are four main levels of logs:
- Debug — recording large-scale state transitions: accessing databases, starting and stopping the service.
- Warning — abnormal situations, for example, an incorrect request format.
- Error — a record of typical errors.
- Fatal — fatal crashes: database access denied, lack of disk space.
There are two additional levels of logging:
- Trace — recording the process step by step; is needed when it is difficult to localize the problem.
- Info — general information about the operation of the service.
Log types:
- Server — calls to the server and errors that occur during calls;
- Event — records the data about network traffic and usage (login attempts, application events);
- System — all system events;
- Authorization and authentication logs — login and logout processes, access problems, etc.;
- Logs of applications that are in this system;
- Database logs — access to the database.
How to write logs correctly?
To keep logging that is convenient to use, you need to write logs correctly:
- log all critical events, such as stopping transactions and starting an application;
- add tags to navigate to the desired records quickly;
- remove repeated words;
- establish a format for creating log files in the company to standardize the process;
- enter only the required information.
Logging in AppMaster
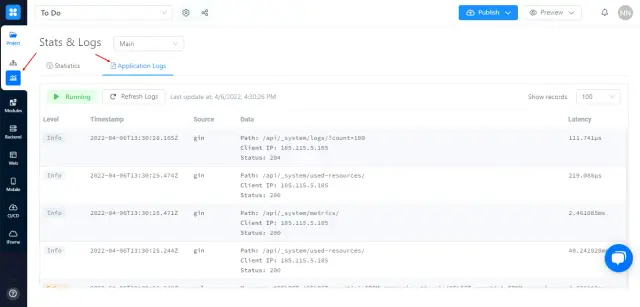
Every AppMaster project supports standard logging. To work with logs, go to the Project / Deploy Stats tab. Here in the Application Logs tab, you will find all the application logs.
How to write log value to the application file?
The system automatically records certain events to a file, but you can record the necessary data additionally. The business process editor has a Write to log block to do this.
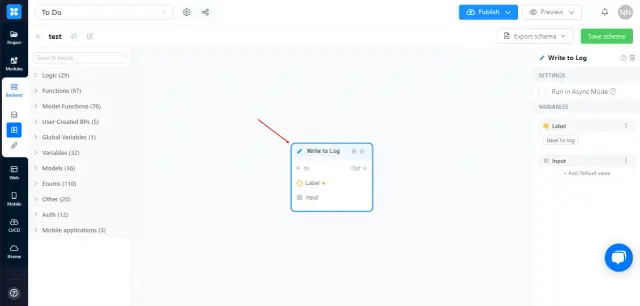
The block has two input fields:
- Label — a title that is written to the log file in the string format;
- Input — any value that needs to be stored in the log.
Creating a logger
You can also create a logger in AppMaster. This is very convenient when many requests are sent to the application, and it is inconvenient to record everything manually.
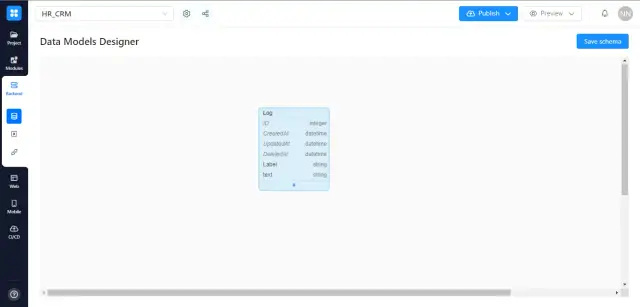
To create a logger, first create a data model — Log and add the following fields:
- Label — for the title of the entry;
- Text — for the body of the entry.
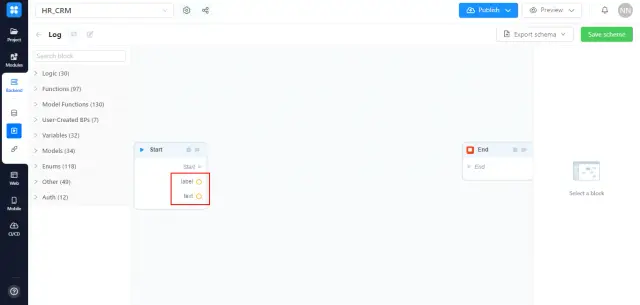
To save the values to the log, you will need a business process. Create a new BP and set the fields for the Start block:
- Label - in string format;
- Text - in string format.
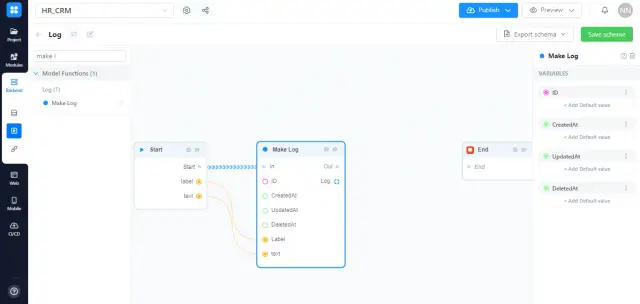
Next, add a Make block and create a record by passing the fields from the Start block to it.
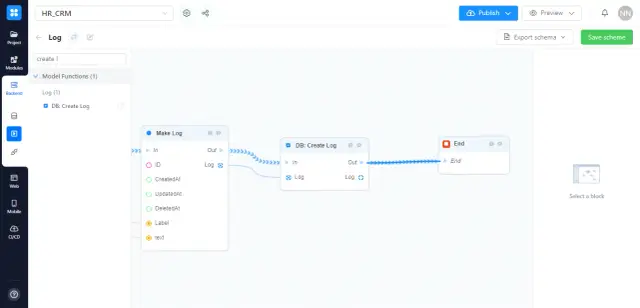
Save the record to the database using the Create block.
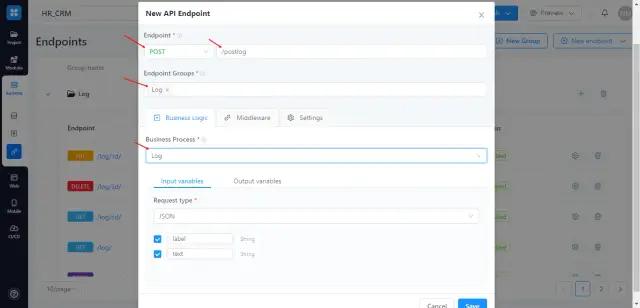
You need to create an endpoint for the new BP so that it can be accessed from the frontend. Go to the Endpoints tab and create a new endpoint. Set options:
- Select the POST method;
- Set the URL;
- Select a group;
- Set the created business process.
Now, you can use the created BP where you want to write logs.
To sum up
Let’s summarize everything we discussed about logs.
So logs are the records of events that occur in an application. They can help troubleshoot issues, track usage, and monitor security.
It can be challenging to determine what caused an issue or where a problem originated without logs. Logs can help you identify bugs and issues to resolve them before they cause significant problems.
When writing logs, it's essential to be as specific as possible. Include the date and time of the event, the type of event, the log level, the data involved, and any other relevant information.
It's also important to keep your logs secure. If sensitive data is being logged, be sure to encrypt it. And don't store logs in a publicly accessible location. Only authorized personnel should have access to them.


