Getting Started with Canva
Canva is an online design tool that allows users to create professional-quality graphics for various purposes, including social media posts, presentations, banners, and more. To get started with Canva, follow these steps:
- Visit Canva's official website.
- If you don't already have an account, sign up using your email, Google, or Facebook account. If you have an existing account, click the "Log in" button and enter your login credentials.
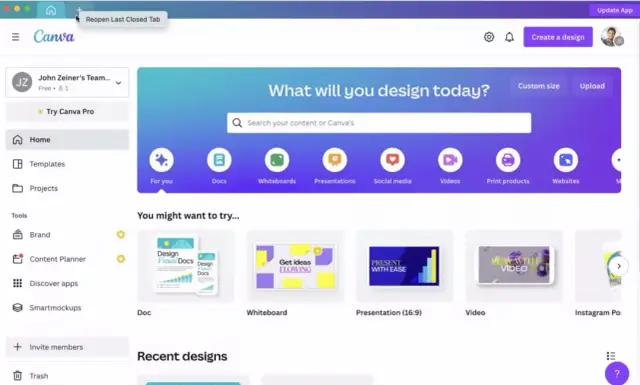
- Once logged in, you'll be taken to your Canva homepage. Here, you can view your previously created designs, access templates, and start new projects.
- Click the "Create a design" button in the upper right corner of the page to start a new project. From here, you can search for a specific template or browse the available categories.
Now that you can access Canva's tools, it's time to create your social media graphic by selecting the right template and customizing it to your needs.
Each social media platform has its own specific dimensions and formats for posting graphics. Choosing the right template for your target platform is essential for creating a professional and engaging design.
To choose the right social media template in Canva, follow these steps:
- From your Canva homepage, click the "Templates" tab in the left-hand sidebar menu.
- Scroll down to the "Social media" section, where you'll find templates specifically designed for various platforms, such as Facebook, Instagram, Twitter, and more. Find the platform you want to create a graphic for, and click on it.
- Browse through the available templates and select one that aligns with your content and branding. Click on the desired template to start editing and customizing it.
Note that some templates are exclusive to Canva Pro users. If you want to use these premium templates, consider upgrading to the Canva Pro subscription plan.
Customizing Your Graphic
Once you've selected a template, it's time to customize your graphic and make it your own. Canva offers several customization options, such as adjusting the layout, adding elements, changing colors, fonts, etc.
To customize your Canva graphic, follow these steps:
- Adjusting the layout and background: If you want to change the template's layout or background, click on the layout or background image. You can then move or resize elements, change the background color or image, or use the options in the toolbar to apply various effects.
- Adding elements: Enhance your design by adding shapes, icons, stickers, or illustrations. Click on the "Elements" tab in the left-hand sidebar, then search or browse the available elements. To add an element, simply click on it or drag and drop it onto your canvas. Resize, rotate, or reposition the element as needed.
- Changing colors: To change the color of an element, text, or background, select it and click on the color picker in the toolbar. Choose a new color or enter a specific color code. You can also use the eyedropper tool to sample a color from your design.
- Uploading images: If you want to add your own images to your design, click on the "Uploads" tab in the left-hand sidebar, and either drag and drop your files or click "Upload an image or video" to select them from your device. Once uploaded, you can add the image to your design and adjust its size, position, and other properties.
By customizing your social media graphic, you can create a unique and eye-catching design that reflects your brand and captures your audience's attention.
Working with Canva Elements
Canva elements consist of various graphics, shapes, lines, icons, and more that you can use to enhance your social media design. To work with elements in Canva:
- Access the Elements tab: On the left side of the Canva interface, click the 'Elements' tab (shaped like a triangle).
- Search or browse elements: Use the search bar at the top of the Elements panel to look for specific items or scroll through the available categories to explore a broad range of graphics and shapes.
- Add an element to your design: Click on an element you want to include in your graphic, and it will appear on the canvas. You can also drag and drop elements directly onto your design.
- Resize and position elements: Click and drag the circular handles on the corners of the selected element to resize it. Click inside the element and move your mouse to reposition it on your canvas. Hold Shift and move the corners to resize while maintaining the original proportions.
- Change element colors: To change the color of an element, click on it and use the color-picker tool at the top of the screen. Choose a color from the palette or enter a custom color code (e.g., HEX, RGB).
- Layer elements: If multiple elements overlap, right-click on the element and select 'Bring to front' or 'Send to back' to adjust its position in the layer hierarchy. You can also use the 'Position' option at the top of the interface for finer control over layer ordering.
- Delete elements: To delete an element from your design, click on it and press the 'Delete' key on your keyboard or use the trash bin icon at the top of the screen.
Adding Text to Your Design
Text is essential to most social media graphics, delivering your message to your audience. To add and customize text in Canva:
- Access the Text tab: On the left side of the Canva interface, click the 'Text' tab (shaped like an 'A').
- Choose a text style or font: Browse the various pre-designed text styles available, or select 'Add heading,' 'Add subheading,' or 'Add a little bit of body text' to start with a blank text box. You can always customize the font later on.
- Add text to your design: Click on a text style or font option to add it to your canvas. Alternatively, drag and drop the text directly onto your design.
- Edit the text content: Click on the text box and type in your desired text. The existing text will be replaced with your input.
- Format the text: Use the formatting toolbar at the top of the screen to modify the font style, size, colors, and more. Using the available options, you can also adjust text alignment, line spacing, and letter spacing.
- Resize and position text: Click and drag the circular handles on the text box's corners to resize it. Click inside the text box and move your mouse to reposition the text on your canvas. Like elements, holding Shift and moving the corners maintain the original proportions while resizing.
- Delete text: To remove a text box from your design, click on it and press the 'Delete' key on your keyboard, or use the trash bin icon at the top of the screen.
Powerful Tips for More Attractive Graphics
Creating visually appealing social media graphics can help your posts stand out and drive engagement. Here are some valuable tips to keep in mind:
- Use high-quality images: Choose images with good resolution and composition to ensure your graphics look sharp and professional. Canva offers a vast library of stock images, or you can upload your own.
- Apply filters and effects: Utilize Canva's built-in filters and effects to modify and enhance your images, adding a unique touch to your design. Be consistent with the filters you use to maintain a cohesive look across your visuals.
- Consistency is key: Use similar color schemes, fonts, and design elements throughout your graphics to create a recognizable brand identity.
- Visual hierarchy: Arrange elements on your canvas in a way that guides the viewer's attention through the graphic. This can be achieved by strategically using size, color, and placement to prioritize essential elements.
- Use emphasis: Draw attention to key areas or messages by using bold fonts, contrasting colors, or other design techniques that make those parts stand out.
- Simplicity over complexity: While adding many elements to a design is tempting, keep your graphics clean and simple. Too much clutter can make your design confusing and challenging to comprehend.
- Check for readability: Ensure your text is easily readable against the background. Use contrasting colors and adjust text size or spacing as needed.
- Preview and test your graphics: Take a step back and preview your design. Make sure everything appears as intended, and your message is clearly communicated. Make adjustments as necessary before exporting your graphic.
By implementing these tips, you can create visually engaging social media graphics that grab your audience's attention, helping your content stand out in the crowded social media sphere.
After putting all your creativity into designing the perfect social media graphic, it's time to export your work. Canva makes exporting your designs a seamless process with just a few clicks. Follow these steps to export your social media graphic:
- Select the correct file type: Canva supports multiple file formats. Depending on the platform you're using and the final product's intended quality, you may choose JPEG, PNG, or PDF. JPEG is optimal if you prioritize smaller file sizes, while PNG is ideal for images with transparent backgrounds. For high-quality graphics, consider exporting as a PDF.
- Click the 'Download' button: In the upper-right corner of the Canva editor, click the 'Download' button. A dropdown menu will appear, allowing you to choose a file format. Select the type you prefer based on your needs.
- Choose the export quality and compression: Some formats, such as PNG or JPEG, allow you to adjust the export quality and compression. This option allows you to balance between quality and file size. Choose the best balance for your specific needs.
- Download your graphic: After configuring the export settings, click 'Download' to save the file to your device. Canva will generate the graphic in the selected format and download it to your computer.
- Share and publish: Once your graphic is downloaded, you can share it on your desired social media platforms. For best results, ensure you adhere to each platform's image dimensions and file size restrictions.
With your social media graphic exported, it's now ready to draw the attention of your target audience and elevate your online presence.

Combining Canva's design capabilities and the AppMaster platform is a powerful duo for creating visually appealing applications. By integrating Canva-created graphics into the UI/UX of your AppMaster-built applications, you can achieve a memorable user experience. Here's how you can use Canva with the AppMaster platform:
- Create visually appealing UI components: Using Canva, design custom graphics to enhance your application's UI elements, such as buttons, icons, and background images. This approach boosts the appearance of your apps and makes them stand out.
- Optimize image sizes for various devices: The AppMaster platform allows you to build applications for web, Android, and iOS. With Canva's image formatting and resizing flexibility, you can create great graphics on all device types. Optimize your images for every platform without sacrificing quality.
- Apply a consistent look and feel across your applications: Using the same graphics or following a consistent design theme can create a unified brand experience across your AppMaster-built applications. Canva makes maintaining a consistent look and feel easy while building various applications.
- Iterate and update graphics quickly: Canva lets you iterate and modify your graphics quickly. If you need to update a design element in your application, you can easily make the changes in Canva, export the new graphic, and upload it to your AppMaster application.
- Take advantage of Canva's vast library of resources: Canva boasts a huge library of templates, icons, images, and fonts, which can all be utilized in your AppMaster projects. This collection makes designing engaging visuals that align with your application's purpose easier.
Canva is a handy tool for designing stunning social media graphics and improving your application's UI/UX on a no-code platform like AppMaster. By leveraging Canva's capabilities, you can create beautiful and engaging graphics for your audience, while the AppMaster platform ensures a smooth, efficient, and cost-effective application development process. Don't miss out on the combined power of these two valuable tools!