


Equipment reservation app: prevent conflicts and track returns
Plan an equipment reservation app that prevents double bookings, records returns and damage, and places faulty items on maintenance hold.
Learn the essentials of creating your own app from scratch. This guide covers the key steps, tools, and tips to help you build a functional and engaging application.

Creating your own app might seem like a daunting task, but with the right guidance and tools, it's an achievable goal even for beginners. Whether you aim to build a mobile app for business, a web app for your personal project, or a comprehensive software solution, understanding the basics of app development is crucial. In this section, we'll explore why app development is important and how you can get started.
Mobile and web applications have become integral parts of our daily lives. From productivity tools to social networks and e-commerce platforms, apps drive engagement and provide value to users across the globe. For businesses, having a custom app can enhance customer interactions, optimize operations, and open new revenue streams. For individuals, creating an app can be a creative outlet or a way to solve specific problems.
App development typically involves several stages:
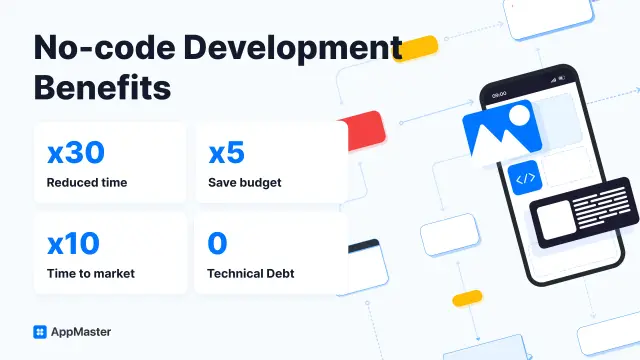
No-code development has revolutionized how apps are built, particularly for those without technical backgrounds. Platforms like AppMaster provide intuitive tools that allow users to create fully functional apps through a visual interface. By dragging and dropping components, users can quickly design UIs, create data models, and define business logic without writing a single line of code.
The first step in your app development journey is deciding what kind of app you want to create. Consider the problems you wish to solve, the audience you aim to serve, and the unique features your app will offer. Once you have a clear idea, explore no-code platforms like AppMaster to start turning your vision into reality. With accessible tools and a supportive community, embarking on your app development journey has never been easier.
Before you start building your app, it's critical to have a clear understanding of its purpose. Ask yourself the following questions:
Understanding the problem your app solves and the needs of your target audience will guide every aspect of your development process.
Once you have a clear concept, conduct market research to validate your idea. Look into existing apps that fulfill a similar purpose:
This research will help you refine your idea and define unique selling points that will set your app apart.
Next, create a detailed list of features your app will include. Categorize them into primary and secondary features to focus on what's essential first. A typical feature list might include:
Having a clear feature list will help you stay organized and ensure that you don't overlook any critical aspects during development.
The user journey is the path users take to accomplish tasks within your app. Here's how you can design an effective user journey:
A well-designed user journey ensures that your app is intuitive and user-friendly, which is crucial for retaining users.
Building an MVP allows you to launch a simpler version of your app with core features. This approach has several benefits:
Focus on delivering value with your MVP, rather than trying to include every possible feature from the start.
A project timeline helps you organize your development process and set realistic milestones. Here are some tips for creating an effective timeline:
Using project management tools can help you manage your timeline effectively. Platforms like AppMaster provide intuitive interfaces for planning and tracking your project.
Based on your app's complexity, budget, and your technical skills, decide whether to use traditional code-based development or a no-code platform like AppMaster. No-code platforms make it easier for beginners to build functional apps quickly and with less financial investment.
Finally, have a plan for post-launch activities, which are vital for your app's success:
Proper planning ensures that your app not only successfully launches but also continually improves and grows over time.Planning your app is crucial to its success. By taking the time to thoughtfully answer these questions and map out your strategy, you’ll be well-prepared to move into the design and development phases with confidence.
Designing the user interface (UI) of your app is a crucial step in the app development process. A well-designed UI not only enhances the aesthetic appeal of your app but also significantly improves user experience (UX), making it easier for users to navigate and interact with your app. Here’s a detailed guide to help you get started with designing a compelling UI:
The first step in designing an effective UI is understanding your target audience. Determine who will be using your app and what their needs and preferences are. Conducting user research through surveys, interviews, and usability tests can provide valuable insights into your audience's expectations and behavior.
Wireframes are basic blueprints for your app’s design. They outline the structure and layout of each screen without focusing on color schemes or graphics. Tools like Figma, Sketch, and Balsamiq are popular for wireframing. Start by sketching out the main screens of your app and the navigation flow between them.
When designing your app’s UI, keep these key design principles in mind:
Prototyping involves creating interactive versions of your wireframes to simulate the user experience. This allows you to test your design and make necessary adjustments before moving on to full development. Tools like Adobe XD, InVision, and Marvel are effective for creating prototypes.
Selecting the right colors and fonts is essential for creating an appealing and user-friendly interface. Choose a color scheme that aligns with your brand and is visually pleasing. Ensure there is sufficient contrast between text and background colors for readability. For typography, select fonts that are legible and consistent across the app.
Responsive design ensures that your app looks and functions well on different devices and screen sizes. Use flexible grid layouts and scalable images to adapt your design to various resolutions. Testing your app on multiple devices is crucial to ensure a seamless user experience.
Design systems provide a set of standards and reusable components for building your app’s UI. They help maintain consistency and speed up the design process. Popular design systems include Google's Material Design and Apple's Human Interface Guidelines.
No-code platforms like AppMaster offer built-in design tools and templates that simplify the UI design process. With drag-and-drop interfaces and pre-designed components, you can create aesthetically pleasing and functional UIs without needing advanced design skills.
Finally, gather feedback from users and stakeholders to identify any issues or areas for improvement. Iterative design involves making changes based on feedback and continuously refining your UI to enhance user experience.
Designing an effective user interface is an iterative and collaborative process that involves understanding your users, applying design principles, and leveraging the right tools. By following these steps and continuously seeking feedback, you can create a visually appealing and user-friendly interface for your app.
Creating your app starts with selecting the right development tools. These tools can significantly impact the efficiency of the development process, the quality of the final product, and your overall experience. Whether you're a beginner or a seasoned developer, it's crucial to find tools that align with your project's needs, your skill level, and your goals.
Before diving into the tool selection process, have a clear understanding of your app's purpose and goals. Determine what kind of app you are building—whether it's a web app, a mobile app, or a combination of both. Consider the features you plan to incorporate and the platforms on which you want your app to run (iOS, Android, web, etc.). Understanding these aspects will help you choose tools that support your vision effectively.
If you're new to app development or want to speed up the process, no-code and low-code platforms are excellent starting points. These platforms enable you to build apps with minimal or no coding experience by using visual interfaces and pre-built components.
AppMaster is a leading no-code platform that specializes in creating backend, web, and mobile applications. With its drag-and-drop interface and visual BP designer, you can create a comprehensive application complete with data models, business logic, and REST API endpoints without writing a single line of code. This makes AppMaster an ideal choice for beginners and businesses looking to develop apps rapidly and cost-effectively.
For those with some coding experience, Integrated Development Environments (IDEs) like Xcode for iOS, Android Studio for Android, and Visual Studio Code for cross-platform development are popular choices. These environments provide a suite of tools to write, test, and debug code, making them suitable for more complex app development projects.
Frameworks and libraries can accelerate development by providing reusable code and components. Popular frameworks include React Native for building cross-platform mobile apps, Flutter for creating natively compiled applications, and Angular for web applications. These tools offer efficiency and consistency across different projects and platforms.
Managing the backend of your app involves handling databases, authentication, server hosting, and more. To simplify this, you can use Backend as a Service (BaaS) providers like Firebase or AppMaster. Such platforms handle server management, user authentication, database operations, and real-time data sync, allowing you to focus on building front-end features and user experiences.
Design is a crucial aspect of app development. Tools like Figma, Sketch, and Adobe XD enable you to create interactive prototypes and design user interfaces. These tools help you visualize the app's look and feel before actual development begins, ensuring a well-thought-out user experience.
Quality assurance is vital for a successful app. Tools for testing and debugging include JUnit for Java applications, XCTest for iOS apps, and Selenium for web app testing. These tools help you identify and fix bugs, ensuring your app runs smoothly across various environments and devices.
If you're working with a team, collaboration and project management tools like Jira, Trello, and Slack can help keep everyone on the same page. These platforms facilitate communication, task assignment, and progress tracking, ensuring a coherent development process.
In conclusion, choosing the right development tools is a critical step in the app creation process. Whether you opt for a no-code platform like AppMaster, an IDE, or various frameworks and libraries, the key is to select tools that align with your project's needs and your skill level. With the right tools in hand, you'll be well-equipped to bring your app idea to life efficiently and effectively.
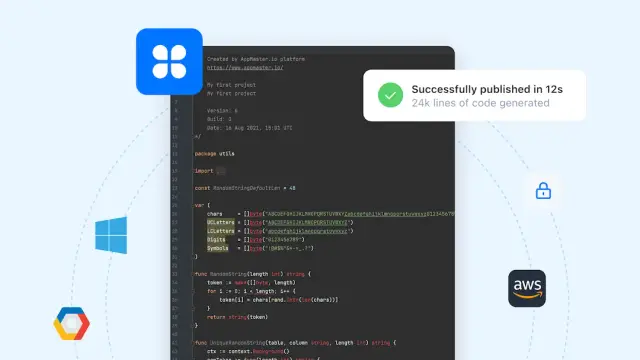
Choosing the right development platform is critical to your app's success. For beginners, no-code platforms like AppMaster are ideal because they provide a user-friendly interface and eliminate the need to write code. AppMaster stands out by automatically generating the source code, compiling the applications, running tests, and even deploying them to the cloud, making it a comprehensive solution for building web, mobile, and backend applications.
Once you've selected your platform, the next step is to set up your project. In AppMaster, you can start by defining your project's name and choosing the type of application you want to build—be it a mobile app, web app, or a backend service. With a simple interface, setting up your project in AppMaster takes just a few minutes.
A critical part of any app is its database. In AppMaster, you can visually create and manage data models using the Data Model Designer. This feature allows you to define the database schema, set up relationships between different data entities, and specify data types with ease.
Business logic drives the core functionality of your app. AppMaster provides a visual Business Process (BP) Designer, where you can graphically create business workflows without writing code. You can drag and drop pre-built components to define how your app should respond to various actions and conditions.
Creating an engaging and user-friendly interface is crucial for the app's success. AppMaster offers a drag-and-drop UI designer, allowing you to effortlessly design web and mobile interfaces. Each component of the UI can have its business logic, and you can preview your design in real-time to ensure it meets user expectations.
Many applications require robust backend services for data processing and storage. With AppMaster, you can create backend applications in Go (Golang) and define REST API and WebSocket endpoints. These services are essential for handling HTTP requests, performing CRUD operations, and integrating third-party services.
Before launching, it's crucial to thoroughly test your app to ensure it functions correctly. AppMaster generates complete sets of applications and runs tests to identify any issues. You can also create your own test cases to validate the app's behavior under various conditions.
After testing, you're ready to publish and deploy your app. AppMaster offers a seamless deployment process, enabling you to push your app to the cloud or export the project for on-premises hosting. Whether you're targeting iOS, Android, or web platforms, you can achieve a smooth deployment with just a few clicks.
Using platforms like AppMaster significantly simplifies the app-building process, making it accessible to both beginners and seasoned developers. By following these structured steps, you can efficiently bring your app idea to life.
Once you've built your app, the next crucial step is testing and debugging. This ensures your application functions correctly, is user-friendly, and is ready for deployment. This phase involves various types of testing and debugging strategies to identify any issues and rectify them before your app reaches users.
To ensure comprehensive coverage, utilize the following testing types:
1. Unit Testing:
Unit testing involves testing individual components or functionalities of your application independently. This ensures that each part of your app works correctly in isolation.
2. Integration Testing:
Integration testing is performed to verify that different components or systems work together correctly. It aims to identify issues when these components interact.
3. Functional Testing:
This tests the app against the functional requirements/specifications. It ensures that every feature works as expected.
4. Usability Testing:
Usability testing focuses on the user experience and interface. It involves real users testing the app to provide feedback on its ease of use and overall experience.
5. Performance Testing:
Performance testing evaluates how the app performs under different conditions, including load testing and stress testing. This is critical for apps expected to handle numerous users simultaneously.
6. Security Testing:
Security is paramount. This testing ensures your app is secure from vulnerabilities and threats, protecting user data and privacy.
Effective debugging is essential for fixing the issues identified during testing. Here’s how you can approach it:
1. Log Analysis:
Check the logs generated by your app to identify errors and trace the root cause. Logs provide detailed insights into the app’s processes and help pinpoint where things went wrong.
2. Breakpoints:
Use breakpoints in your development environment to pause the execution of your app. This allows you to inspect the state of your application at specific points and identify where the logic goes awry.
3. Step-by-Step Execution:
Walk through the code step by step to examine the flow of execution and the state of variables. It helps in understanding how data is processed and where discrepancies occur.
4. Automated Testing Tools:
Leverage automated testing tools to run repetitive tests efficiently. Tools like Selenium for web applications or Appium for mobile apps can save time and improve accuracy.
5. Error Reporting:
Implement a systematic error-reporting mechanism within your app to catch unexpected issues in real-time. User feedback often indicates unforeseen bugs and performance issues.
With no-code platforms like AppMaster, testing and debugging become significantly more manageable. These platforms often have built-in testing tools and features that simplify the process:
Once you complete testing and debugging, your app is ready for the final stage: deployment. A thoroughly tested app ensures a positive user experience, fewer post-launch issues, and successful adoption.
Deploying your app is the final step before it goes live to your users. Here's a concise guide to ensure a smooth deployment process:
Post-deployment, maintaining your app is crucial to ensure its continued success and user satisfaction. Here's how to handle ongoing maintenance:
Your app's success begins with a clear vision. Define the primary purpose of your app, the problems it will solve, and the target audience. This clarity will guide your development process, ensuring you stay focused and aligned with your goals.
A Minimum Viable Product (MVP) includes only the essential features of your app. By launching an MVP, you can test your concept with real users, gather feedback, and make necessary improvements before committing to a full-scale development. This approach minimizes risks and helps you prioritize the most important features.
A seamless and intuitive user experience is key to retaining users. Spend time on UI/UX design to ensure that your app is easy to navigate, visually appealing, and provides a rewarding experience. User interface design tools and wireframing can help map out your app's layout and flow before development.
No-code platforms like AppMaster enable you to build functional apps without writing a single line of code. These platforms offer visual interfaces, drag-and-drop features, and pre-built templates, which simplify the development process and significantly reduce time to market. Such tools are ideal for beginners and small businesses looking to create impactful solutions quickly.
Testing is a critical part of the app development process. Test your app across multiple devices and platforms to identify and fix any bugs or issues. Use beta testing to gather user feedback and make iterative improvements. Continuous testing ensures that your app is reliable and provides a smooth experience for users.
The tech industry is ever-evolving, so staying updated with the latest trends and technologies is crucial. Attend workshops, webinars, and industry events, and join relevant online communities. Staying informed helps you implement current best practices and innovations in your app.
Develop an app store optimization (ASO) strategy to increase the visibility and discoverability of your app. Use relevant keywords in your app title and description, create eye-catching icons and screenshots, and encourage positive reviews and ratings. A well-optimized app is more likely to attract and retain users.
App security should be a top priority, especially if your app handles sensitive user data. Ensure that your app complies with data protection regulations and employs robust security measures such as encryption and secure authentication. Regularly update your app to address security vulnerabilities and protect user data.
User feedback is invaluable for continuous improvement. Encourage users to provide feedback and reviews, and actively listen to their suggestions and concerns. Use analytics tools to track user behavior and identify areas for enhancement. Adapting to user needs helps maintain a loyal user base and improves overall satisfaction.
Even the best app needs a solid marketing strategy to succeed. Utilize social media, content marketing, partnerships, and press releases to promote your app. Identify influencer collaborations and leverage online communities to reach a wider audience. A comprehensive marketing plan increases your app's visibility and user engagement.
Engaging with the developer community can be incredibly beneficial. Join forums, attend meetups, and participate in online discussions to share your experiences and learn from others. Networking with fellow developers can provide new insights, solutions to challenges, and opportunities for collaboration.
Creating your own app can be a rewarding endeavor with the right approach and tools. Platforms like AppMaster make it possible for even beginners to bring their app ideas to life swiftly and efficiently. By following these tips, staying focused, and continuously iterating based on user feedback, you can build a successful app that stands out in the competitive market.
You need a basic understanding of design principles, problem-solving skills, and some technical proficiency. However, with no-code platforms like AppMaster, you can build apps without deep technical knowledge.
No-code platforms, such as AppMaster, allow users to create applications using a graphical interface rather than writing traditional code. This makes app development more accessible to non-technical users.
The time required to build an app varies depending on the complexity and features of the application. Simple apps can be built in a few days, while more complex apps may take several months.
There are free tools and platforms available for building apps, but for more advanced features or storage, you might need to invest in a paid subscription. Platforms like AppMaster offer various pricing plans to suit different needs.
Consider factors such as your technical skills, budget, project complexity, and the platform's features and support. No-code platforms like AppMaster provide an excellent starting point for beginners.
Yes, you can make an app without coding by using no-code platforms such as AppMaster. These tools allow you to create apps through visual interfaces and drag-and-drop features.
An MVP is the initial version of an app that includes only core features. It allows you to test your app idea with real users and gather feedback for further development.
You can test your app using emulators or real devices to check for functionality, usability, and bugs. Platforms like AppMaster often provide built-in testing tools.
Common challenges include unclear project requirements, design issues, technical hurdles, and user feedback. Using a structured approach and leveraging platforms like AppMaster can help mitigate these challenges.
Marketing strategies for your app include creating a social media presence, using app store optimization (ASO), engaging with your target audience, and utilizing paid advertising. Obtaining user feedback and continuously improving your app also helps.
Experiment with AppMaster with free plan.
When you will be ready you can choose the proper subscription.


