


 Jul 14, 2026
 8 min
8 minEquipment reservation app: prevent conflicts and track returns
Plan an equipment reservation app that prevents double bookings, records returns and damage, and places faulty items on maintenance hold.

Build a lab sample chain of custody workflow that records collection, every handoff, condition checks, timestamps, and final results.
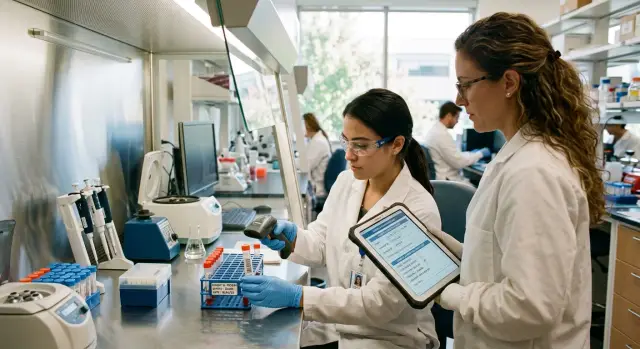
A lab result only carries weight when staff can show what happened to the sample before testing. One missing handoff can leave basic questions unanswered: who had the sample, when did they receive it, and was it still suitable for analysis?
Paper notes, inbox messages, and verbal updates often split that story across several places. A field worker may record the collection time on a form, a courier may sign a separate log, and the lab may enter the sample only after receiving it. When a complaint, audit, or unexpected result arises, staff must reconstruct the record afterward.
A lab sample chain of custody records every transfer as an event. It creates a continuous history from collection through result release.
A sample status is a short label such as "collected," "in transit," "received," "testing," or "reported." It helps staff see where work sits, but it does not explain who changed the status, why they changed it, or whether the sample met the required conditions.
A custody event records the details behind a status change. When a courier gives a water sample to a lab technician, the record should identify the sender and recipient, record the date and time, note the location when needed, and document the sample condition. The technician can confirm that the seal was intact and the cooler temperature fell within the accepted range.
This distinction matters during a review. "Received" says the lab has the sample. A handoff event says that Jordan Lee accepted sample W-104 at 10:18 on June 4, checked the seal, and placed it in refrigerated storage.
Teams need one consistent record from collection through reporting. The exact fields depend on the lab and test type, but most workflows need a unique sample ID, collection date and time, collection location, and collector name. They also need a record of every transfer, including the sender, recipient, timestamp, and acceptance or rejection decision.
The record should capture condition checks such as container integrity, seal status, temperature, volume, and visible damage. It should also show storage location, test assignment, analyst, major processing steps, the final result, reviewer, release time, and later corrections.
Staff should record exceptions when they happen. If a courier arrives late or a container leaks, the record needs the actual condition, the person who noticed it, and the action they took. Changing a status or deleting an event hides information that a reviewer may need.
A single workflow gives everyone the same place to enter these details. For example, a no-code application built in AppMaster can require the recipient to complete a condition check before accepting a handoff. The workflow stores the timestamp and responsible person with the sample record instead of relying on later memory or scattered messages.
A lab sample chain of custody starts with a simple rule: create the record when the sample enters your care. Assign a unique sample ID at collection, not when the sample reaches the lab. A handwritten label can work for a small team, but it must match the digital record exactly. Duplicate IDs create confusion that no later note can fully resolve.
Use an ID format staff can read quickly, such as a collection date plus a short sequence number. Avoid personal names and sensitive case details in the ID itself. Put those details in protected fields in the sample record.
The first record should answer basic questions without forcing anyone to chase paper forms or call the collector. Capture the collector's name and contact details, collection date and exact time, location, sample type, linked project or test request, requested analysis, and any required turnaround date.
Collection details alone do not show whether the sample remained suitable for testing. Staff also need a clear starting condition. Record what the collector observed: intact, leaking, frozen, chilled, cloudy, dry, or damaged. Free-text notes help with unusual cases, but fixed choices for common conditions make records easier to search and compare.
Give the container and seal their own fields. Record the container type, quantity or volume, seal number when one exists, and whether the seal was intact at collection. A water sample, for example, may require a sterile 500 mL bottle, an intact tamper seal, and storage at 2-8 C. If the collector uses a different container or finds a broken seal, the record should show it immediately.
Storage instructions also need to be specific. "Keep cold" leaves room for error. "Store at 2-8 C, protect from light, deliver within 24 hours" gives the courier and lab receiver clear instructions.
A no-code app built in AppMaster can require these fields before staff save a collection record. It can also display different condition and storage fields by sample type, so field collectors do not work through irrelevant questions.
Do not make every field optional. Require the ID, collector, time, location, sample type, initial condition, container, and storage requirement. If someone lacks a required detail, let them select a defined exception reason and add a note. The lab can then review a visible gap before testing begins.
A chain-of-custody form works best when it follows the route a sample actually takes. Talk with the people who collect, receive, test, review, and report samples. Write down every stop in plain language before creating fields, screens, or rules.
Start with a small set of clear statuses. Many labs use a path such as collected, received, in testing, under review, and reported. Add a status only when it describes a real change in control or work. A status such as "waiting" causes confusion unless staff know who has the sample and why work paused.
The status tells staff where the sample is in the process. The custody record tells them who accepted responsibility at a specific time. Keep those as separate fields.
Create a new custody entry whenever responsibility changes hands or the sample moves somewhere that changes its control. A field technician who places a vial in a cooler records collection. A courier who accepts the cooler records receipt. A lab technician who removes the vial for analysis records the next handoff.
Use one practical rule: if someone could ask "who had it at 10:30?", the workflow needs an event that answers that question. Each event should capture the sample ID, date and time, responsible person, location or transfer point, and condition check.
Condition checks need structured fields. Staff should select values such as seal intact, container damaged, temperature acceptable, or temperature outside range. Comments can explain an exception, but they should not replace the check itself.
Notes and corrections are normal parts of lab work. A technician may add "label slightly wet" or correct a typo in a location name. Neither action should silently rewrite the original custody event.
Keep the original handoff entry and add a separate correction record with the editor, time, reason, and updated value. Attach notes to the relevant event without changing the sample status. This makes laboratory sample records easier to review during a quality check or customer question.
In AppMaster, teams can model samples, custody events, condition checks, and corrections as separate records. Visual business processes can require a complete handoff before a status moves forward. The result shows the full sample path instead of only the latest update.
Build the lab sample chain of custody around one permanent sample ID. Assign it at collection and use it on the label, collection record, handoff log, test record, and final result. A barcode or QR code reduces typing errors, but staff should still see the ID on screen before saving an event.
Start with a collection form. Require the fields that establish where the sample came from and who collected it: collection date and time, collector name, location or source, sample type, container ID, and condition at collection. Add notes for facts such as a damaged seal or a temperature reading outside the normal range.
Do not overwrite the collector's details when a sample changes hands. Create a handoff record every time someone transfers or receives it. Each record should show both people, the date and time, transfer location, and sample ID.
The receiving person should confirm the sample condition before accepting it. Give them clear choices such as seal intact, container damaged, label unreadable, temperature checked, or quantity insufficient. If they select a problem, require a short explanation and alert the person responsible for review.
A practical handoff record includes the sample ID and current status, the person releasing the sample, the person accepting it, the date, time, and place of transfer, plus the condition check and notes. Add a supporting photo only if your lab uses one.
Store every event under the same sample ID, not in separate spreadsheets or email threads. Staff can then see a time-ordered history that answers an audit question: who had this sample at each point?
When testing ends, the analyst records the result, method, completion time, and result notes. A reviewer or authorized staff member then releases the result and records their name and release time. Keep result release separate from the test entry so the record shows who produced the result and who approved it.
AppMaster lets teams create these forms and status rules without code. A business process can prevent a handoff or result release when required fields are missing. For example, it can block acceptance until the receiver records the seal condition. That rule closes a common custody gap before it reaches the final report.
A custody record only helps when a reviewer can answer five questions without chasing emails or paper forms: who sent the sample, who received it, when the transfer happened, where it happened, and why it moved. Put these fields on every handoff form and require staff to complete them before confirming the transfer.
Use names from staff accounts instead of free text where possible. This avoids entries such as "J. Smith" in one record and "John" in another. For locations, offer a short approved list, such as collection site, receiving bench, cold storage, or testing area.
A transfer reason prevents vague history. Staff might select "routine delivery," "moved to storage," "assigned for testing," or "sent for repeat analysis." Match the choices to the lab's actual work rather than giving staff a long generic list.
The receiving person should record the sample's condition before accepting responsibility. A simple checklist keeps reviews consistent across shifts. Include seal condition, temperature range, container damage, sample volume, and label readability.
If someone finds an issue, require a note. "Damaged" does not tell the next person whether the container leaked, cracked, or arrived without a lid. A useful note states what staff saw, what they did, and who they told. For example: "Seal partly lifted on arrival. Container had no leak. Receiver placed it in 4 C storage and informed the lab supervisor."
A photo can help when lab policy allows it, especially for broken packaging or an unclear label. Attach it to the same sample record so staff do not need to search a separate folder.
Once sender and receiver confirm a transfer, lock the original handoff details. Staff can correct a later entry with a new correction record, but they should not overwrite the first timestamp, condition result, or responsible people.
A correction record should keep the original entry visible, show the corrected information, identify the person making the correction, and require a reason. If a technician entered the wrong storage location, the record should say so instead of quietly replacing "cold storage" with "testing area."
An AppMaster form can collect the handoff fields, while a business process can require both confirmations before changing the sample status. The same process can create an exception task for a supervisor when a receiver reports damage, a temperature problem, or low volume.
A field collector takes a water sample from River Site 14 at 09:12. Using a phone or tablet, they create a record, scan the bottle barcode, and enter the collection time, location, sample type, and their name. They also record the bottle's seal number and add a photo of the sealed container.
At 09:25, the collector places the bottle in a cooled transport box. They record the box ID, temperature, and expected arrival time. The custody record now shows who had the sample, where it was stored, and its condition before transport began.
The courier receives the box at 10:05. Both people confirm the transfer in the workflow. The record adds a timestamp and lists the courier as the responsible person. A paper signature can work, but a digital confirmation is easier to find later.
A lab technician receives the sample at 11:18. During intake, they scan the barcode and compare the seal number with the collection record. The technician sees a small tear in the outer seal.
They record the condition check, add a photo, and select "damaged seal" as the exception. The workflow sends the record to a reviewer and prevents the technician from assigning the sample to testing.
The record includes the intake time and technician's name, observed damage and photo, temperature on arrival, and the reviewer assigned to the exception.
The reviewer checks the collection photo, transport details, and intake note. They contact the collector, who confirms that the bottle cap stayed closed and that the tear affected only the outer tamper seal. The reviewer records the explanation, decides the sample remains suitable for analysis, and closes the exception at 12:02.
Only then does the workflow release the sample to an analyst. At 12:15, the analyst accepts the handoff, performs the approved test, and enters the measurement. The system keeps the original observation, exception, review decision, and result together.
A supervisor reviews the completed record at 14:40. They check that every transfer has a person, time, and condition entry, then approve the final result. The workflow marks the result as released only after approval. If the reviewer had rejected the damaged seal, the record would show the reason and block release.
A no-code application built in AppMaster can guide staff through these checks in one process, reducing reliance on memory and separate spreadsheets.
Most breaks in a lab sample chain of custody begin with a small shortcut. A technician types an ID from memory, changes a condition note in place, or enters a result before testing closes. Later, the record may look complete but fail to show exactly what happened.
Free-form sample IDs cause trouble quickly. "Water-14," "water 14," and "WTR14" may all refer to one container, yet a system can treat them as separate samples. Generate each ID, use barcode or QR scanning when possible, and reject entries that do not match the expected format. Staff should search for an existing record before creating a new one.
Condition checks need their own history. If a courier records that a cooler arrived at 5 C and a lab receiver later finds a cracked lid, both observations belong in the laboratory sample records. Do not replace the first note with the second. Save the time, person, condition, and any photo or comment for every check.
A handoff also needs two distinct confirmations. The person releasing the sample and the person accepting it should each confirm the transfer, with a timestamp and location. One person may handle both steps when moving samples into a locked refrigerator after hours. Allow that exception, but require a reason and flag it for supervisor review.
Result entry needs a firm gate. A technician may know the likely outcome before all checks finish, but the workflow should block final release until testing is complete. It should also confirm that the sample ID, method, analyst, and required condition checks are present. Draft notes can exist during testing. A released result needs a complete trail.
Use simple rules at the point of entry: reject invalid or duplicate sample IDs, add new condition checks instead of editing old ones, require sender and receiver confirmation for transfers, and block result release while testing remains open.
These controls make sample handoff tracking less dependent on memory. A reviewer can follow the sample from collection to result without reconstructing events from emails or paper notes.
A final result should not leave the lab until the record tells one complete, readable story. Start with the sample ID. It must match the collection record, container label, transfer log, test record, and result. The current status should also make sense, such as "testing complete" or "ready for review."
Review the custody log in order, from collection to analysis. Every transfer needs the name of the sender, the receiver, and a timestamp. A handoff recorded only as "received by lab" leaves too much room for doubt.
Before release, confirm that one sample ID appears across every laboratory sample record. Check that each handoff identifies both sender and receiver, then look for blank, duplicate, or out-of-order timestamps. Review temperature, seal condition, container damage, and storage location. Read every exception note and confirm that the team resolved or approved each issue.
A missing condition field deserves attention even when the result looks normal. If a technician records that a cooler arrived at 12 C and the method requires a lower range, the reviewer needs that information before deciding whether to release, qualify, repeat, or reject the result.
The person approving a result should compare the test record with the entire lab sample chain of custody, not only the final instrument output. Confirm that the analyst worked on the correct sample, testing started after lab receipt, and storage and preparation steps fit the method.
Clear status changes help reviewers find gaps. A sample may move through collected, in transit, received, stored, prepared, tested, reviewed, and released. If it jumps from "in transit" to "tested," someone should explain the missing receipt or storage step.
Laboratory workflow automation can reduce repetitive review work. A workflow can block result release when a transfer lacks a receiver, a required timestamp is blank, or an exception has no decision. AppMaster supports this type of no-code workflow with handoff forms, status rules, and a review screen that shows the sample history in one place.
Keep the final approval record with the result. Record who approved it, when they approved it, and any qualification attached to it. That final entry closes the custody history.
A lab sample chain of custody works best when the first version is narrow. Choose one sample type, such as water samples collected by a field team, and one group of regular users. Do not try to replace every paper log and lab system on the first day.
Ask collectors, receivers, analysts, and approvers to define the fields they need. Keep the list practical: sample ID, collection time, collector, current location, person accepting each handoff, condition on arrival, and final result status. Agree on exception rules before the pilot starts.
For example, a receiver may record a broken seal, missing label, or temperature outside the accepted range. The workflow should require a reason, a photo or note if your lab uses one, and a supervisor decision. A blank condition field should never move a sample forward.
AppMaster can turn this process into an application without writing code. Use the Data Designer to create records for samples, handoffs, condition checks, and staff members. Build web or mobile forms for collection and receiving, then use the Business Process Editor to control what happens after staff submit each form.
Set access around real duties. A collector can create a sample and record collection details. A receiving technician can accept or flag it. An analyst can enter test status and results. Only an authorized reviewer should release the final result. Earlier entries should remain visible instead of being overwritten by later users.
Before staff use active samples, run realistic tests with clearly marked practice records. Test a damaged container, an incorrect sample ID, a handoff after the expected holding time, an unavailable receiver, and a rejected result sent back for correction.
Review each test record. Confirm that the application captures the timestamp, responsible person, condition, exception note, and decision at every point. Also confirm that staff can find the complete history quickly by searching for a sample ID.
Keep the pilot short enough for the team to discuss problems while details remain fresh. Fix unclear field labels, missing choices, and approval steps that slow routine work. Once staff can complete ordinary handoffs without side notes or separate spreadsheets, add the next sample type or team.
 When should I assign a sample ID?
Create a unique sample ID at collection, then use it on the label, collection form, every transfer, test record, and final result. Generate IDs in one format and scan a barcode or QR code when practical to reduce duplicate entries.
What is the difference between a status and a custody event?A status tells staff where the sample sits in the process, such as received or testing. A custody event records who transferred or accepted it, when and where the handoff happened, and what condition the receiver observed.
What should every sample handoff record include?Record the sender, receiver, date and time, transfer location, reason for the move, and sample condition. The receiver should also confirm seal condition, temperature, container integrity, volume, and label readability before accepting responsibility.
How should we record a damaged seal or temperature issue?Create a new condition check for each observation. Keep the earlier check visible, then add the new time, person, finding, and note or photo. This shows whether the sample changed during transport or storage.
What happens if a sample arrives in poor condition?Let the receiver flag the exception, describe what they found, and send it to an authorized reviewer. The workflow should stop testing or release until that reviewer records a decision, such as accept with a qualification, repeat, or reject.
Can staff correct a custody record after confirming it?Lock the confirmed handoff and add a separate correction record. That record should show the original value, corrected value, editor, time, and reason. Do not quietly replace timestamps, names, or condition results.
Do both people need to confirm a handoff?Each person should confirm their own part of the transfer. The sender confirms release and the receiver confirms acceptance. If one person moves a sample after hours, require an exception reason and send the event for review.
Who should release the final lab result?Keep result entry and result release as separate steps. The analyst records the method, result, and completion time. An authorized reviewer checks the custody history, exceptions, and test details before recording approval and release time.
Which fields should be required at collection?At minimum, require the sample ID, collector, collection time, location, sample type, initial condition, container details, and storage instructions. If staff do not know a required detail, they should choose an exception reason and explain the gap.
Can I build a chain-of-custody workflow without code?Yes. In AppMaster, teams can create records for samples, handoffs, condition checks, corrections, and results. Forms can require condition checks, while business processes can prevent status changes or result release when required information or an exception decision is missing.
Experiment with AppMaster with free plan.
When you will be ready you can choose the proper subscription.
 Jul 14, 20268 min
 Jul 13, 20268 min
 Jul 08, 20268 min