


 Jul 14, 2026
 8 min
8 minEquipment reservation app: prevent conflicts and track returns
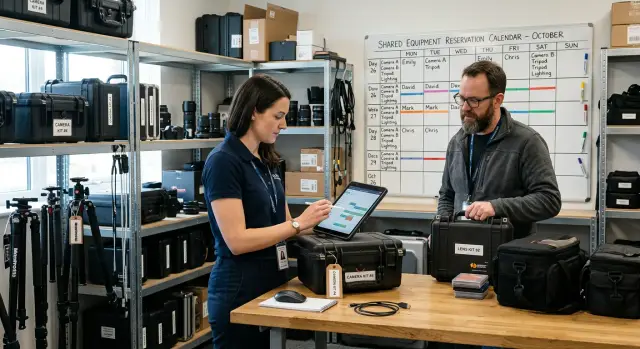
Plan an equipment reservation app that prevents double bookings, records returns and damage, and places faulty items on maintenance hold.

Learn how to plan a custom order management app that tracks requests, line items, production work, and delivery updates in one clear workflow.

Custom work rarely starts in one place. A customer may send measurements by email, confirm a color in a chat, then call to change the delivery date. One person copies details into a spreadsheet while another keeps notes in a shared inbox.
That approach works for a handful of orders. It starts to fail when several jobs run at once. Two people may reply to the same request, or nobody may notice it. Sales might quote an old specification because the latest change is buried in a message thread. Production then receives incomplete instructions.
Small omissions become expensive. A request for 24 engraved signs needs the material, dimensions, finish, artwork file, quantity, deadline, shipping address, and approval status. If the record says only "24 custom signs," staff must chase the details later. The quote can be wrong, production can stop, and the customer may receive repeated questions.
Spreadsheets also make status difficult to trust. One tab may show an order as ready while a packing note says it still needs inspection. Courier details may sit with the person who booked the shipment. When a customer asks for an update, staff search files and conversations instead of opening one record.
A custom order management app gives each job a shared record from the first request through quoting, approval, production, packing, and delivery. It should hold customer details, item requirements, notes, files, prices, due dates, and the current status.
Sales can then confirm what the customer approved. Production can work from complete item details. Support can give an update without asking around the office. The app should also show who needs to act next and which information is still missing.
For a small team, this can replace a patchwork of inbox labels and spreadsheet columns. For a larger team, it makes handoffs clearer. When someone opens an order, they should see what the customer requested, what the team promised, and what remains before delivery.
Build the app around the work people already do. Start by listing the jobs involved: receiving the request, confirming price and timing, making the item, packing it, and arranging delivery. In a small business, one person may handle several of these jobs. Record the job itself, not only the person's title.
Sketch the order path on paper before creating fields or screens. Include every handoff. For example, sales enters a request for 40 engraved mugs, a manager approves the artwork and quote, production engraves the mugs, packing checks the count, and delivery sends tracking details to the customer.
Choose a short set of stages that match real decisions. Avoid broad labels such as "In progress" when the team needs to know whether it can start work, must wait for approval, or needs to book a courier.
A practical custom order workflow could use these statuses:
Keep cancelled and on-hold orders separate. A paused job needs a reason, such as "waiting for material" or "customer changed artwork." Staff can act on that detail instead of asking for an explanation.
Every status change needs a named owner. Sales should not move an order to ready for production until someone approves the quote. Production should not mark an order packed. Clear boundaries stop orders from sitting in a shared queue because everyone assumes somebody else will move them.
Set one rule for each stage: who can move an order into it, what information they must provide, and who receives the next task. For delivery, the owner might add the carrier, tracking number, dispatch date, and proof of delivery.
AppMaster lets teams model these rules in a visual Business Process. Start with the normal path, then add exceptions after the team has used the app on real orders.
Each custom order needs one record that gives the team a shared view of the job. Include the customer name, company name where relevant, phone number, email, request date, and required delivery date.
Add an order number that people can search for and use in messages. Let the app generate it, such as CO-1042, rather than asking staff to create one. Duplicate or unclear numbers waste time when someone needs to find the right job.
Keep the first screen focused. Anyone opening an order should quickly see who requested it, what they need, when they need it, and its current status.
For many teams, these stages are enough:
Give each status one clear meaning. Move an order to Approved only after the customer accepts the quote, not when a salesperson expects approval. This keeps production order tracking accurate.
Use a general notes field for context that does not belong to a line item. Notes might say "Customer will collect after 3 pm" or "Match the sample supplied on 12 May." Keep reference photos, signed approvals, specification sheets, and artwork files with the order rather than in an email thread.
Use two message areas. Internal notes can cover supplier issues, estimated labour time, pricing concerns, or reminders to call before dispatch. Customers should never see this area.
Customer-facing updates should contain only information you are prepared to send, such as "Your order is in production" or "Your order is ready for collection." In AppMaster, you can place these fields in one visual order form and control who can view or edit them.
A bakery receiving a request for 80 branded cupcakes could store the event contact, delivery date, logo attachment, agreed price, and status in one order record. Production has a reliable starting point before adding flavours, quantities, and individual tasks.
A custom order can look simple in the first message: two engraved mugs, a printed card, and delivery next Friday. Yet each part may have its own price, materials, approval needs, and production work. Put every product or service on its own line item.
The main order holds customer details, the requested delivery date, and the overall status. Line items hold the item-specific details. This keeps the app readable even when a request includes several products.
Create fields that match the decisions your team makes during fulfilment. A print shop may need card size, paper stock, artwork, quantity, unit price, and foil colour. A catering business may need servings, menu choices, dietary requirements, and setup instructions.
Most custom line items need:
Keep instructions with the relevant item. "Engrave Sarah's name on the blue mug" belongs on the mug line item, where the production and packing teams can find it quickly.
The app should multiply quantity by unit price for each line item, then add the subtotals to calculate the order total. Manual totals lead to errors when customers change quantities or replace an item.
For example, 20 invitation cards at $3 each plus two signs at $18 each totals $96. If the customer increases the card quantity to 30, the total becomes $126 immediately.
Let staff add or remove items while the order remains editable. If several people handle orders, record who made each change and when. Where an audit trail matters, keep a reason for removed items, such as "customer cancelled."
In AppMaster, a line item data model can link many items to one order. Staff can add items, update quantities, and review calculated totals on a simple order screen before production begins.
An approved order needs more than one "In production" label. Break the work into tasks that match how the team makes the item. Each task should connect to its order and, where needed, to a specific line item.
For a made-to-order sign, tasks might include confirming artwork, cutting material, printing, quality checking, and packing. A team member should be able to open a task and see the item details, promised date, customer notes, and files without searching messages.
Set up a task template for common product types. When staff approve an order, the app creates the required tasks. This removes repeated data entry and makes the work visible from the start.
Each task needs an owner or team, a due date, and a simple status:
Use "Waiting" when a task cannot move forward. Staff should select a blocker, such as missing approval, late materials, or a machine issue, then add a brief note. The order owner can spot the delay early and contact the customer before the promised date is at risk.
Set deadlines from the delivery date rather than guesswork. If packing must finish one day before collection and printing takes two days, the task dates should reflect that order. Account for weekends, supplier lead times, and quality checks.
Production staff rarely need the full order history. Their screen should show the next assigned task, deadline, order reference, and the details required to begin.
A printer may need only the approved file, material, quantity, finish, and print notes. Managers still need the full view, including completed tasks, blockers, and order history.
When someone completes a task, record who did it and when. A note such as "Artwork checked against proof" gives the next person more context than a status change alone.
AppMaster can link tasks to orders and line items, then use Business Processes to create tasks, assign work, and update the order when production finishes.
A customer requests 50 branded tote bags in two print colours: 30 navy bags with a white logo and 20 natural bags with a black logo. Sales creates a new request under the customer's name and adds the due date, contact details, artwork files, and delivery address.
The order has two line items rather than one note that says "50 tote bags." The first records 30 navy bags with white print and the agreed unit price. The second records 20 natural bags with black print, including its own price and notes. The workshop needs separate instructions for each combination.
The app totals the items, adds shipping and any setup fee, then creates a quote. Sales records the customer's approval and changes the order to Approved. The app can lock quoted quantities so staff do not begin work on the wrong version.
Production sees the approved order in its work queue. A team member checks the artwork and confirms the logo size and colours. The order then moves to printing.
A clear sequence might be:
During quality checking, a team member counts both batches and checks print placement. If five navy bags need reprinting, they add the note to the navy line item rather than the full order. Packing then sees the final quantity, box count, and delivery address in the same record.
After dispatch, the shipping owner changes the status to Dispatched, adds the carrier and tracking reference, and records the dispatch date. The customer receives an update that the 50 tote bags have shipped, including the tracking reference.
Sales can answer a customer call without asking the workshop for an update, while production can see approved details without searching old email threads. AppMaster supports visual data design, business processes for status changes, and separate screens for sales, production, and dispatch.
Delays often start with a workflow that leaves too much open to interpretation. The app should show what needs attention, who owns it, and what must happen before the work moves forward.
Avoid using "pending" or "in progress" for most of the order lifecycle. Those labels force staff to read notes or ask a colleague what is happening. They also make a delayed approval look the same as an item that someone is actively making.
A furniture maker should not start cutting material when a customer has only requested a quote. The order should remain at "Quote sent" until the customer accepts and the team records approval. This protects production time and avoids disputes over unapproved changes.
Free-text notes create another problem. "Three blue shirts, medium and large, add logo" does not give production reliable item data. Staff cannot quickly see the quantity for each size, logo position, or item deadline. Use line items with fields for quantity, options, price, production notes, and work status.
Teams often track delivery in a separate spreadsheet. Someone marks an order as shipped there but forgets to update the order workflow. Support sees an old status and gives the customer the wrong answer.
Store the carrier, tracking number, dispatch date, delivery address, and delivery status in the order app. When staff update a shipment, the customer-facing record should update too. Managers can then find orders that have missed their expected delivery date.
Permissions need the same care. A production worker may need to complete a task but should not edit the order price, payment state, or delivery address. Give each role access only to the fields it handles.
A 15-minute test with a realistic order can expose gaps that seem minor on screen but cause missed work later. Use an order with several items, a customer note, two production stages, and a delivery date. Ask someone who did not build the app to complete the test.
Check the record at every handoff. Sales, production, and delivery staff should each see what they need without looking elsewhere.
Test an ordinary change. A customer may increase an order from 20 printed shirts to 24 after production begins. The order owner should see the change, the line total should update, and production should see the new quantity. If staff must message one another to discover it, adjust the workflow.
Also test incomplete orders. Try saving one without a customer, delivery date, or line-item quantity. The app should stop the user or clearly show the missing information. Accepting incomplete records creates cleanup work later.
Start with an order type your team handles often, such as a made-to-order sign, printed shirt bundle, or furniture request. Do not try to cover every product on day one. Focus on the information staff need to accept, make, and deliver that order.
Ask the people who take requests, do the work, and arrange delivery to test it with realistic sample orders. Watch where they pause. If a production worker cannot tell what to do next, improve the screen or status before adding more fields.
Include orders that cover normal and awkward cases: a complete order with several line items, a request awaiting customer approval, an order delayed by material supply, a completed order ready for delivery, and an order the customer changes or cancels.
Fix the manual workflow first. Staff should be able to create an order, assign work, record progress, and send a delivery update without relying on chat notes or a separate spreadsheet. Then add automation carefully, starting with alerts for events such as an order waiting for approval or becoming ready for delivery.
AppMaster is a no-code platform for building this type of application. Use its Data Designer for customers, orders, line items, and production tasks, then set the rules in the Business Process Editor and create separate screens for sales, production, and customers. It can also send updates through email, SMS, or Telegram when your process requires them.
Expand after the first order type works with real users. Add another product category, production team, or customer portal one piece at a time, while keeping the order record as the shared source for the request, current work, and delivery status.
 What should a custom order management app track?
Use one shared order record from the first enquiry through delivery. Store customer details, specifications, files, prices, deadlines, approvals, tasks, and shipping details there so staff do not need to search emails and spreadsheets.
Which order statuses should I use?Use stages that match actual decisions, such as New request, Waiting for approval, Ready for production, In production, Packed, and Delivered. Keep on-hold and cancelled orders separate, and require staff to record why a job is waiting.
Why do custom orders need line items?Put each product or service on its own line item. The main order holds shared details like the customer and delivery date, while each item records its quantity, options, artwork, price, and production instructions.
How do I stop orders from getting stuck between teams?Give every handoff a named owner. Define who can move an order into each status, what information they must add, and who receives the next task. This prevents orders from sitting in a queue without action.
How should I track production work?Create production tasks when the customer approves the order. Each task should show its owner, due date, status, linked order or line item, and the files or instructions needed to start work.
Can staff notes stay private from customers?Keep internal notes separate from customer-facing updates. Internal notes can include supplier issues or pricing concerns, while customer updates should only contain information your team is ready to share.
How can the app calculate custom order totals?Calculate each line item as quantity multiplied by unit price, then add the subtotals, shipping, and fees. When staff change a quantity or replace an item, the app should update the total immediately.
What delivery details should the app store?Store the carrier, tracking number, dispatch date, delivery address, and delivery status in the same order record. Support staff can then answer delivery questions from the app instead of checking a separate shipment sheet.
Should I build every order type at once?Start with one common order type, such as printed shirts or engraved signs. Build the intake form, line items, approvals, tasks, and delivery update for that flow first, then test it with real examples before adding more product types.
How can AppMaster help build a custom order app?AppMaster lets you create data models for customers, orders, line items, and tasks without writing code. Use its visual Business Process Editor to control approvals, assignments, status changes, and notifications, then build separate views for sales, production, and dispatch.
Experiment with AppMaster with free plan.
When you will be ready you can choose the proper subscription.
 Jul 14, 20268 min
 Jul 13, 20268 min
 Jul 08, 20268 min