


Equipment reservation app: prevent conflicts and track returns
Plan an equipment reservation app that prevents double bookings, records returns and damage, and places faulty items on maintenance hold.
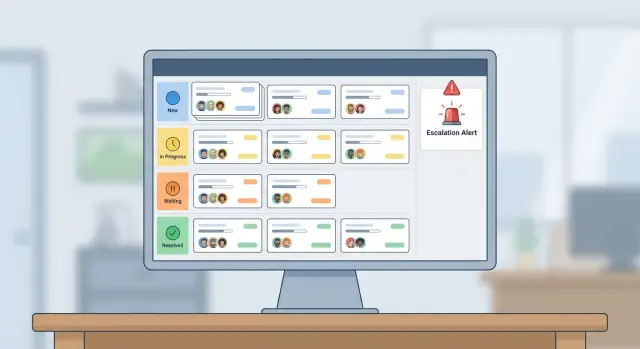
Build a ticket triage internal tool in a day with a clear data model, status workflow, SLAs, and escalation notifications using visual business logic.
When tickets arrive through email, chat, a web form, and quick pings in internal messengers, the same request shows up twice, or worse, not at all. People forward screenshots, copy notes into spreadsheets, and rely on memory to track who owns what. Urgent items get buried, and the loudest message wins.
Manual triage also breaks at handoffs. A request gets "assigned" in a chat thread, then the assignee goes offline and nobody knows the next step. Statuses mean different things to different people, so managers can’t trust dashboards and requesters wait longer than they should.
Late responses usually aren’t caused by bad intent. They happen when there’s no structure: clear ownership, clear deadlines, and a clear path for escalation.
A ticket triage internal tool fixes that by turning messy intake into a simple, visible flow. For a one-day build, the goal isn’t a full helpdesk with every feature. It’s a reliable backbone you can expand.
By the end of the day, aim for four things:
If you build this in a visual platform like AppMaster, you can map the workflow as business process logic instead of writing code, then adjust it as your team’s real habits show what needs changing.
A triage tool is only useful on day one if it does three things reliably: gets tickets into one place, assigns an owner, and makes overdue work obvious. Everything else can wait.
Start by picking one or two ticket sources. Email plus a simple web form is often enough for a first version. Chat can come later, because it adds noise (short messages, missing details) and usually needs extra rules to group and label requests.
Decide who touches a ticket and what "done" means for each group. Keep the team map small and clear. For example: Support handles intake and basic fixes, Ops owns access and account tasks, Engineering takes bugs and changes that need code. If a team can’t act on a ticket type, it shouldn’t be assignable to that team.
For a realistic one-day scope, commit to these outcomes: create and view tickets (title, requester, urgency, category), triage and assign (owner plus team, with a clear "unassigned" state), track an SLA clock (first response due and resolution due), escalate when overdue (notify the right channel or person), and close with a short outcome note.
This fits well in AppMaster: a simple data model, a basic internal dashboard, and visual business process logic for assignment and escalation notifications.
Skip metrics for now. Capture the raw data (timestamps, status changes, assignee history) without building reports. Later, add dashboards for trends like time to first response or top categories, but don’t let analytics delay the tool people need today.
A good gut check: if a new request arrives at 9:00 and nobody looks at it until 11:00, your first version should make that failure visible and hard to ignore.
A triage tool fails when nobody is clearly responsible. Start by naming the few roles you actually need, then make permissions match how support work really happens.
Most teams can cover almost everything with four roles:
Visibility is the next decision. Pick one model and stick to it, or people will stop trusting the tool.
A practical approach: requesters see their own tickets; agents see tickets in their team queue; team leads see all tickets for their department; admins see everything. If you need privacy, add a "restricted" flag that only leads and admins can open.
Accountability comes from a few tight rules, not a huge permission matrix. For example, only leads and admins can change ownership across teams; only the assignee (or lead) can move a ticket to Resolved; closing requires a resolution note and a category; reopening requires a reason.
Finally, require an audit trail. Every change that affects service should be recorded: status, assignee, priority, SLA tier, and any escalations. Store who did it, when, and what the old and new values were.
In AppMaster, you can enforce this with built-in auth plus a visual business process that writes an AuditEvent record whenever key fields change.
A quick test: if a lead asks, "Why was this ticket marked resolved at 6:12 pm?", your system should answer on one screen without guesswork.
A ticket triage internal tool lives or dies by its data model. If the tables are clean, the workflow and dashboard stay simple to build (and easy to change later).
Start with five building blocks in your database (for example, in AppMaster’s Data Designer with PostgreSQL):
A few fields prevent future pain. Add first_response_due_at and resolve_due_at (even if you calculate them). Store last_customer_message_at and last_agent_message_at so you can detect silence without complex queries.
Make statuses and priorities enums (or reference tables). It keeps reporting consistent and avoids "High", "HIGH", and "Urgent!!!" becoming three different priorities.
A triage tool breaks down when people can’t tell what a status means. Keep the set small and obvious. A simple baseline is: New, Triaged, In Progress, Waiting, Resolved, Closed. If your team argues about a seventh status, it’s usually a labeling problem, not a workflow problem.
Statuses work best when each one answers a single question:
Transitions are where clarity is won or lost. Write down what can move where, and who is allowed to do it. If you’re building in AppMaster, you can enforce these rules in visual business logic so the UI only shows valid next actions.
Practical rules that keep chaos out:
Decide what creates timestamps, because that powers reports and SLAs. First response time should lock when a human posts the first public reply. Resolved time should lock when status becomes Resolved. Closed time should lock when status becomes Closed. If a ticket is reopened, keep the original timestamps and add a separate reopened_at so you can see repeat issues without rewriting history.
An SLA is a promise with a timer. Keep it to the timers most teams actually use: first response (someone acknowledges), next response (the conversation keeps moving), and resolution (the issue is done).
Start by deciding how you pick the rule. A simple approach is by priority. If you also support different customer tiers, add one more switch: customer type. That gives you predictable SLA rules without a maze of exceptions.
Store SLA deadlines as timestamps, not only as durations. Save both if you want, but the deadline timestamp is what makes reporting and escalation reliable. For example, when a P1 ticket is created at 10:00, you calculate and store FirstResponseDueAt = 10:30, NextResponseDueAt = 12:00, ResolutionDueAt = 18:00.
Define what pauses the clock. Most teams pause next response and resolution when the ticket is in "Waiting on customer," but don’t pause first response.
Be explicit about what counts as meeting an SLA. Pick one event per timer and stick to it: an agent comment, a status change to In Progress, or an outbound message.
In AppMaster, you can model this in the Business Process Editor by triggering on ticket created, comment added, and status changed, then recalculating due timestamps and writing them back to the ticket.
A ticket triage internal tool works best when the path is predictable. Aim for one "happy path" that covers most tickets, and keep exceptions visible instead of hidden.
When a ticket is created (from a form, email import, or an internal request), set a few fields automatically so nothing starts half empty. Save the initial status (usually New), a default priority (like Normal), the requester, and timestamps like created_at and last_activity_at.
Capture the minimum needed to triage: short title, description, and a category or service area. If any of these are missing, flag the ticket as Incomplete so it doesn’t get assigned by mistake.
Triage is a quick quality check. Confirm required fields, set a category, and calculate SLA deadlines from simple rules (for example, priority + customer type = first response due). If you use AppMaster, this can be a visual business process that writes due_at fields and records a triage_event entry for audit.
Before moving on, do a fast "is this ours?" check. If not, route it to the right queue and add a short note so it doesn’t bounce back.
Assignment can be manual for day one, or rule-based (category -> team, then lowest open count). As soon as an assignee is set, keep the status as Triaged and send a clear notification so ownership is visible.
During work, allow status changes like In Progress or Waiting on Customer. Each public reply should update a next_response_due time, and each comment should update last_activity_at. This keeps SLA tracking and escalation reliable.
Resolution should require a short summary, a resolution code (fixed, won’t fix, duplicate), and resolved_at. Close can be automatic after a quiet period or manual after confirmation, but always store closed_at so reporting stays consistent.
Escalations fail for two reasons: they fire too often, or they don’t tell the recipient what to do next. The goal isn’t more alerts. It’s one clear nudge at the right time.
Start with triggers that are easy to explain and easy to test. Most teams only need a small set: SLA is at risk (for example, 75% of the window is gone), SLA is breached, no assignee after a short grace period (like 10-15 minutes), and a ticket stuck in Waiting longer than expected.
Route each trigger to the smallest set of people who can fix it. Notify the assignee first. If there’s no assignee, notify the team lead or the on-call rotation. Notify the requester only when you need input or when you change the promised resolution time.
A good escalation message includes ticket title, priority, current status, time left (or time overdue), and one next action. Example: "Ticket #1842 is 30 minutes from breach. Status: In Progress. Owner: unassigned. Next: assign an owner or downgrade priority with a note."
Use channels with intent. Email is fine for "at risk." SMS or Telegram is better for "breached" or "unassigned critical." In-app notifications work well for quiet nudges inside the dashboard.
To prevent spam, add simple throttle rules: one alert per stage, plus a cooldown (for example 60 minutes) before repeating. If the ticket changes status or owner, reset the escalation timer.
Log every notification so you can debug trust issues later. At minimum, store when it was sent and by which trigger, channel and recipient, and delivery result (sent, failed, bounced). If you can capture acknowledgement (clicked, replied, marked seen), keep that too.
In AppMaster, this maps cleanly to a Notification table plus a business process that checks timers, picks recipients (assignee, lead, on-call), and sends via email, SMS, or Telegram modules, while also writing an in-app record.
Run one tough scenario before you build screens. It quickly shows whether your statuses, deadlines, and notifications make sense in real life.
It’s 12:10 PM. A "Payment failed" ticket arrives from a key customer, marked urgent in the subject but not assigned. Your triage system should treat it as time-sensitive even if nobody is watching the dashboard during lunch.
First, triage sets Category = Billing and Priority = Urgent. The moment those fields are set, the system calculates the first-response deadline (for example, 15 minutes) and stores it on the ticket. That deadline should be visible on the list view, not buried.
Next, auto-assignment kicks in. It selects the on-call agent for Billing and sends a short notification: "Urgent billing ticket assigned. First response due 12:25." If you’re building this in AppMaster, this fits naturally as a visual business process: trigger on ticket creation (or priority change), then a few decision blocks.
If there’s still no public reply by 12:25, escalate. Keep escalation simple and consistent: notify the team lead, add an internal comment noting the missed first-response SLA, and set an escalation_level field (instead of inventing a new status that people will misuse).
At 12:40 the agent replies and marks the ticket Waiting on Customer. Your SLA should pause while you wait. When the customer replies at 2:05 PM, the SLA resumes from where it left off, not from zero. This one test catches most workflow mistakes.
With one day, build screens that reduce back-and-forth: one place to see the queue, one place to decide, and one place to work.
This is the home screen. It should answer, in 10 seconds, what needs attention right now.
Include filters that match how people actually triage: status, priority, SLA state (on track, at risk, breached), unassigned, and category.
Keep each row compact: title, requester, priority, current owner, SLA countdown, and last update time.
The detail page should feel like a single timeline. Put the key actions up top: assign, change status, add comment, set priority. Then show the full history (status changes, assignments, comments) in order.
Make SLA visible without being noisy. A simple countdown label and color is enough. Add a clear Escalate action for edge cases.
When someone creates a ticket, require the minimum fields: category, short summary, and impact. Add quick actions like Assign to me and Mark duplicate. If you can, show a suggested assignee based on category or workload.
Agents need My tickets, Due soon, and one-click status updates. Leads need Unassigned, At risk, and Breached, plus a way to rebalance assignments quickly.
Keep admin tight: manage categories and SLA rules (by category and priority), plus who is on the rotation. In AppMaster, these screens are quick to assemble with the UI builders, while the rules live in visual business process logic so you can change them without rewriting the app.
Most triage tools fail for simple reasons: the rules are fuzzy, and the UI encourages workarounds instead of clear decisions.
The first trap is status sprawl. Teams add a new status for every edge case ("Waiting for Vendor", "Waiting for Finance", "Blocked by Product"), and soon nobody agrees what each one means. Keep statuses few, and define what must be true to move forward (for example, In Progress means an assignee is set and the next action is known).
SLA timing is the second trap. A clock that never pauses punishes agents when they’re waiting on the requester. A clock that always pauses makes SLAs meaningless. Pick explicit pause rules you can explain in one sentence, and tie them to a small set of states (for example, pause only when you are waiting on the requester, resume on any requester reply).
Notifications often fail because they have no owner. When alerts go to everyone, they become background noise. Escalations should route to a specific person or role, with a clear expectation of what to do next.
Common failure patterns:
A simple test: imagine a ticket is escalated and the requester complains. Can you answer, in one minute, who owned it at each step, when the SLA paused, and what was communicated externally? If not, add an audit trail and separate public replies from internal notes. In AppMaster, you can enforce this with separate data fields and a business process that only exposes the right one in each screen.
Before you build, do a pass with a "can we run this tomorrow?" mindset. The tool only works when the data, rules, and notifications agree with each other.
Check for gaps:
Build the tables first, then wire the workflow. In AppMaster, you can model the database in the Data Designer (PostgreSQL), then implement status transitions, SLA timers, and escalation rules in the Business Process Editor using visual logic. Start with one team and one SLA policy, run it for a week, and only then add complexity (multiple queues, business hours, custom forms).
When it feels stable, deploy where your team is comfortable: AppMaster Cloud, AWS, Azure, Google Cloud, or export the source code for self-hosting. If you want to explore the approach without a big build-out, AppMaster at appmaster.io is designed for internal tools like this, with visual workflows and production-ready apps generated from your model.
A ticket triage tool turns scattered requests into one queue with clear ownership, consistent statuses, and visible deadlines. The main win is reducing missed or duplicated work by making “who owns this and what happens next” obvious.
Start with email plus a simple web form, because they capture enough detail and are easier to standardize. Add chat later once you’ve defined rules for required fields, deduping, and how short messages become real tickets.
Use a small set that people can explain without debate: New, Triaged, In Progress, Waiting, Resolved, Closed. Keep statuses as conditions, not feelings, and enforce who can move between them so the meaning stays consistent.
Default to four roles: Requester, Agent, Team lead, Admin. This keeps permissions easy to understand and supports real workflows like reassigning across a team and locking down who can close or override priority.
Include Tickets, Users, Teams, Comments (public vs internal), AssignmentHistory, and an AuditLog. Add due timestamps like first_response_due_at and resolve_due_at plus “last customer/agent message” fields so SLAs and silence detection don’t require complex queries.
Store SLA deadlines as timestamps on the ticket (not only durations) so lists, alerts, and reports are consistent. A practical default is three timers: first response, next response, and resolution, with clear pause rules tied to specific statuses like Waiting on customer.
Make assignment visible and immediate: set one owner, keep an explicit unassigned state, and notify the assignee (or on-call/lead if unassigned). For day one, manual assignment is fine as long as it’s fast and tracked in history.
Start with a few triggers people can remember: unassigned after a short grace period, SLA at risk, SLA breached, and stuck in Waiting too long. Each alert should go to the smallest group who can act, include one next step, and be throttled to avoid spam.
Build a ticket list (queue) with filters like status, priority, SLA state, and unassigned; a ticket detail view with a single timeline; and a fast intake/triage screen. Add a small admin screen only for categories, SLA rules, and on-call rotation.
AppMaster is a strong fit when you want the workflow to live as visual business process logic instead of hand-coded rules. You can model PostgreSQL data, enforce status transitions, compute SLA deadlines, and send notifications, then regenerate production-ready apps as your process changes.
Experiment with AppMaster with free plan.
When you will be ready you can choose the proper subscription.


