


Equipment reservation app: prevent conflicts and track returns
Plan an equipment reservation app that prevents double bookings, records returns and damage, and places faulty items on maintenance hold.
Learn how to design a self-serve customer portal that shows customers only what they need, supports key actions, and keeps internal admin workflows protected.
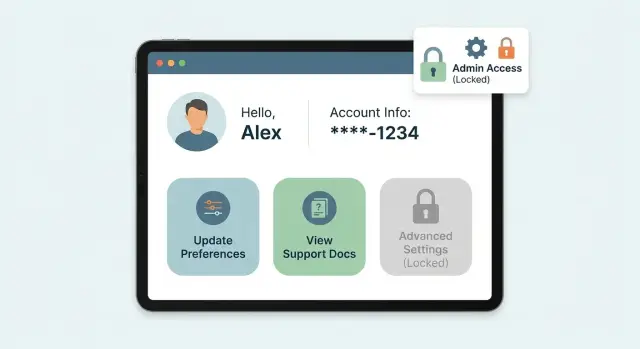
A self-serve customer portal is a small, focused front door into your business systems. It lets customers check the status of what they already bought or requested, and complete a few safe tasks on their own. It’s not a copy of your internal admin app, and it shouldn’t expose everything your team can see.
Showing internal data directly is risky because it’s usually designed for staff, not customers. One “Orders” table might include internal notes, fraud flags, supplier costs, employee names, or links to other customers. Even if you hide a few fields, it’s easy to miss something sensitive, and hard to explain later why a customer saw it.
The goal is simple: give enough visibility to reduce support tickets without oversharing or creating new security problems. Customers usually want clear answers to a few questions: What’s the current status? What changed since last time? What do you need from me? When is the next step?
Portal users also vary more than many teams expect. You might have a buyer who pays invoices, a requester who opens service tickets, and a customer-side admin who manages their company profile, users, or locations. All of them belong to the same customer, but they need different access.
A concrete example: if someone asks, “Where is my delivery?”, the portal should show shipment status, delivery address, and proof of delivery when available. It should not expose your warehouse pick list, internal escalation notes, or employee chat history.
Treat the portal as its own product surface: a clean set of screens, data views, and actions designed for customers first, not a mirror of internal workflows.
A self-serve customer portal works best when it answers the same questions your support team gets all day. Pull 20 to 50 recent tickets or chat threads and group them by intent. You’re not designing a full dashboard yet. You’re choosing what to expose so customers can help themselves without touching admin workflows.
Common high-volume categories include status checks (order, project, case), invoices and payments, company and contact updates, scheduling or change requests, and document downloads (receipts, contracts, reports).
For each category, identify the minimum data that answers it reliably. “Reliably” matters: if staff often correct a field manually, don’t show it yet. Start with a small set of fields you trust, like current status, last updated time, invoice total, due date, delivery window, and tracking number.
Next, choose a few customer actions that reduce back-and-forth. Good portal actions are simple, reversible, and easy to audit: paying an invoice, updating billing details, uploading a document, requesting a change, or reopening a closed ticket. If an action triggers complex internal steps, expose it as a request rather than direct control.
Also write down what must stay internal. Typical “do not show” fields include staff notes, internal statuses (like fraud checks or margin flags), internal owner names, escalation tags, and any field that reveals process weaknesses.
A practical test: if you wouldn’t paste a field into an email to the customer, it shouldn’t appear in the portal.
A customer portal only works when the rules are simple: who the user is, what organization they belong to, and what data they can touch. If you get those boundaries right, everything else (screens, buttons, APIs) becomes safer.
Start with roles that match real behavior. Most portals need three levels: public (no login), authenticated customer users, and a customer-admin role that can manage people in their own company. Keep customer-admin focused on customer tasks like inviting teammates or setting notification preferences. Keep your internal admin workflows separate.
Tenancy is the non-negotiable line. Every record that appears in the portal should be tied to a tenant identifier like account_id or organization_id, and every query should filter by that tenant by default. That’s the heart of portal access control, and it prevents the worst-case scenario: a customer seeing another customer’s data.
Record-level rules come next. Even inside one organization, not everyone should see everything. A simple approach is to connect records to an owner (created_by) and a team or department. For example, a customer user can view only the tickets they opened, while a customer-admin can view all tickets for the organization.
Field-level rules are the last guardrail. Sometimes a customer can see an invoice but should never see internal notes, cost price, risk flags, or staff-only contact details. Treat these as separate “portal-safe” fields, not just hidden UI elements.
If you need to write scope down, keep it as short rules:
A portal fails when it shows the “right” record but the wrong meaning. Internal tables are built for staff workflows, audits, and edge cases. Portal screens are built for customers who want quick answers and clean actions. Treat those as two different models.
Create a dedicated portal view model, even if it mirrors parts of your internal data. This can be a database view, a read model, or a separate table populated from internal events. The key is that portal fields are curated, stable, and safe to expose.
Internal workflow states are usually messy: “PendingReview”, “BackofficeHold”, “RetryPayment”, “FraudCheck”. Customers don’t need that. Map many internal states into a small set of customer-friendly statuses.
For example, an order might have 12 internal states, but the portal only needs:
Prefer summaries first, then details on demand. A list page should show the essentials (status, last update, total, reference). A detail page can show line items, attachments, or event history. This limits accidental leaks and keeps pages fast.
Make formatting consistent and understandable. Use one date format across the portal, show amounts with currency, and avoid internal identifiers that confuse people. If you must display an ID, provide a customer-facing reference like “Invoice INV-20418” rather than a database UUID.
A simple test: if a customer screenshots the page and emails it to support, will your team understand it without translating internal jargon? If not, refine the portal view model until it reads like a customer document, not an admin record.
A portal shouldn’t be a read-only window, but the safest portals keep customer actions narrow and predictable while leaving operational control to internal tools.
Start with actions customers already ask support for and that are easy to validate. Typical examples are updating contact details and notification preferences, paying an invoice or updating a payment method, requesting a change (address, delivery window, plan tier), opening a ticket with attachments, and downloading invoices or receipts.
Define allowed transitions for each action. Think in simple states: a request can be Draft, Submitted, Approved, Rejected, or Completed. Customers can move it forward (Draft to Submitted) but shouldn’t be able to “complete” it. That last step belongs to admins and back office systems.
Put clear rules around what can be changed and when. For example, allow an address change only before a shipment is Packed. After that, the portal should switch from “Edit address” to “Request change”, so the customer can ask without directly rewriting operational data.
For irreversible actions, add an extra confirmation. “Cancel subscription” and “refund request” are common trouble spots. Use a second step like re-entering an email, typing CANCEL, or confirming via a one-time code. Keep the message plain: what will happen, what can’t be undone, and who to contact if it was a mistake.
Keep an audit trail for every customer-facing action. Record who did it (user ID), what they did (action name), what changed (before/after), and when (timestamp). If you collect it, capture where (IP/device) consistently.
A good portal isn’t a “window into your database”. Think of it as a separate layer: a small set of portal objects, a small set of actions, and UI screens that only use those safe pieces.
Start by mapping internal sources into portal objects. Internal tables often contain fields customers should never see (discount rules, fraud notes, internal tags). Build a portal view model that includes only what customers need, like Order, Invoice, Shipment, and Support Ticket.
A practical build sequence:
Design endpoints around outcomes. “Pay invoice” is safer than “update invoice”. “Request address change” is safer than “edit customer record”. Each endpoint should verify who is calling, which tenant they belong to, and whether the object is in an allowed state.
For UI, keep it simple: a dashboard, a list, and a detail page.
Before going live, test as if you were a customer trying to break it: attempt to view another account’s invoice, repeat actions quickly, submit weird inputs, and use old links. If the portal stays boring under pressure, it’s ready.
A customer portal only works if customers can trust it and your team can sleep at night. Most portal incidents aren’t fancy hacks. They’re simple gaps like “the UI hides it” or “the link was guessable.”
Use authentication that matches your risk. Email login with a one-time code can be enough for many portals. For larger customers, add SSO so access follows their offboarding rules.
Keep sessions short enough to reduce damage, but not so short that users get kicked out constantly. Protect sessions with secure cookies, rotation after login, and a logout that actually ends the session.
Don’t rely on the UI to hide admin buttons. Every API call must answer: “Who is this user, and are they allowed to do this to this exact record?” Run that check even if the request looks valid.
A common failure looks like this: a customer opens an invoice URL, then edits the ID in the address bar to view someone else’s invoice. Prevent this by using safe identifiers (random UUIDs, not sequential IDs) and verifying ownership or tenant membership on every read and write.
Logging isn’t only for security teams. It helps support answer “who changed this?” and helps you prove what happened.
At minimum, log login events (including failures), reads of sensitive records (invoices, tickets, files), changes (updates, cancellations, approvals), permission or role changes, and file uploads/downloads.
Files are where portals leak the most data. Decide who can upload, view, replace, and delete attachments, and make that consistent across the portal.
Store files with access checks, not public URLs. Scan uploads, limit file types and size, and record which user uploaded each file. If a customer account is closed, make sure their file access closes with it.
Most portal problems aren’t “big hacks”. They’re small design choices that quietly expose the wrong thing or let customers do more than you intended.
One common mistake is accidentally showing internal-only fields. Internal notes, staff-only tags, and hidden statuses often sit right next to customer-friendly data in the same record. A portal page that displays “everything” from the database will eventually leak something, especially when new fields get added later. Treat portal views as a separate contract: pick only the fields customers need.
Another trap is relying on the UI to hide data or buttons. If the backend still allows the request, a curious user can call the endpoint directly and get the data or run the action. Permissions must be enforced server-side, not only in the interface.
Tenant leaks are the most damaging and also easy to miss. It only takes one query that filters by record ID but not by account or organization. Then one customer can guess another customer’s ID and see their records. Always scope reads and writes by tenant, not just by “logged in”.
Be careful with “helpful” customer edits. Letting customers change amounts, statuses, owners, or dates can bypass admin workflows and break approvals. Capture a request and route it for review instead of editing the main record.
A few checks prevent most issues:
Before you open a portal to real users, do one last pass focused on two things: what customers can see, and what they can change. Most issues come from small oversights like a missing filter on one screen.
Do a dry run with two test customers from different organizations. Log in as Customer A, find an invoice number that belongs to Customer B, and try to view it by searching, changing a URL parameter, or using an API call. If you can reach it once, you can reach it again.
A short pre-launch checklist:
When this passes, you can launch with confidence and fix smaller usability issues later without risking admin workflow protection.
A common portal request is simple: “Let me see my invoices, pay what I owe, and track deliveries.” The risk is also simple: the moment you expose the same screens your team uses, customers start seeing notes, flags, and statuses that were never meant to leave the company.
Here’s a safe pattern for an invoice and delivery portal.
Give customers a focused view that answers their questions without revealing how your team runs the back office. A strong customer view includes invoice lists with totals, due dates, and payment status; invoice details with line items and taxes for their own account; payment history with a receipt download after payment; delivery status with tracking events and an expected date; and a “Report a delivery issue” form tied to a specific shipment.
For actions, keep them narrow and record-based: pay an invoice, download a receipt, open an issue. Each action should have clear rules (for example, “Pay” appears only on unpaid invoices, and “Report issue” only appears on delivered or delayed shipments).
Support and finance can work on the same invoices and deliveries, but with internal-only fields and tools: credit risk flags and credit limit decisions, staff comments and internal attachments, internal queue states (triage, escalations, SLA timers), and manual overrides like refunds, write-offs, or address corrections.
The key is separating customer-facing fields from operations fields, even if they live on the same underlying record.
Treat your portal like a product, not a data dump. The safest launch starts with a narrow, read-only slice that answers top questions (status, history, invoices, tickets), then expands once you see how people actually use it.
A practical rollout path:
After release, watch for “confusing but technically correct” data. Customers get stuck on internal codes, partial statuses, or fields that look editable but aren’t. Replace internal terms with plain language and hide anything you can’t explain in one sentence.
Keep teams aligned by writing roles and permissions in one place: who can see what, who can do what, what happens after an action, and what admins can override. This prevents quiet drift where new fields get added, support promises something, and the portal slowly exposes more than it should.
If you want to build a portal without hand-coding, AppMaster can help you model portal-safe data, enforce access rules in business logic, and generate production-ready backends, web apps, and native mobile apps. If you need flexibility in deployment, AppMaster supports cloud deployments and source code export, so the portal can fit into your existing setup (appmaster.io).
A self-serve portal should reduce repetitive support requests by answering the few questions customers ask most: current status, what changed, what’s needed from them, and what happens next. It should not try to replicate your internal admin app or expose internal workflow details.
Internal tables often mix customer-facing data with staff-only fields like notes, fraud flags, costs, and internal tags. Even if you hide fields in the UI, it’s easy to miss something sensitive, and future schema changes can accidentally expose new fields.
Start by reviewing recent support tickets and grouping them by intent, then pick the smallest set of fields that reliably answer those requests. If your team frequently corrects a field manually, don’t show it yet; show what you can confidently keep accurate, like status, totals, due dates, and last-updated timestamps.
A good default is to offer simple, reversible, easy-to-audit actions such as paying an invoice, updating contact details, uploading a document, or reopening a ticket. If an action triggers complex internal steps, expose it as a request that your team reviews instead of letting customers directly change operational records.
Define tenant scope first, then apply it to every read and write so users only ever see records tied to their organization identifier. This prevents the worst failure mode where a user changes an ID in a URL or API call and can view another customer’s invoices or tickets.
Use roles that match real behavior: an authenticated customer user for their own items and a customer-admin for managing users and company settings within their organization. Keep internal admin permissions separate and avoid “customer-admin” roles that quietly become mini-staff accounts.
Treat portal-safe fields as a separate contract rather than “everything except a few hidden fields.” Create a dedicated portal view model (view, read model, or curated table) that includes only what customers should see, and map messy internal states into a small set of customer-friendly statuses.
Enforce authorization on every request at the backend, not just in the UI, and scope every query by tenant and role. Use non-guessable identifiers, keep sessions secure, and make sure attachments are stored behind access checks rather than public file URLs.
Log who did what, to which record, and when, so support can answer disputes and you can investigate incidents. At minimum, capture logins (including failures), reads of sensitive records, changes, role updates, and file uploads/downloads with consistent timestamps and user IDs.
Start with a narrow read-only release that covers top support questions, then add one or two low-risk actions with clear state rules and confirmations. If you want to avoid hand-coding the whole stack, AppMaster can help you model portal-safe data, enforce access rules in business logic, and generate the backend and apps so you can iterate without accumulating messy workarounds.
Experiment with AppMaster with free plan.
When you will be ready you can choose the proper subscription.


