


Equipment reservation app: prevent conflicts and track returns
Plan an equipment reservation app that prevents double bookings, records returns and damage, and places faulty items on maintenance hold.
Step into app development with Kotlin: this guide covers all you need to know as a first-time developer, from setup to coding and deployment.

Welcome to the world of Kotlin, a modern programming language that has captured the hearts of developers worldwide, especially in the realm of Android app development. JetBrains developed Kotlin, and since its release in 2011, it has seen a rapid rise in popularity. In 2017, Google announced first-class support for Kotlin on Android, and since then, there has been no looking back.
As a first-time app developer, you might wonder why Kotlin has gained such traction and how it stands out from its peers. The answer is multifaceted. Firstly, Kotlin is interoperable with Java, which means it can use all existing Android libraries in a Kotlin application. This seamless interoperability also adds a more concise and expressive syntax than Java, leading to cleaner and more maintainable code. Kotlin does not just stop at being syntactically pleasing; it also introduces several language features that help prevent common programming errors, such as null pointer exceptions, thanks to its inherent null-safety.
Beyond safety, Kotlin is designed for developer happiness. The language's focus on usability and thought-out functionality shines through its comprehensive tooling support. With JetBrains being the brains behind both Kotlin and one of the most popular Integrated Development Environments (IDE) IntelliJ IDEA, you can expect a first-class development experience. As a bonus, Android Studio, the officially recommended IDE for Android development, is built on IntelliJ, which further enhances Kotlin's Android development capabilities.
For those venturing into app development, Kotlin presents an accessible and practical entry point. With tools like AppMaster amplifying the app development process through a no-code platform, integrating and developing features like backends and APIs becomes fast and straightforward. Embracing Kotlin could kickstart your development journey, making it an exciting choice for your first foray into building applications.
Embarking on your journey as a Kotlin developer starts with setting up the right tools and environment. Whether you aim to create mobile apps, server-side applications, or even web projects with Kotlin, a properly configured development environment is crucial for productivity and learning. Here's how to get your development environment ready for Kotlin development:
For Kotlin, the recommended IDEs are JetBrains IntelliJ IDEA and Android Studio, both of which are well-integrated with Kotlin. Android Studio is essential if you plan to develop Android applications, while IntelliJ IDEA is a powerful tool for other types of Kotlin development. Here are the steps to install these IDEs:
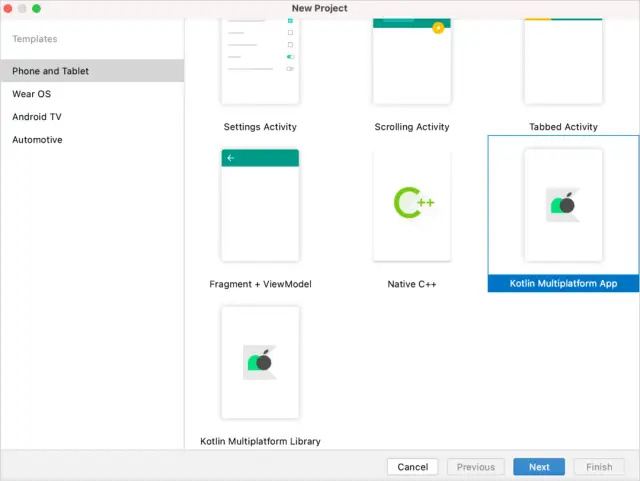
Image Source: JetBrains
While Android Studio comes with Kotlin support out of the box, IntelliJ IDEA users will need to install the Kotlin plugin. To do this:
After installation, check that the Kotlin compiler is configured correctly:
Understanding your IDE's project structure will help you organize and manage your code. Familiarize yourself with creating new projects, adding new Kotlin files, and setting the build configurations. Here's a basic overview:
Version control is imperative for developers to maintain a history of changes and to collaborate with others. You can use Git for version control with familiar hosts like GitHub, GitLab, or Bitbucket. Here's how to set it up:
For Android development, testing on an emulator or a real device is an essential part of the process:
Lastly, familiarize yourself with keyboard shortcuts within your chosen IDE. They will significantly speed up programming tasks and help manage your development workflow more efficiently. The IDEs usually offer thorough documentation and cheat sheets for their shortcuts.
With these tools and configurations in place, you'll be ready to start writing Kotlin code. Remember that the more comfortable you are with your development environment, the easier it will be to focus on learning the language and building your applications.
If you’re venturing into the world of app development with Kotlin for the first time, you're making a wise choice. Kotlin is designed to be more approachable and concise than Java, and Google fully supports it for Android development. A step-by-step guide will take you from zero to your first Kotlin application.
First things first, you need an Integrated Development Environment (IDE) that supports Kotlin, and the most popular choice is JetBrains IntelliJ IDEA. Download and install the Community Edition, which is free, or choose the Ultimate Edition if you want additional web development features. It's directly available on the JetBrains website.
Open IntelliJ IDEA and select “Create New Project”. In the project wizard, choose Kotlin from the list of languages on the left-hand side, and select JVM | IDEA, as this template sets up everything you need for a simple Kotlin application. Click Next to proceed.
Name your project, choose a suitable location on your computer to save it, and verify that the Project JDK is set correctly. IntelliJ IDEA typically takes care of JDK setup for you. Yet, if there's no JDK, you can install it directly from the dialog. Click Finish and wait for the IDE to initialize the project structure.
Your new Kotlin project has a few important folders:
Within the src directory, you should see a file called Main.kt. This is the default entry point for your application.
Double-click on Main.kt to open it in the editor. You'll see a fun main() function, which is the starting point for Kotlin applications. Inside this function, write your first line of Kotlin code:
println("Hello, Kotlin World!")
This line of code makes your application print "Hello, Kotlin World!" to the console when you run it.
Now it's time to see your application come to life. Right-click on the open Main.kt file in the editor and select "Run 'MainKt'". Alternatively, you can click on the green play button in the toolbar. IntelliJ IDEA will compile and execute your application, and you should see the "Hello, Kotlin World!" message output in the Run tool window at the bottom of the IDE.
Writing software is all about experimentation. Try modifying the message in the println() function and re-run the application to see the changes. This immediate feedback loop is a powerful feature of modern IDEs and helps you learn and understand the effects of code changes rapidly.
Try adding more code to your Main.kt file. Create variables, perform operations, and learn how to use control flow statements like if, when, and loops. Kotlin's concise syntax and strong inference make it enjoyable to start creating more complex programs.
Starting with a simple console application is a great way to get the feel of the Kotlin language. As you become more comfortable, you'll want to explore Kotlin's rich features like classes, objects, inheritance, and more. But for now, celebrate the accomplishment of creating your very first app with Kotlin.
Remember to utilize resources such as the official Kotlin documentation or join communities online where you can ask questions and share your progress. And, if ever you wish to transform your Kotlin endeavors into a fully-fledged app with a backend, web, and mobile applications, consider no-code platforms like AppMaster, which can help you generate the necessary parts of your app without writing extensive code, all the while still allowing the integration of custom Kotlin modules when needed.
At this juncture, you’re off to an excellent start. The direction you choose next — be it diving deeper into Kotlin syntax, starting a new project, or building on your current application — will lead you towards becoming a proficient Kotlin developer.
Starting your journey in app development with the Kotlin language involves becoming familiar with its syntax and commands. Kotlin's syntax is characterized by its clarity and conciseness, which not only aids in writing code more efficiently but also makes it understandable for anyone reading it, whether it’s your future self or a fellow developer.
Kotlin’s conciseness significantly reduces the amount of boilerplate code you need to write. For instance, you do not need to specify a type for a variable if it can be inferred by the compiler, thanks to Kotlin's type inference feature:
var greeting = "Hello, World!" // The compiler infers the type String
Functions in Kotlin are declared using the fun keyword. Here's an example of a simple function that takes a name and prints a customized greeting:
fun greet(name: String) { println("Hello, $name!")}
Notice how the string template ( $name) is used to embed the variable directly within the string. String templates are a useful feature for easy and intuitive string manipulation!
When discussing control flow, Kotlin’s if expressions can return a value, allowing them to be used in a more functional style. The traditional for loops are similar to those in other languages, but you can also use for to iterate over anything that provides an iterator, like a range of numbers:
for (i in 1..5) { println(i)}
Moreover, Kotlin has powerful when expressions that are an enhanced form of Java’s switch-case statements:
when (choice) { 1 -> println("Chosen 1") 2 -> println("Chosen 2") else -> println("Any other number")}
Furthermore, Kotlin emphasizes null safety. This means that by default, variables cannot hold null values. If you need to allow nulls, you can declare a variable as nullable by putting a question mark after the type:
var name: String? = null // Allowedvar greeting: String = null // Compilation error
Another syntax feature to point out is Kotlin’s use of extension functions, which let you extend a class with new functionality without having to inherit from the class. For example, we can add a new method to the String class like so:
fun String.addExclamation(): String { return this + "!"}val excitedGreeting = "Hello, World".addExclamation() // Results in "Hello, World!"
Kotlin's object-oriented features are also easy to grasp, with concise syntax for declaring classes, properties, and methods. Kotlin supports features like data classes, which automatically provide equals(), hashCode(), toString(), and other utility functions based on the properties declared in the data class:
data class User(val name: String, val age: Int)
It's also worth noting that Kotlin supports lambda expressions and higher-order functions, making it a friendly language for functional programming. Here's an example of a higher-order function that takes a lambda:
fun withGreeting(name: String, operation: (String) -> String): String { return operation(name)}val result = withGreeting("Kotlin Developer") { "Greetings, $it!" }println(result) // Prints "Greetings, Kotlin Developer!"
In the above example, it is an implicit name for a single parameter in the lambda.
As a beginner, mastering Kotlin's syntax and commands will unlock the power of this language and help you write effective, readable, and maintainable code. Whether you are developing an Android app, working on a server-side project, or even tackling multi-platform development, Kotlin’s language features will support you every step of the way. Familiarity with these basics is essential before moving on to more complex topics such as debugging, testing, and deploying your first application.
As you continue to advance your skills, tools like AppMaster can further streamline the development process by automating repetitive tasks, allowing you to focus on crafting the unique features of your Kotlin app with confidence.
Once you've crafted your first Kotlin application, you'll enter the crucial stages of debugging and testing. These steps are imperative to ensure your app functions correctly and provides a smooth user experience. With Kotlin's modern development tools, debugging and testing become more manageable than ever. Let's dive into how you can effectively find and fix issues, and test your Kotlin application.
Integrated Development Environments (IDEs) like IntelliJ IDEA and Android Studio are equipped with powerful debugging tools designed specifically for Kotlin and Android app development. Understanding breakpoints, watchpoints, and the debugger view in your IDE will empower you to isolate and resolve issues efficiently:
Debugging also includes features like 'Step Over', 'Step Into', and 'Step Out' which control the level of granularity you want when walking through your code, line by line or function by function.
Testing is a multi-faceted process, and in Kotlin, you can write unit tests for your logic and instrumented tests for components that interact with Android framework. Kotlin testing frameworks such as JUnit and Espresso provide comprehensive capabilities for this:
Creating test cases involves thinking about the expected behavior of your code. Write tests that cover both typical use-cases and edge cases. Automating these tests will help you catch bugs early and maintain code quality over time.
For a more refined testing strategy, consider setting up Continuous Integration (CI) to automatically build and test your code every time you push a change. Tools like Jenkins, Travis CI, and CircleCI are compatible with Kotlin projects, making integrating automated testing into your workflow easy.
Sometimes, traditional debugging isn't enough, and you may need to resort to logging. Kotlin provides a logging mechanism familiar to Java developers:
Log.d("MyAppTag", "Current value of myVar: $myVar")
It’s good practice to tag your log statements with a consistent tag and meaningful messages so you can filter them easily in the logcat view of Android Studio.
Performance profiling is another layer of testing that can highlight inefficiencies in your code. Android Studio's built-in profiler provides real-time statistics for your app's CPU, memory, and network usage, helping you optimize performance before releasing your app.
While emulators are great for testing most scenarios, testing on real devices is also essential. This ensures your app works well across various Android devices, with their differing screen sizes, resolutions, and hardware capabilities.
Debugging and testing can seem time-consuming, but they're investments in the quality of your application. Embracing these practices will lead to an app that works well and offers a delightful user experience. Moreover, platforms like AppMaster could assist you by providing a strong backend to support the needs of a Kotlin application, ensuring that backend-related issues don't hinder your debugging and testing efforts.
By thoroughly debugging and testing your Kotlin app, you'll gain the confidence needed to deploy your application to the Google Play Store and into the hands of users, knowing that it's been rigorously vetted for quality assurance.
After mastering Kotlin's syntax, creating the app's architecture, and ensuring all the functionalities work as expected, it's time to deploy your Kotlin application. Deployment is a critical phase where your application becomes available to users. Let's walk through the process step by step.
Before deploying your application, you need to prepare it for release. This includes finalizing the app's code, assets, and resources. You will also need to consider versioning, which is crucial for app maintenance and updates. Ensure that you have incremented the version number in your app's build.gradle file.
Android requires that all APKs be digitally signed with a certificate before installation. Signing your app adds a layer of security that verifies your identity as a developer and ensures your app has not been tampered with. To sign your application, you can generate a signing key using the keytool provided by the Java Development Kit (JDK) and sign your app using Android Studio's built-in signing features.
Next, you need to build the release version of your APK or Android App Bundle. In Android Studio, this can be done by selecting "Build" > "Generate Signed Bundle / APK". You'll be guided to create a new keystore or use an existing one, and you'll specify the key and its password to generate your signed APK or App Bundle.
Even though you've tested your app during development, it's important to test the signed release version on different devices. This ensures the app behaves correctly with the optimizations and configurations you've set for release.
Once your app is signed and tested, it's ready to be distributed to users. While there are multiple platforms to distribute Android apps, the most common is the Google Play Store. To publish your app on the Play Store, you need to create a developer account, pay a one-time registration fee, and comply with Google's developer policies.
Before users can download your app, you need to create a compelling Play Store listing. This includes writing a descriptive title and detailed description, uploading screenshots and videos of your app, and setting up the right categorization and tags.
Google Play Store offers the ability to perform staged rollouts where you can release the app to a limited percentage of users. This iterative approach allows for monitoring feedback and addressing issues before the full release. Once satisfied with the rollout, you can push the app to all users.
After deploying your app, monitoring its performance is essential. You can use the Google Play Console to track installations, ratings, user retention, and crash reports. Based on this feedback, you can update your application and deploy new versions through the Play Store.
Although AppMaster does not generate Kotlin code directly, it seamlessly integrates with Kotlin applications, especially at the backend level. For deploying backend services that your Kotlin app might interact with, AppMaster becomes extremely helpful. With AppMaster, you can automate deployment processes, such as API endpoint generation, making your deployment flow faster and more efficient.
Deploying your Kotlin app marks the culmination of the development process and the beginning of your app's life in the market. By following these steps, you ensure your application's smooth transition from development to the real world, where users can enjoy it worldwide.
In the app development journey, integrating with APIs and libraries can greatly enhance the functionality and possibilities of your Kotlin application. APIs, or Application Programming Interfaces, enable your app to interact with other software services and components. On the other hand, libraries are collections of pre-written code that developers can use to add new features without having to write code from scratch.
API integration involves connecting your Kotlin app to web services that offer various functionalities. For instance, you might want to incorporate weather information, payment gateways, or social media sharing within your app. Kotlin allows for straightforward API integration through the use of HTTP client libraries like Retrofit, Ktor, or OkHttp.
Here's a simple example of how you could use Retrofit to perform API calls:
interface ApiService { @GET("weather") fun getCurrentWeather(@Query("q") cityName: String): Call<WeatherResponse>}val retrofit = Retrofit.Builder() .baseUrl("https://api.weatherapi.com/") .addConverterFactory(GsonConverterFactory.create()) .build()val service = retrofit.create(ApiService::class.java)val weatherResponse = service.getCurrentWeather("London")
With this approach, you've created a service interface with annotations that Retrofit can use to make HTTP requests. Now, you'll get responses that you can handle within your Kotlin app, such as displaying the weather to your users.
Similarly, Kotlin's ecosystem provides many libraries that can streamline app development. Whether you're looking to handle image loading, implement complex user interface designs, or manage database transactions, there's likely a library that can help. To include a library in your Kotlin project, usually, you just need to add the dependency to your project's build.gradle file.
For example, suppose you want to handle asynchronous tasks more efficiently in your app. You could integrate Kotlin’s coroutines by adding the following line to your dependencies:
implementation "org.jetbrains.kotlinx:kotlinx-coroutines-core:1.4.2"
After syncing your project with the gradle files, you can now use coroutines to manage background tasks for a smoother user experience.
While Kotlin provides API and library integration mechanisms, platforms like AppMaster can add value by offering visual programming tools that facilitate backend integration and API management. Whether you're creating mobile or web applications with Kotlin, integrating AppMaster's generated endpoints can simplify the backend development process and allow you to focus on the unique aspects of your application.
Integrating with APIs and using libraries can significantly improve your Kotlin app by expanding functionality without reinventing the wheel. Whether you’re a seasoned developer or just starting, leveraging these resources efficiently will make the app development process more effective and enjoyable.
Embracing Kotlin as your programming language for Android app development can be an exciting step in your coding journey. Kotlin's expressive syntax and safety features can make your development process both enjoyable and productive. Here we provide some essential tips to further enhance your efficiency while developing Kotlin apps.
Kotlin is renowned for its concise and expressive language features, which can simplify many common programming tasks. Make it a habit to use:
The Kotlin Standard Library is packed with useful functions that reduce the amount of code you write. For example, collection processing functions like filter, map, and forEach are powerful tools that let you manipulate data with ease. Get to know these library functions well, as they can greatly streamline your coding process.
IntelliJ IDEA and Android Studio are JetBrains products, providing excellent support for Kotlin. These Integrated Development Environments (IDEs) offer features like code completion, inspections, and refactoring tools specifically tailored to Kotlin development. Don’t shy away from using keyboard shortcuts to perform actions faster within the IDE.
Domain-Specific Languages (DSLs) in Kotlin enable you to create highly readable and maintainable code. They are particularly useful in creating clean APIs and configuring complex systems. Investigate how using a DSL can make your code base easier to understand and work with.
The Kotlin ecosystem is rich with libraries and frameworks that can save you time and effort. Whether you need a networking library like Ktor, an asynchronous programming tool like RxKotlin, or a dependency injection framework like Koin, there’s a high chance the Kotlin community has got you covered. Keep an eye on GitHub repositories and Kotlin discussion forums for the latest and greatest in Kotlin tooling.
While Kotlin's syntax is more concise, it doesn't eliminate the need for testing. Writing unit tests for your Kotlin code ensures it works as expected and helps protect against regressions in the future. Kotlin is fully compatible with JUnit and offers a pleasant testing framework called Spek. Make testing a part of your regular development cycle for more bulletproof code.
Like any technology, Kotlin continues to evolve. Stay up-to-date with the latest releases, language features, and best practices by following thought leaders, participating in Kotlin user groups, and reading the official blog. The community can be invaluable when you're stuck or looking for best practices.
While refining your Kotlin skills, exploring how no-code platforms like AppMaster can complement your development process is beneficial. You can prototype an app’s backend services or design your API with AppMaster, then connect it to your Kotlin application, enhancing productivity and allowing you to focus on unique features that require custom coding.
Applying these strategies will not only make your Kotlin development more efficient but also more enjoyable. By leveraging Kotlin’s features to their fullest, embracing the tools at your disposal, and engaging with the community, you’ll be well on your way to crafting high-quality applications.
Your introduction to Kotlin is just the beginning of what can be an exciting journey in app development. With its user-friendly syntax, interoperability with Java, and powerful features, Kotlin stands out as an excellent language for both beginners and seasoned developers. As you grow more comfortable with Kotlin's basics, consider the following steps to deepen your expertise and broaden your development horizons.
Kotlin's possibilities are expansive. From developing Android apps, server-side systems, to even frontend web applications with Kotlin/JS, the language offers many opportunities for developers of all levels. Remember that the learning process is continuous and every line of code you write enhances your craft.
By embracing the principles and practices outlined in your Kotlin journey, you will become a proficient Kotlin developer and be well on your way to mastering the art of creating dynamic and efficient applications. And remember, platforms like AppMaster are there to support you, offering the advantages of no-code development and the flexibility that modern app creation demands. Take your Kotlin knowledge, couple it with powerful tools, and start building the future today.
Kotlin is primarily used for developing Android apps. It's a statically-typed programming language that can be used to create native Android applications, and it can also be compiled to JavaScript for web development, or JVM bytecode for server-side applications.
No, you don't need to know Java to learn Kotlin. While Kotlin is interoperable with Java and runs on the JVM, it is a standalone language with its own syntax and features. It's designed to be more concise and expressive, making it a great choice for beginners and experienced developers alike.
To set up your development environment for Kotlin, you need to install the JetBrains IntelliJ IDEA IDE, which supports Kotlin. Additionally, you will need to install the Android Studio if you are developing Android apps.
Kotlin offers several features beneficial for first-time app developers, such as concise syntax, null safety, extension functions, higher-order functions, and interoperability with Java. These features make the code easier to write, read, and maintain.
Debugging a Kotlin application involves using the debugging tools available in your IDE, like IntelliJ IDEA or Android Studio. These tools allow you to set breakpoints, step through your code, inspect variables, and evaluate expressions at runtime.
Yes, Kotlin can also be used to develop applications for other platforms. It can be compiled to JavaScript for web development, and it can also create server-side applications that run on the JVM. Additionally, Kotlin/Native allows targeting platforms like iOS, macOS, and Windows.
Resources helpful for learning Kotlin include the official Kotlin documentation, online tutorials, video courses, and interactive learning platforms. Websites such as Kotlinlang.org provide a wealth of information and exercises for beginners.
The time it takes to learn Kotlin varies depending on your prior programming experience and how much time you dedicate to learning. A complete beginner may take several weeks to get comfortable with the basics and a few months to gain proficiency.
Kotlin is a versatile choice for building cross-platform apps, especially with Kotlin Multiplatform. This feature allows sharing logic across platforms while building native user interfaces, streamlining the development of cross-platform applications.
AppMaster is a no-code platform that accelerates app development, including Kotlin-based applications. It allows for visual programming, automating many development tasks, and helping developers to focus on creating unique features and functionality.
Yes, you can use Kotlin with AppMaster. Although AppMaster generates backend code in Go (golang), you can integrate Kotlin mobile apps with the backend services created on AppMaster, taking advantage of its visual business process (BP) designer and API end-point generation.
Kotlin includes null safety features to prevent the common null pointer exceptions that frequently occur in Java. Variables in Kotlin can't hold null values by default, and you have to explicitly declare a variable as nullable. This is important as it leads to fewer crashes due to null dereferences.
Experiment with AppMaster with free plan.
When you will be ready you can choose the proper subscription.


