


Equipment reservation app: prevent conflicts and track returns
Plan an equipment reservation app that prevents double bookings, records returns and damage, and places faulty items on maintenance hold.
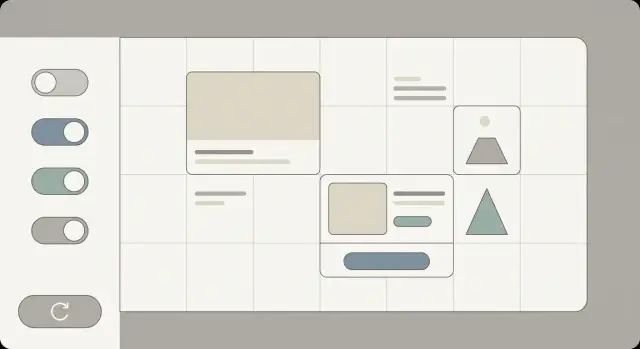
Feature flags for no-code apps let you release new screens and workflows gradually, test safely, and roll back instantly without branching.
Releases feel risky because a “small” change rarely stays small for users. A new screen changes where people click. A workflow tweak changes what gets approved, billed, or emailed. If you publish that to everyone at once, any surprise becomes a full-scale incident.
That stress goes up when the app runs real operations: an internal admin tool, a customer portal, or a support workflow. One wrong step can create bad data, confuse teams, or send the wrong message to customers.
Feature flags reduce that risk. A feature flag is a switch: when it’s ON, users see the new screen or follow the new workflow; when it’s OFF, they stay on the current one. Instead of one high-pressure “release day,” you choose who gets the change and when.
Some teams try to stay safe by cloning the project, building in a separate version, then swapping it in. That trades one risk for another: two copies to maintain, duplicated fixes, and constant uncertainty about which version is the real source of truth. In tools that regenerate apps as requirements change, that kind of branching can slow you down even more.
Feature flags keep one project, but let you control exposure. You can start with a small group, learn what breaks, and expand from there.
A useful mental model: flags are for control, not for quality. They limit blast radius and make rollback fast, but they don’t replace testing.
Releases usually feel scary for a few predictable reasons. Users can get lost when navigation or forms change. Workflows can trigger the wrong approvals, payments, or notifications. Data might be saved in a new format that older screens don’t expect. Support and sales teams get surprised mid-day. And if something goes wrong, the only fix is often “ship another update,” which takes time.
A flag is a simple switch you can flip without rebuilding your whole app. In practice, flags control three big things: what people see, what happens when they act, and what you can shut down quickly if something goes wrong.
The most obvious use is UI gating. You can hide a new screen until it’s ready, show a new button only to a pilot group, or reveal a new menu item for admins first.
This matters most when you’re rebuilding navigation or introducing a new flow that would confuse everyone if it appeared overnight. In a no-code builder, the UI change might be “just one screen,” but the support impact can be big.
Flags aren’t only about visuals. They can decide which workflow runs.
For example, you can route users to the old checkout process or the new one based on a flag, even if both screens exist. The same idea works for approval steps, customer support handoffs, or any business process you model in a visual editor.
Put the flag check near the start of the process. That keeps the rest of the logic clean, and it avoids the worst experience: starting one path and getting dropped into another halfway through.
Kill switches deserve special attention. If a payment step, messaging integration, or new form starts failing, a kill switch flag lets you turn it off fast while keeping the rest of the app working.
One important rule: keep permission rules separate from feature flags. Permissions answer “who is allowed to do this?” Flags answer “is this version active right now?” When you mix them, you eventually show a feature to the wrong group or lock out the right users during a rollout.
The safest releases are boring releases. Show a change to a small, chosen slice of users first, learn quickly, then widen access. That’s the real value of flags: controlled exposure without duplicating screens or forking the whole project.
Begin with rules that match how your team already operates:
Once the pilot group is stable, move to a wider rollout.
Instead of turning a change on for everyone, expand in steps. Percentage rollout is a common approach: start small, confirm nothing breaks, then increase.
Time windows help too. You can enable a new workflow only during business hours when your team is online to watch tickets and logs, then switch it off overnight. The same idea fits promo periods, seasonal screens, or temporary experiments.
When you need predictability, target based on data rules: a region, a plan tier, or accounts older than 30 days. Choosing a more consistent user segment reduces surprises.
If you build in AppMaster, these patterns map cleanly to screen visibility rules and workflow checks in Business Process logic, so the app can decide what to show and which path to take before the user hits a dead end.
Flags work best when they’re treated like small products. Each flag needs a purpose, an owner, and an end date. Without that, you end up with mystery switches that nobody dares to touch.
Start by deciding where flags live. For many teams, a database table is the simplest option because it’s easy to view, filter, and audit. In AppMaster, that often means a small PostgreSQL model in the Data Designer (for example: key, enabled, rollout_percent, updated_by, updated_at). For flags that should never change at runtime, an environment setting per deployment can be safer.
Choose a naming scheme that stays readable as you grow. Stable keys that hint at where they’re used work well, such as ui.onboarding_v2, bp.approval_routing_v1, or api.orders_search_v2. Add metadata so people know what they’re touching.
A short “flag spec” is usually enough:
Plan the default and fallback before anyone builds UI. Ask: “If this flag is OFF, what does the user see, and what happens in the workflow?” For a new screen, the fallback is usually the old screen. For a new workflow, the fallback might be the old path or a read-only mode that avoids risky actions.
Finally, decide who can flip flags. A common rule is: builders can create flags, but only release owners can change them in production, with a short approval note. That keeps rollouts calm, and rollbacks fast.
You don’t need a separate branch or a second copy of your app to ship safely. Add a small bit of data and a few checks in the right places so you can turn changes on or off in seconds.
Create a Flag model in your data layer. Keep it boring and clear: key (unique name), enabled (true/false), rollout_rules (text or JSON), and notes (why it exists, who owns it, when to remove it).
Build a simple admin screen to edit flags. Add basic validation (key required, unique keys, predictable rule format), and restrict access to admins. This becomes your control panel during releases.
Check the flag before you show a screen or start a workflow. Put the check at the entry point, not deep inside. For a screen, check before navigation or before rendering key blocks. For a workflow, check at the start so you don’t do half the work and then switch paths.
Add targeting rules that match real life. Start with role-based rules, then allowlists for specific user IDs, and only then percent rollout. Percent rollout works best when it’s stable per user, so the same person doesn’t flip-flop between versions.
Add a kill switch path so you can fall back fast. Keep the old flow in place and route users to it when the flag is off.
After that, log the decision every time the flag is evaluated: flag key, user, rule matched, and result (on/off). When someone says “I can’t see the new screen,” you can check the log and answer in minutes instead of guessing.
Feature flags work best when they have one home. If the same flag gets copied into multiple tables, screens, or workflows, you’ll eventually flip one and forget another. Keep a single source of truth (for example, one FeatureFlags dataset with clear names), and have every screen and workflow read from there.
Put the check right where a decision is made: when a user enters a screen, or the first step of a workflow. If you check a flag deep in the middle, people can start the new path and then get dropped back into the old one, which feels broken.
Common decision points to gate include screen entry (new vs old), workflow start (which process to run), risky actions (like a new payment step or data write), navigation menus, and API calls (switching old vs new endpoints or payload shapes).
Caching matters more than it seems. Cache too aggressively and “instant rollback” won’t be instant for real users. Refresh too often and you can slow the app.
A practical rule is to load flags at session start (login or app open) and refresh them when it matters, like when an admin changes a flag or when a user returns to the home screen.
Keep the old path working until the rollout is truly done. Old screens should still load, old workflows should still validate data, and shared tables shouldn’t be changed in a way that only the new flow understands. If the new onboarding writes extra fields, make sure the old flow can ignore them safely.
Treat flag changes like production changes. Record who changed what and when. Even a simple admin page can write an audit trail entry each time a flag is updated, so you can answer “why did this change?” during an incident without guessing.
Treat every flag like a mini release. You’re not just hiding a screen, you’re changing what people can do.
Start with manual checks that match real life. Sign in as each target group you plan to expose (internal staff, beta customers, everyone). Confirm they see the right screen, and that the workflow behind it completes end to end.
Run negative tests too. Use an account that should not get the feature and try to reach it anyway: open the old menu, try a saved link, repeat the action that triggers the new flow. If they can still get into the new experience, your gating is too shallow.
Before you turn anything on for customers:
Keep monitoring close to outcomes: error rate (app errors or failed steps), support tickets about the change, and completion of the key task (signup finished, order placed, request submitted).
Practice a rollback drill while the stakes are low. Turn the flag on for a small internal pilot, run the key task, then turn the flag off and confirm recovery. Users should return to the old screens, in-progress work shouldn’t get stuck, and the app should behave normally after refresh and re-login. If rollback isn’t fast in practice, it isn’t a real safety net.
Keep the first pilot small: internal users first, then a few friendly customers, then widen exposure. That pacing gives you time to notice problems before they become everyone’s problem.
Feature flags are simple, but they can create messy releases when they turn into permanent infrastructure.
One common trap is leaving both old and new paths in place long after the rollout. The app still “works,” but every future change takes longer because you’re updating two versions. This is flag debt. Decide up front when the flag gets removed, and schedule that cleanup as soon as the rollout is stable.
Another risky move is using flags as permissions. A flag is great for exposure, but it isn’t a security boundary. If you hide a button with a flag but the workflow can still be triggered another way, you get confusion at best and data leaks at worst. Keep real access control in authentication and role-based rules, then use flags only to control rollout.
Every flag needs a safe fallback. If the “new” path fails, the “off” path must still complete the task. If a new onboarding screen breaks on a certain device, users should still be able to sign up through the existing flow, not hit a dead end.
These guardrails keep releases calm:
Fixed allowlists fail silently. Teams test only internal accounts, then forget that brand-new users, invited users, or users in another region take a different path. Include a default bucket for new users, or use a percent rollout that naturally covers new signups.
Changing multiple flags at once also makes debugging painful. If support reports “checkout is broken,” you won’t know whether it was the new screen, a workflow gate, or a data change. Keep rollouts slow and predictable.
Imagine your onboarding today is simple: welcome screen, short form, then automatic account activation. You want to replace it with a redesigned screen plus a new approval workflow (for example, sales reviews certain accounts before activation). Flags let you change the experience without risking everyone at once.
Start with one flag that represents the whole new experience, like new_onboarding_v2. Keep the old onboarding and old activation path in place.
Roll it out in phases:
Handle people already mid-onboarding carefully. Don’t switch them mid-process. Decide the path once, store it on the account (for example, onboarding_version = v1 or v2), and keep them on that path until completion.
Add a kill switch too. If error reports spike, you should be able to disable the new path instantly. In practice, that means placing checks at entry points: the first onboarding screen and the first workflow step that routes users into approval.
Once the new flow is stable for a full cycle (approvals, emails, edge cases), remove the flag and delete the old path. Keeping dead paths around makes the next release riskier, not safer.
Before you ship anything behind a flag, do a quick pass on the basics. Most flag problems come from naming confusion, unclear ownership, and switches that never get removed.
Do one small rehearsal. Pick a safe screen or workflow step, turn the flag ON for one internal user, then OFF again. If you can’t roll back in seconds, fix that before using flags for bigger releases.
Choose one upcoming change and ship it behind a flag. Make it meaningful (a new screen, a new approval step, a new onboarding page) so you learn how gradual rollout feels under real usage.
If you’re building with AppMaster, you can keep flags in a simple PostgreSQL model and evaluate them in screen rules and Business Process logic without forking the whole project. AppMaster (appmaster.io) is designed for full applications, so this kind of workflow gating fits naturally when you’re rolling out changes safely.
A feature flag is a simple on/off switch that controls whether users see a new screen or follow a new workflow. Instead of shipping a change to everyone at once, you can expose it to a small group first and expand only after it behaves well.
Cloning creates two sources of truth, duplicated fixes, and more chances to ship inconsistent behavior. Flags let you keep one project and control exposure, so you can roll forward or back without juggling parallel copies.
Start with a small internal pilot (like ops or support), then widen to a role-based group (Admins/Managers), and only then consider a percentage rollout. This keeps releases calm because you learn from real usage before everyone is affected.
Feature flags limit blast radius and make rollback fast, but they don’t stop bugs from existing. You still need testing because a flagged feature can break data, payments, approvals, or notifications once it’s enabled for real users.
Use flags for exposure and timing, and use permissions for security and access control. If you mix them, you’ll eventually hide something from the right people or accidentally expose it to the wrong ones.
Put the check at the decision point: before a user enters a screen, or at the very first step of a workflow. Avoid checking deep in the middle, because users can start one path and then get dropped into another.
A kill switch is a flag designed for fast shutdown of a risky feature, like a payment step or messaging integration. When something starts failing, you flip it off and route users back to the safe, existing path.
A simple database table works well because it’s easy to edit, audit, and view in one place. Keep it minimal and readable, like a key, enabled state, rollout rules, notes, and updated timestamps.
Make the rollout stable per user by using a consistent identifier so the same person stays in the same bucket. If users flip between old and new experiences across sessions, it feels broken and makes support issues hard to diagnose.
Remove the flag and delete the old path once the rollout is stable for a full cycle and you’re confident rollback won’t be needed. Leaving both paths forever creates “flag debt” that makes every future change slower and riskier.
Experiment with AppMaster with free plan.
When you will be ready you can choose the proper subscription.


