


Equipment reservation app: prevent conflicts and track returns
Plan an equipment reservation app that prevents double bookings, records returns and damage, and places faulty items on maintenance hold.
Learn deep links for native mobile apps: plan routes, handle “open in app”, and pass tokens safely for Kotlin and SwiftUI without messy custom routing code.
When someone taps a link on their phone, they expect one outcome: it takes them to the right place, immediately. Not somewhere close. Not a home screen with a search bar. Not a login screen that forgets why they came.
A good deep link experience looks like this:
Most frustration comes from links that “sort of work” but break the flow. People see the wrong screen, lose what they were doing, or get stuck in a loop: tap link, log in, land on the dashboard, tap link again, log in again. Even one extra step can make users give up, especially for one-time actions like invites or password resets.
Before you write any Kotlin or SwiftUI code, decide what you want links to mean. Which screens can be opened from the outside? What changes if the app is closed vs already running? What should happen when the user is logged out?
The planning is what prevents most of the pain later: clear routes, predictable “open in app” behavior, and a safe way to hand off one-time codes without putting secrets directly in the URL.
Not every “link that opens an app” behaves the same way. Treat them as interchangeable and you’ll hit the classic failures: the link opens the wrong place, opens a browser instead of the app, or works only on one platform.
Three common buckets:
“Open in app” can mean different things depending on where the tap happens. A link tapped in Safari might jump straight into the app. The same link tapped inside an email or messenger might open an embedded web view first, and the person has to press an extra “open” button (or never sees one). On Android, Chrome may respect App Links while a social app’s in-app browser may ignore them.
Cold start vs app already running is the next trap.
A simple example: an invite link tapped from Telegram often opens inside an in-app browser first. If your app assumes the OS will always hand off directly, users will see a web page instead and assume the link is broken. Plan for these environments up front and you’ll write less platform-specific glue later.
Most deep link bugs aren’t Kotlin or SwiftUI problems. They’re planning problems. The link doesn’t map cleanly to one screen, or it carries too many “maybe” options.
Start with one consistent route pattern that matches how people think about your app: list, detail, settings, checkout, invite. Keep it readable and stable, because you’ll reuse it in emails, QR codes, and web pages.
A simple route set might include:
Then define your parameters:
Also decide what happens when the link is wrong: missing data, invalid ID, or content the user can’t access. The safest default is to open the nearest stable screen (like the list) and show a short message. Avoid dumping people onto a blank screen or a login screen with no context.
Finally, plan by source. A QR code usually needs a short route that opens quickly and tolerates spotty connectivity. An email link can be longer and include extra context. A web page link should degrade gracefully: if the app isn’t installed, the person still lands somewhere that explains what to do next.
If you’re using a backend-driven approach (for example, generating API endpoints and screens with a platform like AppMaster), this route plan becomes a shared contract: the app knows where to go, and the backend knows which IDs and states are valid.
A deep link is often treated like a safe envelope. It isn’t. Anything in the URL can end up in browser history, screenshots, shared previews, analytics logs, or copied into a chat.
Avoid putting secrets in the link. That includes long-lived access tokens, refresh tokens, passwords, personal data, or anything that would let someone act as the user if the link is forwarded.
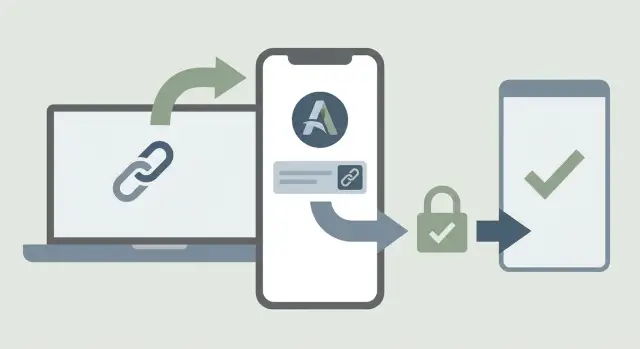
A safer pattern is a short-lived, one-time code. The link carries only that code, and the app exchanges it for a real session after it opens. If someone steals the link, the code should be useless after a minute or two, or after the first successful exchange.
A simple handoff flow:
Even after a successful redeem, confirm identity inside the app before doing something sensitive. If the link is meant to approve a payment, change an email, or export data, require a quick re-check like biometrics or a fresh login.
Store the resulting session safely. On iOS, that typically means the Keychain. On Android, use Keystore-backed storage. Store only what you need, and clear it on logout, account removal, or when you detect suspicious reuse.
A concrete example: you send an invite link to join a workspace. The link carries a one-time code that expires in 10 minutes. The app redeems it, then shows a screen that clearly states what will happen next (join which workspace). Only after the user confirms does the app complete the join.
If you’re building with AppMaster, this maps cleanly to an endpoint that redeems codes and returns a session, while your mobile UI handles the confirmation step before any high-impact action.
Deep links often point to screens that contain private data. Start by deciding what can be opened by anyone (public) and what requires a logged-in session (protected). This one decision prevents most “it worked in testing” surprises.
A simple rule of thumb: deep link to a safe landing state first, then navigate to the protected screen only after you confirm the user is authenticated.
Treat deep links like they could be forwarded to the wrong person.
The reliable approach is: parse the link, store the intended destination, then route based on auth state.
Example: a user taps an “open in app” link to a specific support ticket while logged out. Your app should open to a neutral screen, ask them to sign in, and then take them to that ticket automatically.
To keep it dependable, store a small “return target” locally (route name plus a ticket ID) with a short expiration. After login completes, read it once, navigate, then clear it. If login fails or the target expires, fall back to a safe home screen.
Handle edge cases with respect:
Also avoid showing private data in lock screen previews, app switcher screenshots, or notification previews. Keep sensitive screens blank until data is loaded and the session is verified.
Deep links get messy when every screen parses URLs in its own way. That spreads small decisions (what’s optional, what’s required, what’s valid) across the whole app, and it becomes hard to change safely.
Treat routing like shared plumbing. Keep one route table and one parser, and have the UI receive clean inputs.
Have iOS and Android agree on a single, human-readable list of routes. Think of it as a contract.
Each route maps to:
For example, “Order details” maps to an Order screen with an input like OrderRouteInput(id). If a route needs extra values (like a ref source), they belong in that input model, not scattered across view code.
Keep parsing, decoding, and validation in one place. The UI shouldn’t be asking “Is this token present?” or “Is this ID valid?” It should receive either a valid route input or a clear error state.
A practical flow:
Add an “unknown link” fallback screen. Make it useful, not a dead end: show what couldn’t be opened, explain why in plain language, and offer next actions like going Home, searching, or signing in.
Good deep links feel boring in the best way. People tap and land on the right screen, whether the app is installed or not.
List the first 10 link types people actually use: invites, password resets, order receipts, “view ticket” links, promo links. Keep it small on purpose.
For each entry point, define one canonical pattern and the minimum data needed to open the right screen. Prefer stable IDs over names. Decide what’s required vs optional.
Helpful rules:
Write down, per link type, whether login is required. If it is, remember the destination and continue after login.
Example: a receipt link can show a preview without login, but tapping “Download invoice” may require login and should return the user to that exact receipt.
If the link needs a one-time token (invite acceptance, reset, magic sign-in), define how long it stays valid and how it can be used.
The practical approach: the URL carries a short-lived, single-use code, and the app exchanges it with your backend for a real session.
Deep links break at the edges. Test each link type in these situations:
If you keep routes, auth checks, and token exchange rules in one place, you avoid scattering custom routing logic across Kotlin and SwiftUI screens.
Deep links tend to fail for boring reasons: a small assumption, a renamed screen, or a “temporary” token that ends up everywhere.
Putting access tokens in the URL (and leaking them to logs). Query strings get copied, shared, stored in browser history, and captured by analytics and crash logs. Fix: put only a short, single-use code in the link, redeem it inside the app, and expire it quickly.
Assuming the app is installed (no fallback). If a link opens to an error page or does nothing, users give up. Fix: provide a fallback web page that explains what will happen and offers a normal install path. Even a simple “Open the app to continue” page is better than silence.
Not handling multiple accounts on one device. Opening the right screen for the wrong user is worse than a broken link. Fix: when the app receives a link, check which account is active, ask the user to confirm or switch accounts, then continue. If the action requires a specific workspace, include a workspace identifier (not a secret) and validate it.
Breaking links when screens or routes change. If your route is tied to UI names, old links die the moment you rename a tab. Fix: design stable, intent-based routes (invite, ticket, order) and keep older versions working.
No traceability when something goes wrong. Without a way to replay what happened, support can only guess. Fix: include a non-sensitive request ID in the link, log it on the server and in the app, and show an error message that includes that ID.
A quick reality check: imagine an invite link sent in a group chat. Someone opens it on a work phone with two accounts, the app isn’t installed on their tablet, and the link gets forwarded to a colleague. If the link contains only an invite code, supports fallback behavior, prompts for the right account, and logs a request ID, that single link can succeed in all those situations without exposing secrets.
Invites are a classic deep link: someone sends a teammate a link in a messenger, and the recipient expects one tap to land on the invite screen, not a generic home page.
Scenario: a manager invites a new support agent to join the “Support Team” workspace. The agent taps the invite in Telegram.
If the app is installed, the system should open the app and pass the invite details to it. If the app isn’t installed, the user should land on a simple web page that explains what the invite is for and offers an install path. After install and first launch, the app should still be able to finish the invite flow so the user doesn’t have to hunt for the link again.
Inside the app, the flow is the same on Kotlin and SwiftUI:
Verification is the point. The link should not contain secrets like a long-lived session token. It should carry a short invite code that’s only useful after your server validates it.
What the user experiences should feel predictable:
If the invite is expired or already used, don’t dump the user on a blank error page. Show a clear message and a next step: request a new invite, switch accounts, or contact an admin. “This invite was already accepted” beats “Invalid token.”
Deep links only feel “done” when they behave the same way everywhere: cold start, warm start, and when the user is already signed in.
Before you ship, test each item on real devices and OS versions:
A simple way to validate behavior is to pick a handful of must-work links (invite, password reset, order detail, support ticket, promo) and run them through the same test flow: tap from email, tap from chat, scan a QR code, open after reinstall.
If deep links are starting to spread across screens, treat routing and auth as shared plumbing, not per-screen code. Centralize route parsing in one place, and make every destination accept clean parameters (not raw URLs). Do the same for auth: one gate that decides “continue now” vs “sign in first, then continue.”
If you want to reduce custom glue code, it can help to build the backend, auth, and mobile apps together. AppMaster (appmaster.io) is a no-code platform that generates production-ready backends and native mobile apps, which can make it easier to keep route names and one-time code redemption endpoints aligned as requirements change.
If you do one thing next week, make it this: write down your canonical routes and the exact fallback behavior for each failure case, then implement those rules in a single routing layer.
A deep link should open the exact screen the link implies, not a generic home or dashboard. If the app isn’t installed, it should still help by landing somewhere sensible and guiding the user back to the same destination after install.
Universal Links (iOS) and App Links (Android) use normal web URLs and can open the app when installed, with a graceful fallback when it’s not. Custom schemes are easier to wire up but can be blocked or handled inconsistently by browsers and other apps, so they’re better as a secondary option.
Many email and messenger apps open links inside their own embedded browser, which may not hand off to the OS the same way Safari or Chrome does. Plan for an extra step by making the web fallback clear and by handling cases where the user lands on a web page first.
On cold start your app may show a splash screen, run startup checks, or load config before it’s ready to navigate. The reliable fix is to store the incoming link target immediately, finish initialization, then “replay” navigation once your app is ready.
Don’t put long-lived access tokens, refresh tokens, passwords, or personal data in the URL because URLs can be logged, shared, and cached. Use a short-lived, single-use code in the link and exchange it with your backend after the app opens.
Parse the link, store the intended destination, then route based on auth state so login happens once and the user lands on the right screen after. Keep the stored “return target” small and time-limited, and clear it after it’s used.
Treat routes as a shared contract and centralize parsing and validation in one place, then pass clean inputs to screens instead of raw URLs. This avoids every screen inventing its own rules for optional parameters, missing IDs, and error handling.
First check which account is active and whether it matches the workspace or tenant implied by the link, then ask the user to confirm or switch before showing private content. It’s better to add a short confirmation step than to open the right screen under the wrong account.
Default to the nearest stable screen, like a list page, and show a short message that explains what couldn’t be opened. Avoid blank screens, silent failures, or dumping users onto a login page with no context.
Test each important link type in three states: app closed, app already running, and app not installed, and do it from real sources like email, chat apps, and QR scanners. If you build with AppMaster, you can keep route names and one-time code redemption endpoints aligned between backend and native apps as requirements change, which reduces the amount of custom glue you need to maintain.
Experiment with AppMaster with free plan.
When you will be ready you can choose the proper subscription.


